Chocolate Icebox Cake

img_2219

img_0136

img_0798

img_0837

Wait ‘til you see the super charming recipe I have for you this week!! Sometimes, the most fun, adorable, and delightful things happen when we’re just playing around, and the evolution of this dessert was such a thing.

It was Tuesday, a week after the election, and it was one of those dark, cold, pouring rainy kinds of days. I was still feeling sad and quiet about the election, wanting nothing more than to curl up under a blanket with a book. I had studio chores to do, work for the dr deb practice, and some photo editing crying for my attention. More importantly, the gauge on the fridge was pointing in the direction of empty.

I thought about getting under an umbrella and toddling off to the market, but then I decided to play one of my favorite little games. It’s the Necessity Being the Invention of Mothers Game. Don’t we all get a little more creative when we have to? When we don’t really want to go out in the rain? When we’d rather play with porcelain than deal with those credit card machines that are always so persnickety?

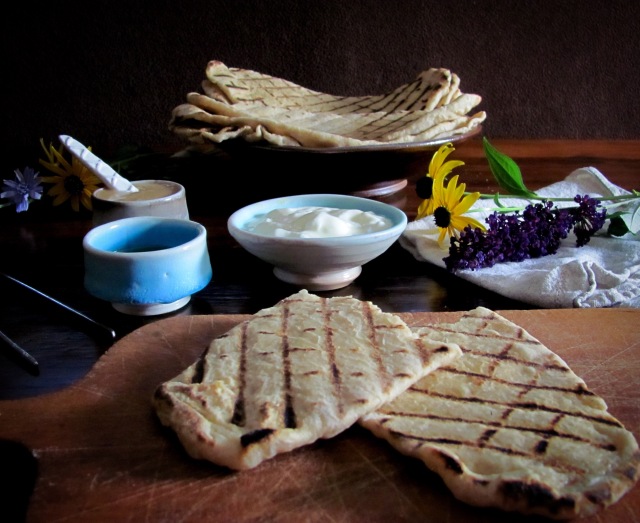
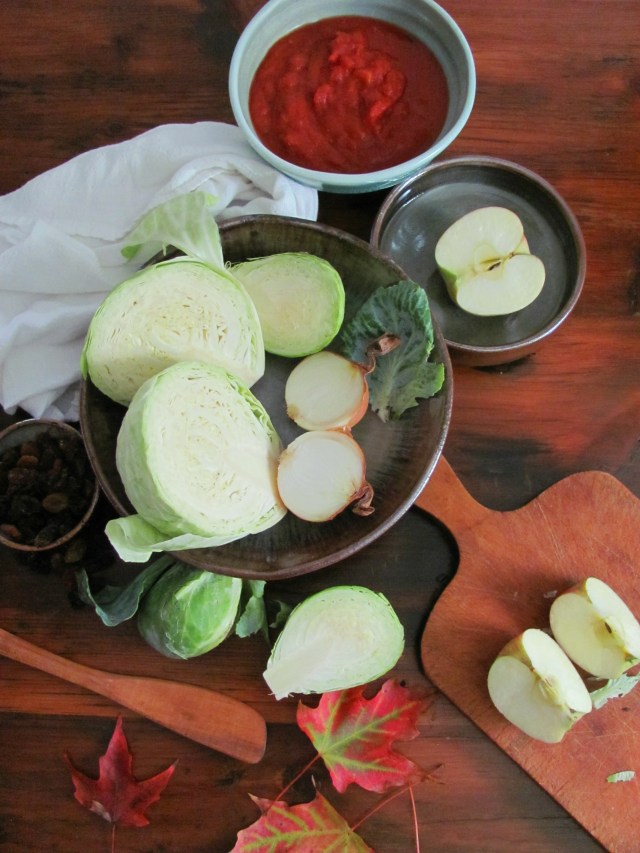
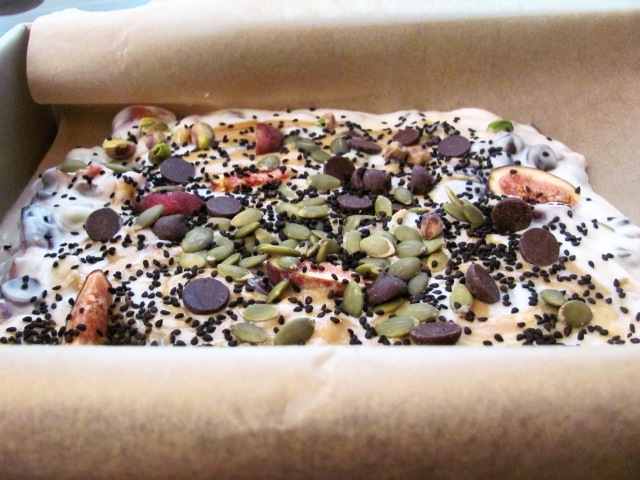
I had some heavy cream leftover from a recent batch of Caramel Almond Ice Cream. And my mother gave me a box of graham crackers when she packed up to head to Florida for the winter. I gave my brain a little nudge and it took off in direction of a homey, old-fashioned, unglamorous, comforting dessert: icebox cake. Mom taught me about icebox cakes; there were a few versions in the family, so this seemed like a perfect use for the heirloom grahams.

Icebox cakes are related to trifles and charlottes. They can be made with any kind of cookie or biscuit and either pudding, or whipped cream. The basic concept has to do with sogginess. In a good way! Some people make them with fruit, which I imagine would be extremely lovely.

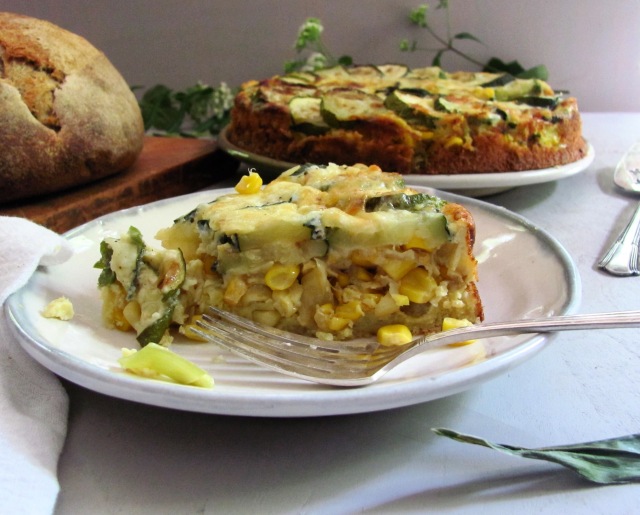
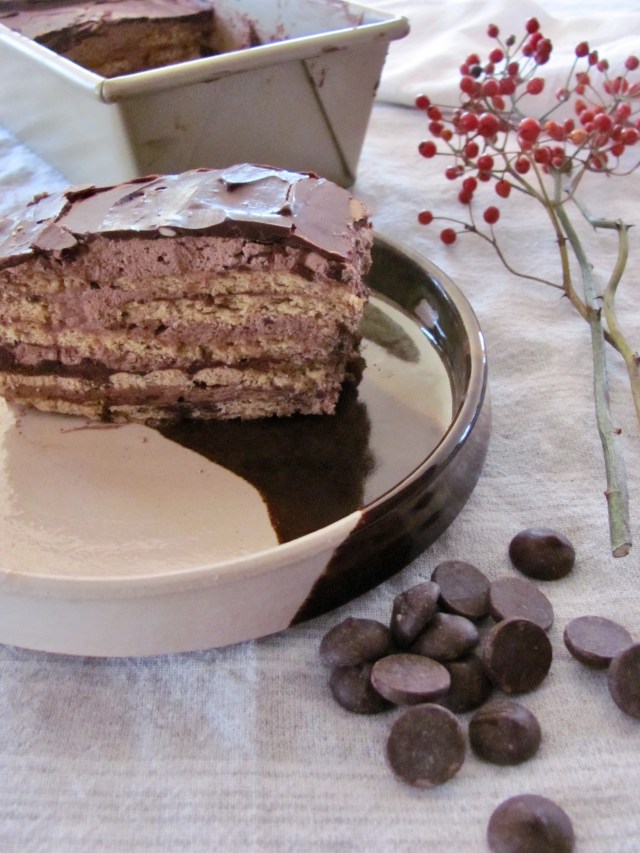
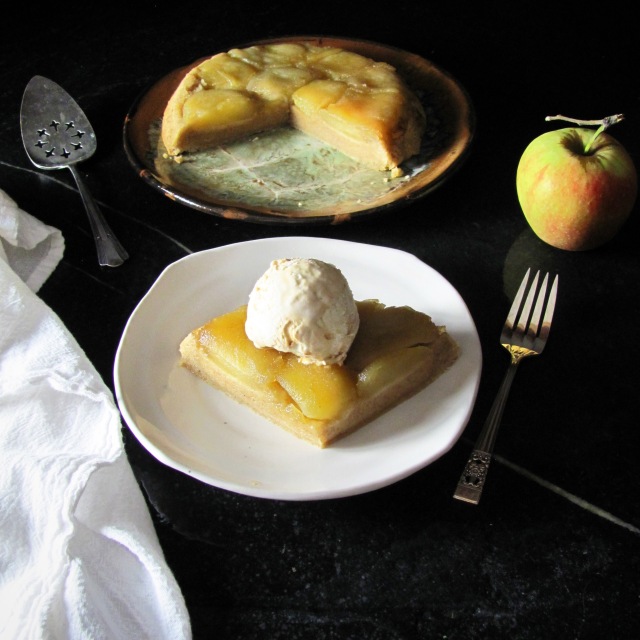
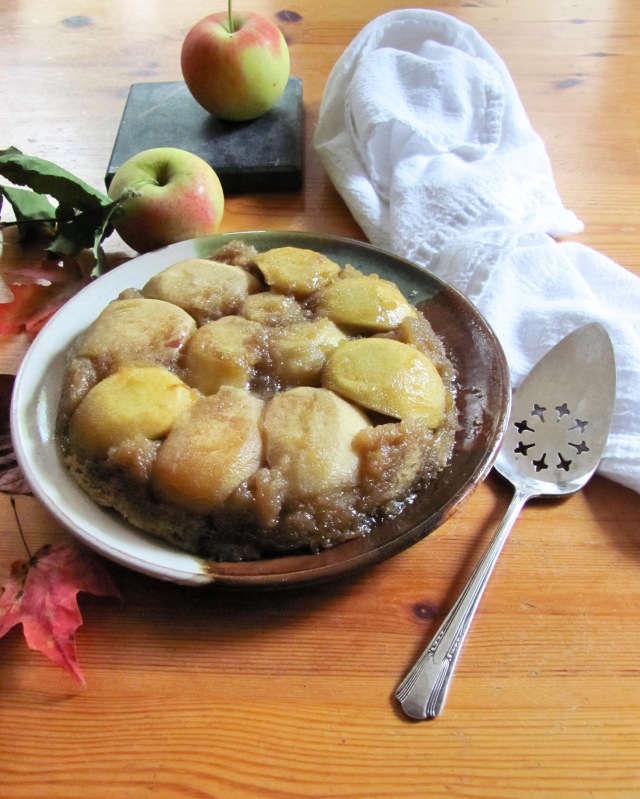
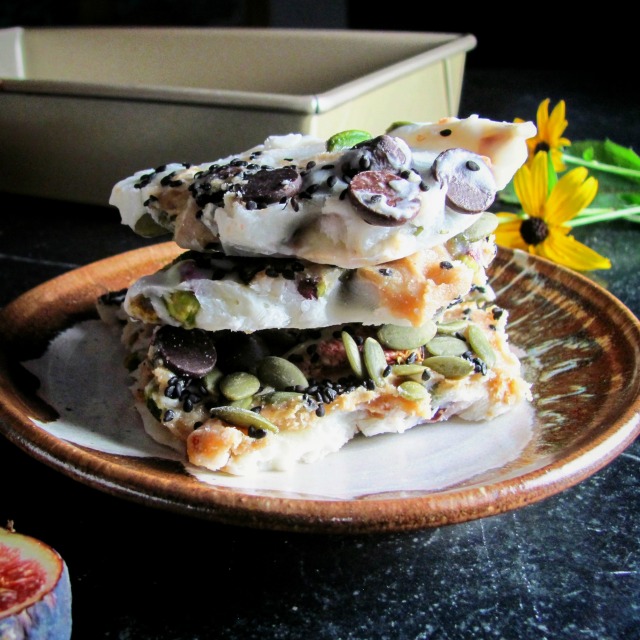
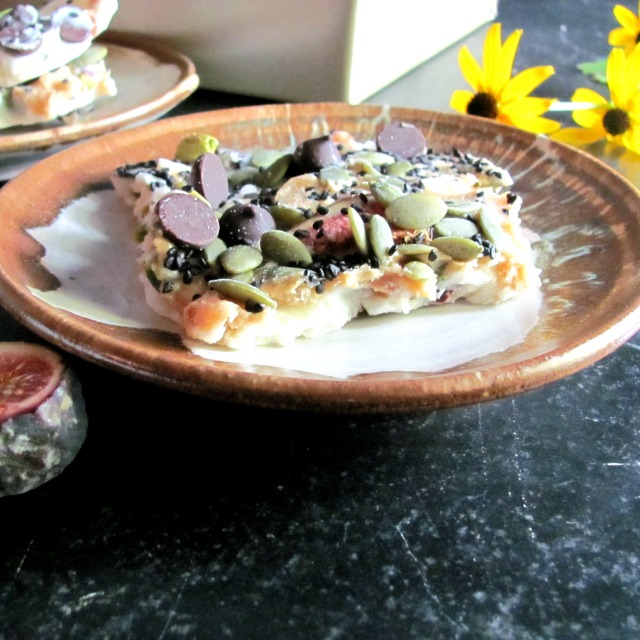
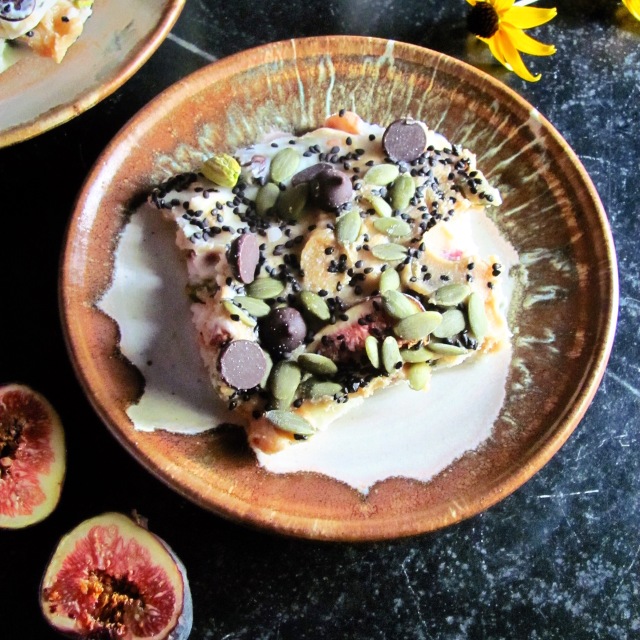
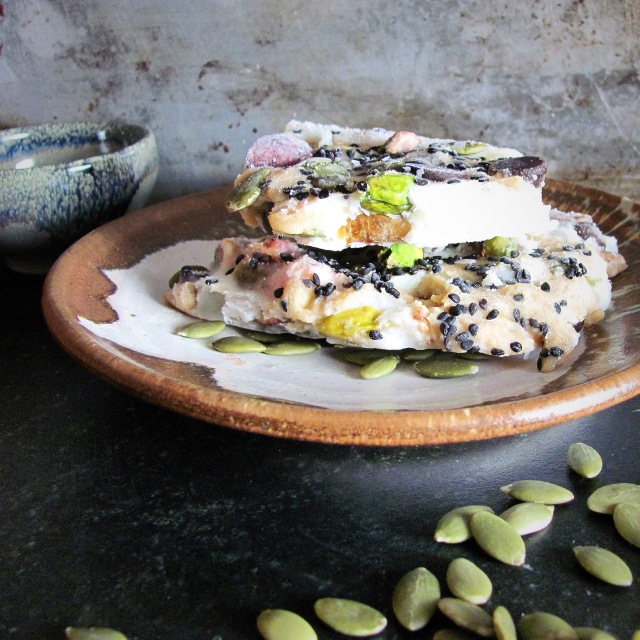
So, the resulting confection is not particularly photogenic, nor is it healthy in any way. But it is utterly wonderful. It’s rich without being over the top, dense and light at the same time, chocolatey in the milky way of good hot chocolate, sweet, but not cloying. And, it stores well, so if you don’t eat it all up right away, you can enjoy it at your leisure. Or make it to take to an event, a pot luck, or a holiday dinner. Perfect for, say, Thanksgiving!!!

img_0777

img_0780

img_0783

icybox

Chocolate Icebox Cake

Vegans, you may use coconut or cashew cream and vegan graham crackers.

Serves 6 or so

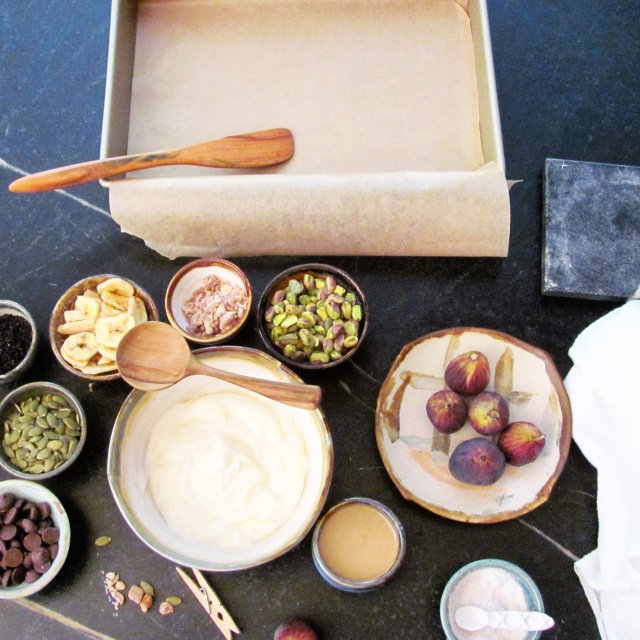
You’ll need a standard 9 x 5 inch loaf pan.

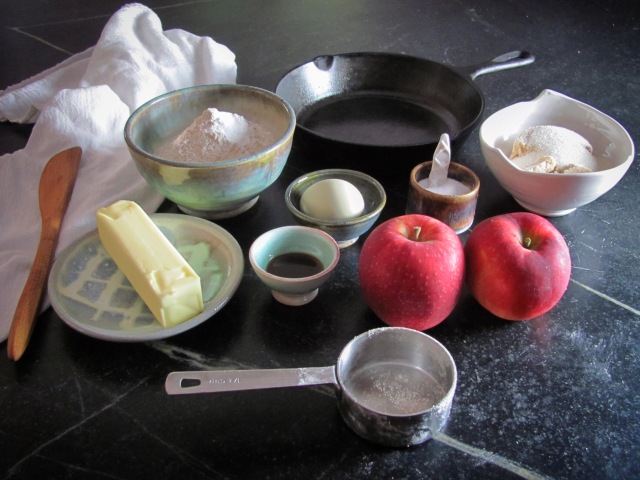
2 sleeves plain graham crackers
1 ½ cups heavy cream
3 tbs. cocoa powder
½ cup sugar (I use organic cane)
1/3 cup dark chocolate chips
1 tsp. vanilla
pinch salt

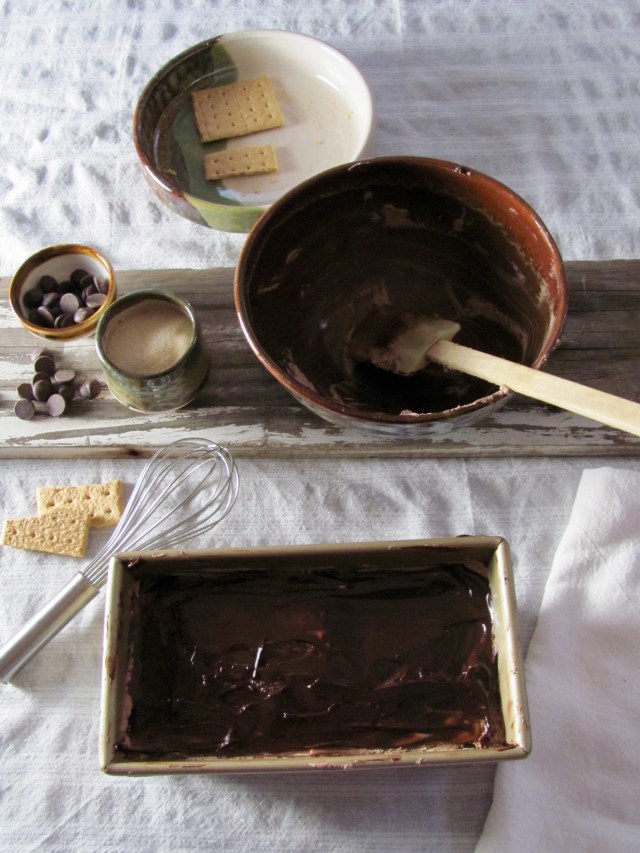
Place the chocolate chips and ¼ cup of the cream in a soup/cereal bowl and microwave on high for 45 seconds, until the cream is just hot. Let stand a couple of minutes and then stir well to make a smooth sauce.

Whip the remaining cream in a stand mixer or with a hand held mixer until soft peaks form. Add the cocoa, vanilla, and salt and whip to combine. Under no circumstances is it ok to eat all of this before you construct your cake. A little taste is permitted, but be warned, it is not easy to control the urge to go in with a huge spoon!

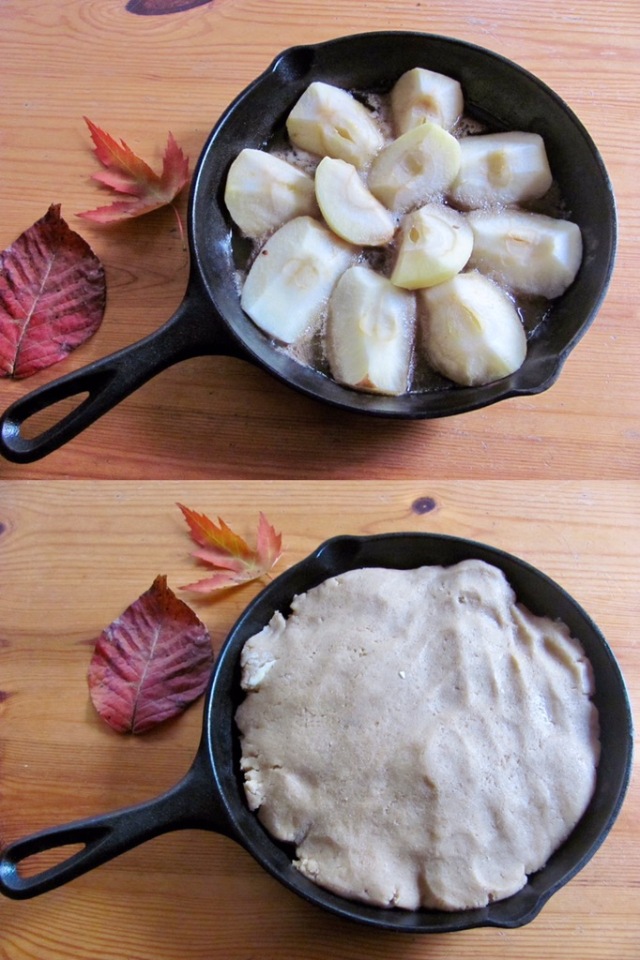
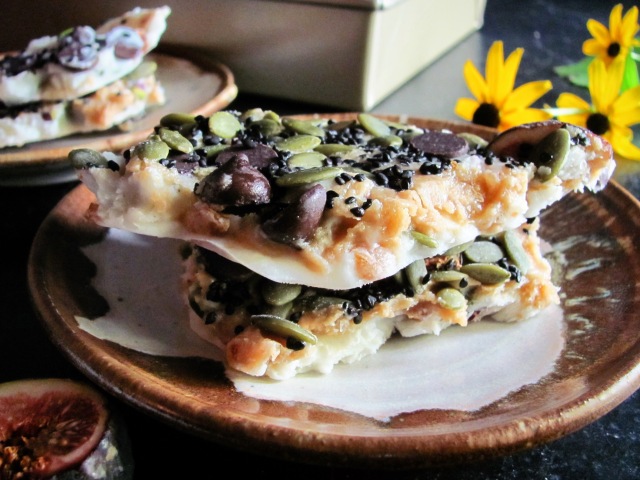
Put a couple of tablespoons full of the chocolate whipped cream into the bottom of the loaf pan, and cover with a single layer of grahams, breaking the crackers to fit. Top the crackers with a thin layer of whipped cream, and then a drizzle of chocolate sauce; spread each with an offset spatula.

Make layers in this fashion until you run out of everything; make sure you have a nice layer of cream topped with chocolate at the top. You’ll have a few crackers left over for munching.

Cover the loaf pan with foil or plastic wrap. Or do what I do. Enclose the whole thing in a plastic produce bag. Make sure the wrapping doesn’t touch and mess up the chocolate glaze. Refrigerate the icebox cake for at least 6 hours. Overnight or a couple of days are fine.

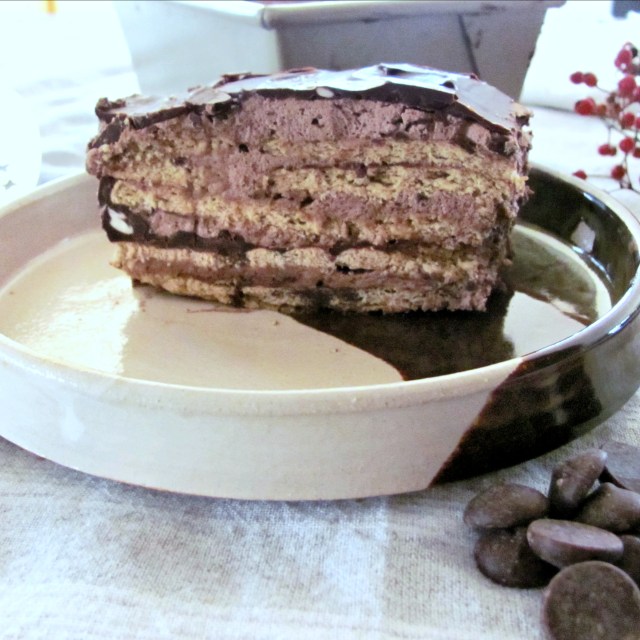
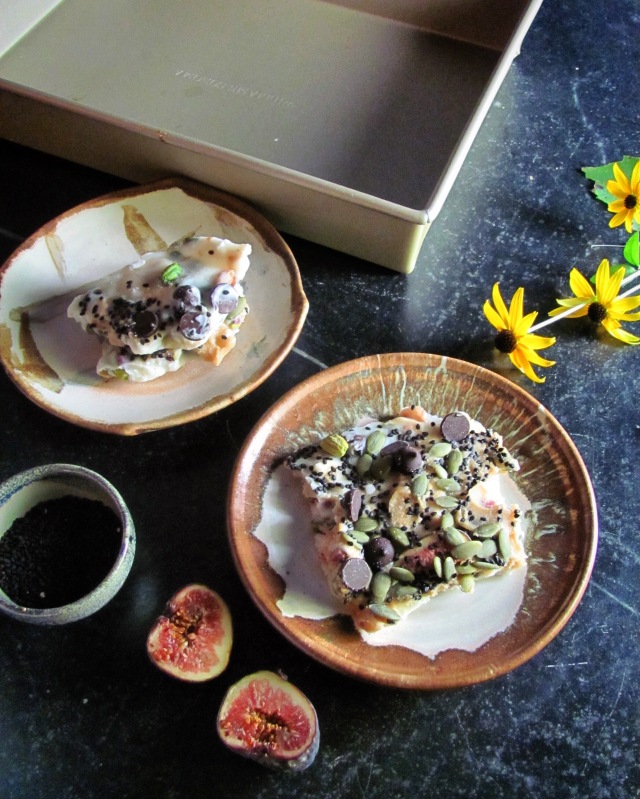
When you are ready to serve, cut slices and free the edges with a blunt, serrated bread knife and then use a spatula to lift out of the pan. The chocolate will crack, but that’s what we call rustic.


icebox-cake

img_0833

glamboxcake

Posted in chocolate, dessert, easy, family, sweets, Uncategorized, vegan, vegetarian | Tagged , , , , , , | 12 Comments

Roasted Carrot Hummus

img_0091

img_0102

img_0484


fave-carrot

Contemplating the recent turn of events in the world has me deeply troubled, discouraged, worried, disappointed, and sad. It is too soon for any of us to fully process the implications of the election results. I am still hoping it was a nightmare, and I’ll wake up soon.

In the meantime, I do what I always do. Today, I will go to the dr deb office and offer comfort and what wisdom I can muster, to the people who trust me to care for them. Tonight, I will make a beautiful supper, unload the kiln, and talk to my husband and two wonderful grown up kids. Tomorrow, I will run in the woods. My intention is to strive to be kind, compassionate, fair minded and loving. At this moment, this is the best I can do. Perhaps, it is the best any of us can do.

When I planned this post, I was anticipating that things would go a different way. And so, I thought it would be inoffensive, maybe even funny, that Roasted Carrot Hummus is orange. I am so horrified and embarrassed that I am tempted to delete the pictures and never think about this again. Except…

Roasted Carrot Hummus is freaking delicious!! Why has this not become a thing before now? Yes, I know, humans are deeply flawed. But, we do have the capacity to learn from our mistakes. So, if you haven’t been making and eating Carrot Hummus until now, it’s time to correct that tragic mistake!!!

img_0451

img_0127

img_0472

img_0463

Roasted Carrot Hummus

Makes about 1 ½ cups of hummus.

2 large or 3 medium carrots, quartered lengthwise
1 large garlic clove, unpeeled
1 tbs. olive oil
1 can chick peas, drained*
¼ cup tahini
juice of ½ lemon
salt and pepper, to taste

*Save the liquid for making Magic Meringues!

Preheat oven to 425°. Place the carrots and garlic on a parchment lined baking sheet and toss with olive oil, salt and pepper. Roast for 5 minutes; remove and reserve garlic. Continue roasting carrots for an additional 10-15 minutes or until they are tender when pierced with a paring knife. Let cool slightly. Pop the skin off the garlic.

Place carrots, garlic, and remaining ingredients in the bowl of a food processor fitted with the steel blade. Pulse until smooth, scraping bowl several times.

Serve warmish, room temperature, or cold. Keeps well for several days.

I like this hummus with a variety of cooked and raw veggies. It is a terrific addition to an abundance bowl, as a spread on a wrap or sandwich, or as a dip for pita, chips, or crackers.

img_0482

img_0469

Blog note: Keep a close eye on my Instagram and Facebook pages for upcoming news about an exciting new way to shop for DebsPots. And make sure to check out my Etsy Store for terrific stoneware and porcelain pots for your table! Remember, pottery makes great holiday gifts!!

Posted in appetizer, gluten free, healthy, main, main course, roasted, side dish, snack, supper, Uncategorized, vegan, vegetable, vegetarian, workout | Tagged , , , , | 4 Comments

Brilliant Kale Salad

img_0070

img_0073

img_0233

img_0239

How do you feel about the color red? As I photographed this post, I realized I have a lot of mixed feelings about it, myself.

I’ve been told I look good in red, that it is a good color to use as an accent in a room. But I never, ever wear colors in the red family. No pink, no burgundy, no purple. And you won’t find any red throw pillows or artwork here in the house in the woods or in my office in the village. Red is a difficult color to achieve in ceramic glazes and many potters seek a good fire engine surface. Not me. Couldn’t care less.

I’ve always thought it has to do with my preference for earthy colors. I live in the woods, prefer to look at greens, golds, browns. But…this week, I am reminded that for a few gaudy weeks a year, Our Mother gets all tricked out and carnival on us! And I love it!

And of course, I LOVE all the red foods. Apples, tomatoes, berries and radishes are gorgeous and delicious. Look at my Instagram feed and you’ll see plenty of bright color.

So, why my seeming aversion? I think it’s really about intensity. It scares me. It’s why I am having such a difficult time with the election. My own temperament is intense. I spend my life and my life’s work learning to sooth, to calm, to reach for what is most humane in my humanity. We are wired to live in nature, which is primitive, often dangerous. We are naturally reactive, combative, fearful. I believe that to truly live well, we must practice being peaceful and peaceable. We must consciously focus on getting along with others, letting things go, resolving inevitable conflict with friendly intent. This election season reminds me of the ugliness of human reactivity, and it is painful. I hope when it is over, we will all move toward healing.

So, I resolve to embrace red and cherish its intensity without anger or fear. Intensity is a part of us; it needs to be expressed. I will express my intensity by cutting open beautiful red fruits and vegetables while being as kind as I can to the people around me.

This salad embraces the intensity of red while celebrating the freshness of green. The tart sharpness of pickled radish and bitter depth of kale, and sweet/sour charm of pomegranate are met and mellowed by creamy goat cheese and toasty nuts. And while it’s delicious as is, the addition of tahini sauce makes it truly unusual and delightfully nuanced.

img_0221

img_0079

img_0242

Brilliant Kale Salad

Feel free to substitute any radish, turnip, or beet, for the watermelon radish here. You may slice the radish on a mandoline or use a very sharp knife. Alternatively, you might like to grate it, which isn’t quite as pretty, but potentially easier and just as tasty.

Vegans, dairy-free, and paleo folks: This salad is perfectly delicious without the cheese.

Serves 4

6-ish cups baby kale, or equivalent*
1 watermelon radish, sliced paper thin
3 tbs. white balsamic vinegar
2 tsp. sea salt
2 tsp. cane sugar
¼ cup pomegranate arils
1 ½ oz. soft goat cheese, crumbled
¼ cup toasted pepitas
3 tbs. xv olive oil
salt and pepper, to taste
optional, but very lovely: Tahini Sauce with Herbs

*or use a similar quantity of sliced curly or tuscan kale.

Variation: Use orange slices instead of or in addition to the pomegranate.

Make the pickled watermelon radish: Place the sliced radish in a soup/cereal bowl, add the salt and sugar and toss. Pour over the vinegar, toss again. Refrigerate for at least an hour and up to a day.

Assemble the salad: Drain the pickled radish, reserving the liquid. Place the kale in a salad bowl and drizzle with the reserved vinegar mixture and the oil. Use your hands to massage the dressing into the kale. Or use my stand mixer trick. I use my hands if I’m making the salad with baby kale (needs much less encouragement to wilt), the mixer if my kale is more mature.

Now, top the salad artfully with the remaining ingredients. This is terrific served right away, but may be refrigerated for a few hours or even overnight with perfect results.

img_0234

Posted in appetizer, easy, entertaining, gluten free, healthy, low carb, paleo, pottery, salad, side, side dish, thanksgiving, Uncategorized, vegan, vegetarian | Tagged , , , , , | 6 Comments

Mindfulness Crackers

img_1942

img_1967

img_0155


img_0154

Recipe testing is a challenge when you’re cooking for one! I’m not one of those cooks who eats a bowl of cereal for dinner when no one else is around, but I don’t make lasagna, either.

As you probably know, our kids are grown up and have kitchens of their own. And Bob has been away for 10 days, making this the longest span of time I’ve lived solo in 35 years!

These have been busy work weeks in the dr deb office, and I’m preparing for a wood firing, so lots of studio time. So, I kept my cooking simple. A big pot of turkey soup with lots of veggies kept me well fed for several nights. And on the remaining days, I threw together big bowls of kale with various cooked and raw vegetables, nuts, cheese, and sometimes an egg.

But I wanted a little carb with my soup or salad. Something to nibble alongside. And I wanted that something to be healthy and nourishing. And not go stale after a day or two.

When my beloved friend and tech angel, Mary, came over to play, we discussed the options and decided on Mindfulness Crackers. They were actually the first version of Mindfulness baked good I tested after reading Sarah Briton’s brilliant LCLOB recipes.

Mary and I rolled up our sleeves and got right to work. Well, that’s not exactly true. First, we ran over to her house to get oats. So, these are Mary’s hands you see here in the pictures. Beautiful, right? Mary is beautiful through and through!

These crackers are loaded with healthy grains, seeds, nuts, and fruit. Like my Mindfulness Bread, they are vegan and gluten free. Happy munching!

img_0101

img_0055

img_0054

Mindfulness Crackers

If you’re purely GF, make sure you use gluten free oats. And if you want to go refined sugar free, sub agave, honey, or maple syrup for the sugar; or omit sweetener. I use all organic products for this recipe and hope you will, too.

2 cups oats

¼ cup each:
flax seed meal
sesame seeds
millet
chia seeds
sunflower seeds
walnuts
pepitas
currants

1 tsp sea salt
1 tbs. cane sugar
1 ½ cups water

Combine all ingredients in food processor and pulse to combine. Let mixture stand 5 minutes and pulse a few times to mix. Go away for an hour to let the seeds absorb water and turn this mess into dough.

Preheat the oven to 350°. Give the mixture another few pulses. Cut two pieces of parchment so that they fit inside a half sheet pan: 18 x 13 inches. Place one piece of parchment on the counter and spread the dough out on the parchment. Place the second piece of parchment over the dough and use a rolling pin to form a thin, even rectangle even with the edges of your paper.

Bake the crackers for 30 minutes, then turn the oven off and allow them to sit for an additional 20 minutes to crisp as the oven cools. Let stand for 30 minutes to cool at room temp before breaking into pieces. Store in an airtight container for up to a week.

img_0149

img_0140

img_0146

SPECIAL OFFER: Take 15% off all pottery in DebsPots Etsy Shop by using code PREFIRE15 at checkout.

Posted in baked, bread, breakfast, brunch, gluten free, healthy, lunch, snack, snacks, trail food, travel food, Uncategorized, vegan | Tagged , | 2 Comments

Caramel Apple Upside Down Cookie Tart

img_0037

img_0027

img_0034


img_0039

“What would you do if you lost your favorite thing”? I still remember exactly where I was sitting, in health class in my sophomore year of high school, when the teacher asked that question. What I thought was: I’d just keep searching until I find it. And then the teacher said, to a class of 30 or so teenagers, “Most of us would sit down and cry, but Debbie [I was Debbie until I was 18] would keep looking until she found it.”

Trust me. It was an antisemitic diss. This woman was a bubby, blond, gym teacher. Her name was still Debbie, at 35. She had bouncy hair and bouncy breasts, and was a former cheerleader. She was the one who told us that Jewish women get breast cancer because of eating matzah balls. Not kidding. She didn’t like me. I was mortified.

I remembered that antisemite cheerleader mortification moment last week when a routine ipad update wiped out my hard drive and I lost a year’s worth of photos. Thinking I had a current backup, I installed the new OS and something fried the firmware. My beloved tech team, Bob and Mary, applied all their magic. The geniuses at Apple took a passing shot. The iPad, Dr. Jonas Salk, was pronounced dead. Enter Icarus, her replacement. Data: Gone.

I was kind of a wreck for a couple of days. Contrary to cheerleader opinion, I am not purely practical. Loss is painful. No sense in distinguishing tragic loss from the more mundane kind. It reminds us of our impermanence. There is no solution; loss is a part of life. There is a point at which searching delays acceptance. Once I gave up the search, I began to move forward.

I got out flour, and sugar, butter, and apples. And bowls. Time to bake. Time to make new images. And new memories. Time to balance loss with sweetness.

You may recognize this type of cookie tart; I made a banana version last winter. This apple version is similar to a tart tatin, but better because…cookie! The crust is just a little chewy, the apples are tender. The flavor is bright, deep, buttery, toffee, with a whisper of vanilla.

img_0038

img_0029

img_0032

img_0036

Caramel Apple Upside Down Cookie Tart

Serves 4

3 apples, peeled, cored, cut in quarters*
1 stick butter, divided, room temp
1 cup cane sugar, divided
1 egg
1 tsp vanilla
1 cup bread flour
¼ cup whole wheat flour
½ tsp salt
½ tsp baking powder

*use an apple that will hold its shape when baked. I like golden delicious or jonagold.

Preheat oven to 375°.

Make the crust. You may do this in a stand mixer, with a hand mixer, in a food processor, or by hand. Combine 6 tbs. butter and ¾ cup sugar. Add the egg and vanilla. Add the flour, salt and baking powder and mix well. Wrap the dough in plastic wrap and place in the fridge while you cook the apples.

Melt the remaining 2 tbs. butter with the ¼ cup sugar in an 8 inch cast iron skillet. Place the apples, rounded side down, in the skillet, crowding them a little (check out my photo); they will shrink as they cook. You will have a few pieces left over to munch. Sauté over high heat for 3-4 minutes, then turn heat to medium and cover the pan. Cook for 7-9 minutes, until the apples turn translucent all the way through. Remove from heat and cool slightly.

Using a nonstick board (I use a plastic cutting board), press the dough into an 8 inch circle (I use the pot lid as a guide). A pastry scraper or spatula will help you lift the round and place it on top of the apples, tucking the edges around the side of the pan.

Bake for 20 minutes, or until the cookie crust is slightly browned. Let cool 3 minutes. Run a paring knife around the edge to make sure the crust isn’t stuck.

Place a serving plate over the pan. Use a good oven mitt or kitchen towel to wrap the pan’s handle. Take a deep breath, and in one swift, confident motion, invert the pan so that the tart falls onto the plate. Use an offset spatula to reposition any stray apple or caramel.

I like to serve this warm with homemade ice cream. Pictured here: Bourbon Vanilla Dulce de Leche. I promise, I’ll write up that recipe soon! If you don’t have homemade ice cream, good purchased vanilla or dulce de leche is wonderful. Or, go with lightly sweetened whipped cream.

And don’t forget to back up your devices!

at


img_0035

img_0041


Posted in baked, baked goods, breakfast, brunch, dessert, snack, sweets, thanksgiving, Uncategorized, vegetarian | Tagged , , , , , , | 17 Comments

Unstuffed Cabbage, The Sequel

oz

lake

cabbage

7

I published a recipe for “deconstructed” stuffed cabbage here on the blog in November of 2014; it was DebsPots 8th blog post. Please don’t click on the blog link!! The recipe is fine, though I’ve tweaked it a bit. But the photography!!! Well, I can see that I’ve made progress. Though, I don’t think this post contains my best food photos, either. And now I know part of the problem.

This is not photogenic food. Real stuffed cabbage is pretty. Unstuffed Cabbage looks, to quote Ina Garten, “like a dog’s breakfast.” And I’m being charitable. But…that’s not the point, is it? True, we eat with our eyes. But sometimes our eyes like something that looks homey and comforting and tasty. Especially when it’s really fall, and cozy is now an option, and curling up with a bowl of something stewy is really appealing.

We did our apple picking thing, just Bob and me this year. And we picked veggies in addition to apples. I fell in love with the teeny baby cabbages! I roasted a few of them, a very successful endeavor. But then, I just had to make a batch of our family’s now-famous Unstuffed Cabbage.

No, it’s not as festive or beautiful as classic stuffed cabbage. But it takes a fraction of the time, and is just as flavorful and satisfying. All the elements are there, without the massive amount of work fussing with frozen/thawing or boiling/cooling heads of unruly leaves.

This is quick enough that you can throw it together after work. And it’s a stew, so reheats beautifully and is actually better the next day. It’s a terrific weeknight meal; the kids will LOVE it, too!

5

6

3

2

Unstuffed Cabbage

I use organic ground turkey, but feel free to do it with chicken or beef.

Serves 4-6

1 lb. ground turkey, chicken, or beef (lean is ok, all breast meat is too dry)
1 medium onion, diced
1 medium head cabbage (or equivalent), roughly chopped
1 apple, peeled and diced
1/3 cup raisins
1 15 oz can crushed tomatoes, I like Muir Glen
1 tbs. olive oil
salt and pepper, to taste

Heat the oil in a heavy pot or dutch oven. Add the onion and cook for a minute or two. Add cabbage, and toss around for a few minutes. Clear a space in the bottom of the pan and add the meat, breaking it up as it browns a bit.

Add remaining ingredients, bring to a boil, reduce to simmer, cover, and cook for 40 minutes or so, until the cabbage and apples are soft.

Serve immediately or chill and reheat within 2-3 days.

8

Blog Note: This week, all proceeds from DebsPots shop on Etsy will go to the Leukemia and Lymphoma Society. Please consider a purchase as a handmade prop for your food photography or start your holiday shopping. LLS does life saving work!

Posted in braise, chicken, dinner, easy, family, gluten free, healthy, kid friendly, low carb, main, main course, one pot meals, paleo, poultry, Uncategorized, weeknight | Tagged , , , , , | Leave a comment

Spicy Mango Salad

img_1786

img_1787

img_1791

img_1789

I’m just a teeny bit mortified about this post. You know I’m all about local, seasonal, and organic. And this month, the produce here at the farms is ah-mazing! This week, I should be giving you a recipe for something with apples, peaches, tomatoes, sweet potatoes, corn, zucchini, or eggplant! But no! I had such a craving for this incredible salad (I’ve been making it weekly all summer), I decided had simply had to share it. Now. So, please accept my apologies. And I will accept your gratitude. ‘Cause you’re gonna love it just as much as I do!

The original version of this Thai-inspired mango salad was one I created in June, when Bob and I were on Kauai for our 30th anniversary. I got the fruit at the farm market there, so it WAS local, organic, and seasonal!!! Ha! I think I made it three times that week. There’s something about the combination of spicy, sweet, sour, and salty that is addicting. And the textures are wonderful! And I’m telling you, this goes with just about everything!!!

In Hawaii, I paired it with a piece of seared ahi tuna, served “black and blue,” (almost raw) and later in the week, next to some crispy pork belly. Over the course of the summer, I’ve served it with salmon, chicken, and grilled pork tenderloin. Tonight, I made a turkey larb to go with this batch. If you’re going meatless, it is terrific with glazed tofu.

img_1794

img_1796

mang

mango

Spicy Mango Salad

I’ve made this with very unripe mangoes, which is traditional. But occasionally, my mangoes have ripened a bit more than I planned, and that’s wonderful, too. I’ve also added peaches, and the combo is delicious!

1 large mango (preferably very firm), organic, if possible
1 medium cucumber (I like kirbys, but any cuke is fine)
1 tbs. mirin
1 tbs. honey (or more if the mango is really sour)
juice of ½ large lime
sriracha or minced hot chili, to taste
green part of one scallion, sliced thinly
minced cilantro, to taste
minced basil, to taste
salt
peanuts for garnish, optional
additional optional garnishes: mint, extra scallion, cilantro, basil, chilis, or hot sauce, lime.

The best way to peel unripe mango is with a vegetable peeler. Make sure you remove all the skin, then slice the mango flesh in long, thin strips with a very sharp knife. Place mango slices in a bowl.

Slice the cucumber lengthwise and remove the seeds. Use the peeler to make cucumber ribbons. Add to the bowl. Add the remaining ingredients, toss, taste, and adjust flavors to your liking. Sprinkle with peanuts, if you like. Serve immediately or refrigerate for up to a day.

Find this gorgeous, versatile, stoneware serving bowl on Etsy!

img_1793

img_1788

spicyman

Posted in easy, fruit, low carb, salad, side, side dish, side dishes, simple recipes, Uncategorized, vegan, vegetable, vegetarian | Tagged , , , , , | 8 Comments

Yogurt Bark

img_1736

img_1727

barker


img_1740

The hummingbirds arrive in here in our woods on Brian’s birthday, May 2; they leave on Megan’s birthday, September 18. I fill the feeder in this week before their departure knowing that my nectar will provide fuel for their long flight south; I wish them a safe journey.

The kids were home last weekend to celebrate Bob’s birthday, and we snuck in some Meg’s birthday festivities, too. Hard to believe that I’ve been a mother for 26 years! I bet you’ll be surprised to hear that I did lots of cooking while everyone was home! All four of us are currently focused on cutting back the carbs, so treats and desserts were a challenge. Brian is the only one without a sweet tooth, so he is happy with savory snacks. The rest of us like a little something desserty while we watch a movie in the evening.

My everyday bedtime treat usually involves some iteration of yogurt and fruit. I like frozen yogurt, but find that without additives or loads of sugar, it freezes too solid to scoop or to eat easily. Often, I solve this problem, as I did here, by freezing for a discreet amount of time, or by microwaving to thaw. But I wanted a solution that was super simple.

Enter yogurt bark. Because it is frozen in a sheet, rather than in a container, it is easy to break into pieces once frozen. It can be eaten out of hand when taken directly out of the freezer, or served on a plate or bowl and enjoyed with a fork or spoon. Perfect any time.

Like my previous post, this is more a technique than a recipe. The possibilities are endless. I can’t wait to hear your combinations!

img_1748

img_1747

img_1746

bbark

Yogurt bark

You will need a 9 x 13 pan, lined with parchment paper. And, you will need to create a level space in your freezer in which to place the pan. That is the most difficult part of this “recipe.”

2 cups yogurt, lowfat or whole milk, greek or regular*
sweetener of choice- honey, agave, maple syrup, or fruit juice, to taste
mix-ins and toppings: here’s a partial list:

vanilla extract or powder
coconut, maple, or almond extract
nuts
nut butter
seeds
granola
dried fruit
fresh fruit, diced
coconut
chocolate chips

*Vegans use your favorite coconut, soy, or almond yogurt.

Mix in your sweetener and chosen ingredients, and spread the chunky yogurt in a half inch layer on the parchment. Sprinkle on toppings. Freeze until solid, at least 4 hours. Break into pieces, and store in a large, lidded container or zip-top bag.

The version you may have seen last week on Instagram contained: lowfat greek yogurt sweetened with agave, chocolate chips, date pieces, pepitas, and coconut chips

Pictured here: lowfat plain yogurt sweetened with honey, lightly sweetened tahini, chocolate chips, date pieces, pepitas, pistachios, black sesame seeds, and quartered fresh figs.

img_1739

img_1742

I’d love it if you let me know your combinations here in comments or tag me on Instagram.

Also, don’t forget to check out the Etsy Shop to see all the terrific new pots!

brightbark

okbark


Posted in breakfast, brunch, chocolate, dessert, easy, gluten free, healthy, low carb, simple recipes, snack, treats, Uncategorized, vegetarian | Tagged , , , , , | 4 Comments

Quichetatta

img_1680

img_1673quichetatta

img_1683We start out together, but after about 1/4 mile, I signal him to take the lead. He is a foot taller than me, and has an easy, lopey stride that will allow him to finish the five mile race in 44 to my 48 minutes. This puts me in the happy position of regarding my newly 60 year old husband from several paces back, allowing me to admire the human to whom I am most attached.

The man I follow moves through the world with ease and unselfconscious confidence. He is the smartest person I know, not just full of facts and concepts, but also wisdom and people sense. He is the kind of leader who is in high demand because he knows how to handle situations that baffle the rest of us. There is no better father, brother, or son-in-law. Or husband. He’s a gem. And cute, too!

I am not person of prayer, but as I run behind the man I love, I say a silent blessing. I wish him happiness, love, and good health. I hope that he will be able to be active and fit for many years; that we can run this race together after his 80th birthday! I repeat the vow I made 3 decades ago, to take good care of him, as he takes good care of me.

You, my blog readers, know that I feed my loved ones mostly healthy food interspersed with occasional treats. This “quichetatta,” is a little bit of both. It’s a perfect, mostly good-for-us, slight indulgence for a couple of not-so-young runners after a race!

I mean this recipe to be a springboard for your creativity. A cross between a frittata and a quiche, it has the decadence of pie, without the work of pastry. I’ve used the bounty that is late-summer harvest, but feel free to substitute what is fresh and seasonal whenever the whim strikes.

img_1677

img_1679

img_1678

img_1684

Quichetatta

The flour in the custard, with the panko and parm in the “crust,” combine to form a crispy base for this hearty pie.

Serves 4-6 as a supper portion, 6-8 as an appetizer or brunch element.

For the custard:
8 large eggs, preferably free range
1/2 cup whole milk
2 tsp dijon mustard
1 tbs. flour
1 cup grated extra sharp cheddar
1 tsp salt

For the “crust”:
1/2 cup panko
1/4 cup grated parmesan
1 tbs. olive or walnut oil

For the filling:
2 small or 1 large leeks, cleaned and sliced
2 small or 1 large zucchini
kernels from 2 ears fresh corn
2 tbs walnut or olive oil
1 tbs butter
2 tbs. heavy cream
salt and pepper

Preheat oven to 450°. Prepare the filling. Slice the zucchini into coins, 1/4 inch thick. Place on parchment-lined baking sheet. Brush with 1 tbs oil, sprinkle with salt and pepper, bake for 10 minutes. Remove from oven and lower temperature to 375°.

Melt butter in heavy, large skillet, add remaining 1 tbs oil, sauté leeks over med-high heat until they begin to soften, about 3 minutes. Increase heat to high and add corn, salt and pepper. Cook 4-5 minutes, until veggies begin to brown. Add cream, deglaze pan, and remove from heat.

Make the “crust.” Brush a 10 inch springform pan with oil. Sprinkle bottom of pan with panko and then parm.

Make the custard: Whisk all ingredients except cheddar.

Assemble: Spread leek/ corn mixture carefully on top of “crust.” Sprinkle with half of cheddar. Arrange zucchini slices on top of corn mixture, and sprinkle on remaining cheese. Now, carefully add the custard, pouring it evenly over the filling.

Bake for 30 minutes or until the custard is just set in the middle. Cool for 5 minutes, then use a pairing knife to loosen the sides and unmold the pie. You may use a large, serrated knife to separate the bottom and slide the quichetatta onto a platter. Serve warm or room temp. Reheats beautifully in oven or microwave.

Variations:
sautéed mushrooms, corn, and cheddar
spinach, sun-dried tomato, and brie
sautéed kale and crumbled, cooked, sausage

img_1676

img_1682

Blog note: A huge thank you and hugs to all of you who have expressed concern and support about my parents’ health. It has been a very difficult summer for them both, but we are hopeful that fall will bring resolution to this round of cancer surgeries and treatments and that they will both enjoy a return to full activity and ease.

Posted in baked goods, baking, breakfast, brunch, eggs, entertaining, entree, family, kid friendly, lunch, main, main course, main courses, main dish, supper, supper, main courses, Uncategorized, vegetarian | Tagged , , , , , | 10 Comments

Naan

img_6895

img_6875

naan

img_9186

It’s been at least a year since Ashley asked me for the recipe for naan, the traditional Indian flatbread I make regularly. It was on my list of future posts and last week I realized that my dear young friend is moving to Ithaca for grad school this month. Since I had so much fun with both Adam and Megan  starring in the previous two posts, I decided invite Ash to join me for a naan blogfest. So this afternoon, while the clouds gathered and thunder began rumbling in the swampiest of skies, we got out the flour and the rolling pin.

I met Ashley through Brian when they were friends in high school. She shares my love of cooking and pottery and we forged a connection. When Sadie came to live with us as a tiny, feral rescue kitten, Ashley was smitten and offered to become her caregiver. So, for five years, this wonderful young woman has stayed here when we travel, taking care of our house, and loving Sadie as much as we do. And since cats know when people have hearts of pure gold, Sadie can never get enough of her dear friend, Ash.

Naan is traditionally cooked in a tandoor, which is a wood-burning clay oven. I was reminded of this last weekend, when I “cooked” my pots in the wood fired kiln at Canton Clayworks. So, in celebration of that firing, all the pots you see in this blog post were fired there. AND, Ashley helped me to photograph the one I have chosen for my very first Instagram giveaway this week!! Check it out!

In spite of this fun reminder, I do not have a tandoor. Or a wood kiln. Yet. But I recently acquired a stylish, new, cast iron, ridged grill pan from Victoria! I think it works just as well, and have tweaked the recipe for this delicious flatbread so that you can make it using a grill pan or skillet, since I assume you don’t have a bread kiln either.

img_1586

img_1579

img_1577img_1576

img_9213

img_1587

These beautiful flatbreads are chewy, stretchy, tender, and crisp, like a good pizza crust. They are delicious in both sweet and savory applications. I served them last week with the Butterless Butter Chicken. They do, in fact, make a terrific base for a pizza. I like them dipped in good olive oil with sprinkle of salt; a slice of ripe tomato doesn’t hurt. Make a lovely cinnamon toast with butter and cinnamon sugar. Or enjoy as Ash did today, with tahini and honey. Naan can be frozen; thaw and recrisp in a hot oven or directly over a flame.

Naan

Makes 8 naan, roughly 6 inches long and 3 inches wide.

2 cups organic bread flour
½ cup organic whole wheat flour
2 ½ tsp. active dry yeast
2 tbs. cane sugar
1 tsp. fine sea salt
¼ cup yogurt
2 tbs. olive oil, plus a bit more for oiling the bowl
1 cup warm (not hot) water

Mix the dry ingredients in a large bowl (you may use a stand mixer and dough hook). Make a well and add wet ingredients, stirring with a wooden spoon until dough comes together. Transfer to floured board and knead for a few minutes until the dough is smooth and elastic. Oil the bowl, and place the dough in the bowl; cover with a tea towel and let rise for 30 minutes.

Working on a floured board, use a scraper or knife to divide the dough into 8 equal pieces and form these into smooth balls. Let stand for 5 minutes while you preheat a cast iron grill pan or skillet.

Using just enough flour to prevent sticking, roll the dough balls out into oblongs roughly 6 x 3 inches. Place carefully into preheated grill pan and cook for 3-4 minutes until you can see dark brown marks and the underside is dry. Turn bread 90 degrees to create crosshatches and cook for another minute or so. Flip and cook for 2 minutes. You should be able to develop a pleasant rhythm of rolling and cooking. If this seems too complicated, invite a wonderful, young partner to assist you like I did!

Serve hot, warm, or cool.

img_1585

img_9190

img_9203

Don’t forget to hop on over to Insta to enter the GIVEAWAY!
AND check out all the gorgeous new pots in the Etsy Shop!


Posted in baked, baked goods, bread, breakfast, lunch, side, side dish, side dishes, snacks, Uncategorized, vegetarian | Tagged , , , , | 6 Comments