Potato Chip Salmon

IMG_4418

IMG_4415

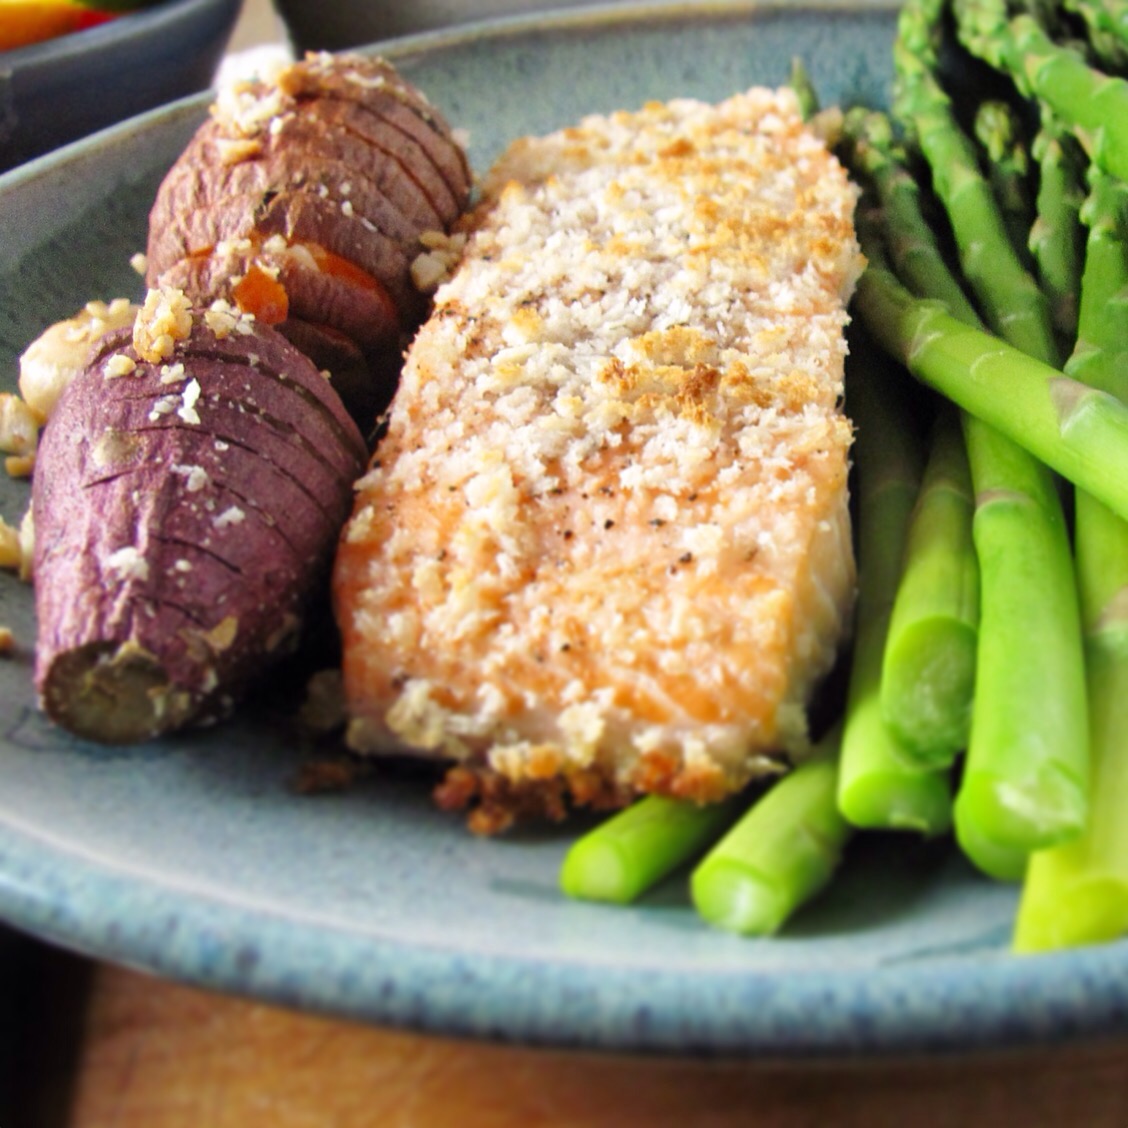
The name of this recipe is extremely clever because it has two meanings. The first is obvious; the topping is made with potato chips. The second is obvious, too, since I am clearly less clever than I like to believe. The salmon is so good, you can’t stop eating it. Like potato chips, get it?

Please forgive me and don’t stop reading, this may well be the best recipe I’ve given you so far. It is very loosely based on two different Cook’s Illustrated recipes. If you like salmon even a little bit, you really must try this one.

Before I give you the recipe, I need to share one little bit of salmon family lore. I know, how many families have fish stories? We have a couple; I’ll tell you the story of Megan and the Fish some other time. This one involves Meg, too, and our shared love of Laurie Colwin. We regularly perform a little routine from one of our favorite Laurie stories. It’s a scream at a party.

When Laurie Colwin was a young mother in New York City, she and her friends would amuse their toddlers by taking them to the fish store after playgroup:

The fish man, an unshaven, unsmiling person, turned to the child.
“Whadda want,” he barked.
“Slamber,” she said without batting an eye.
“What color is it?”
“Pink and green,” said the child.
“Oh, yeah?” he said, “Well, we don’t carry it.”
“Then give me something else,” said the little girl.

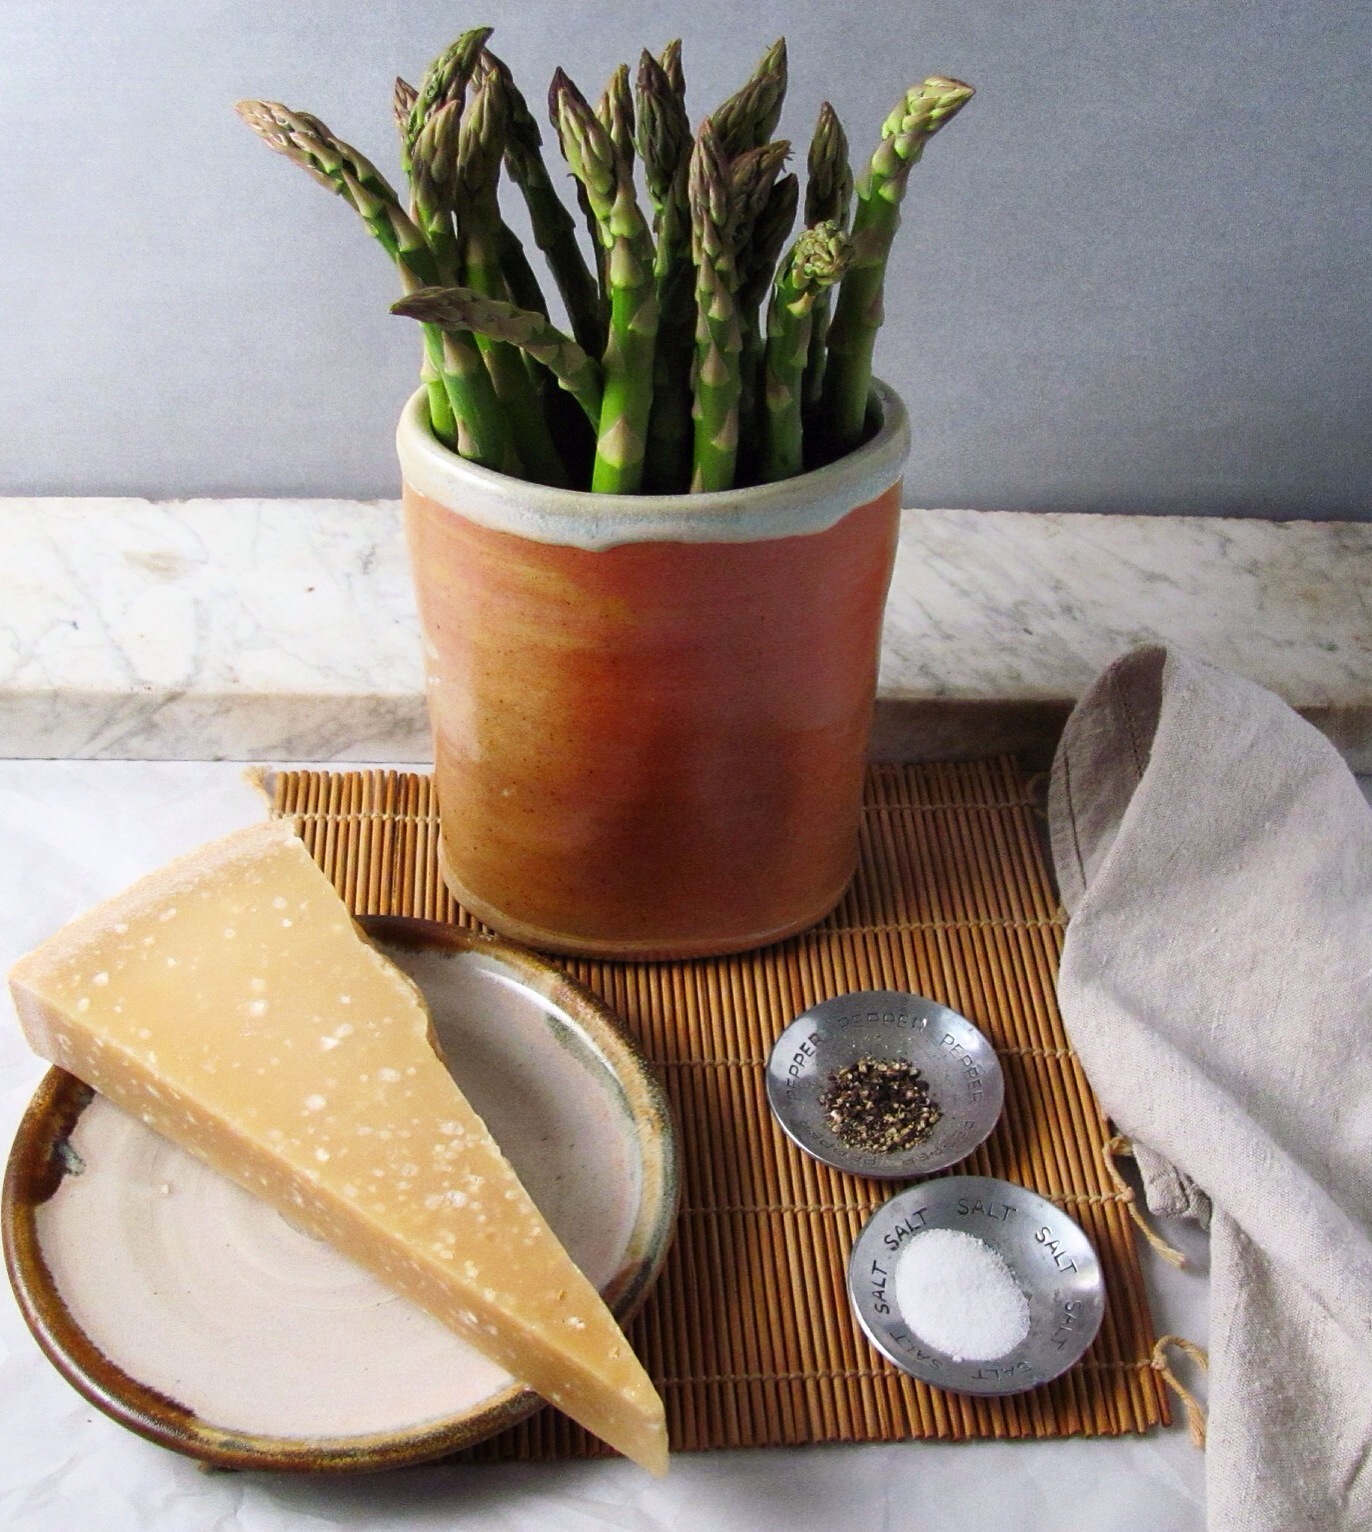
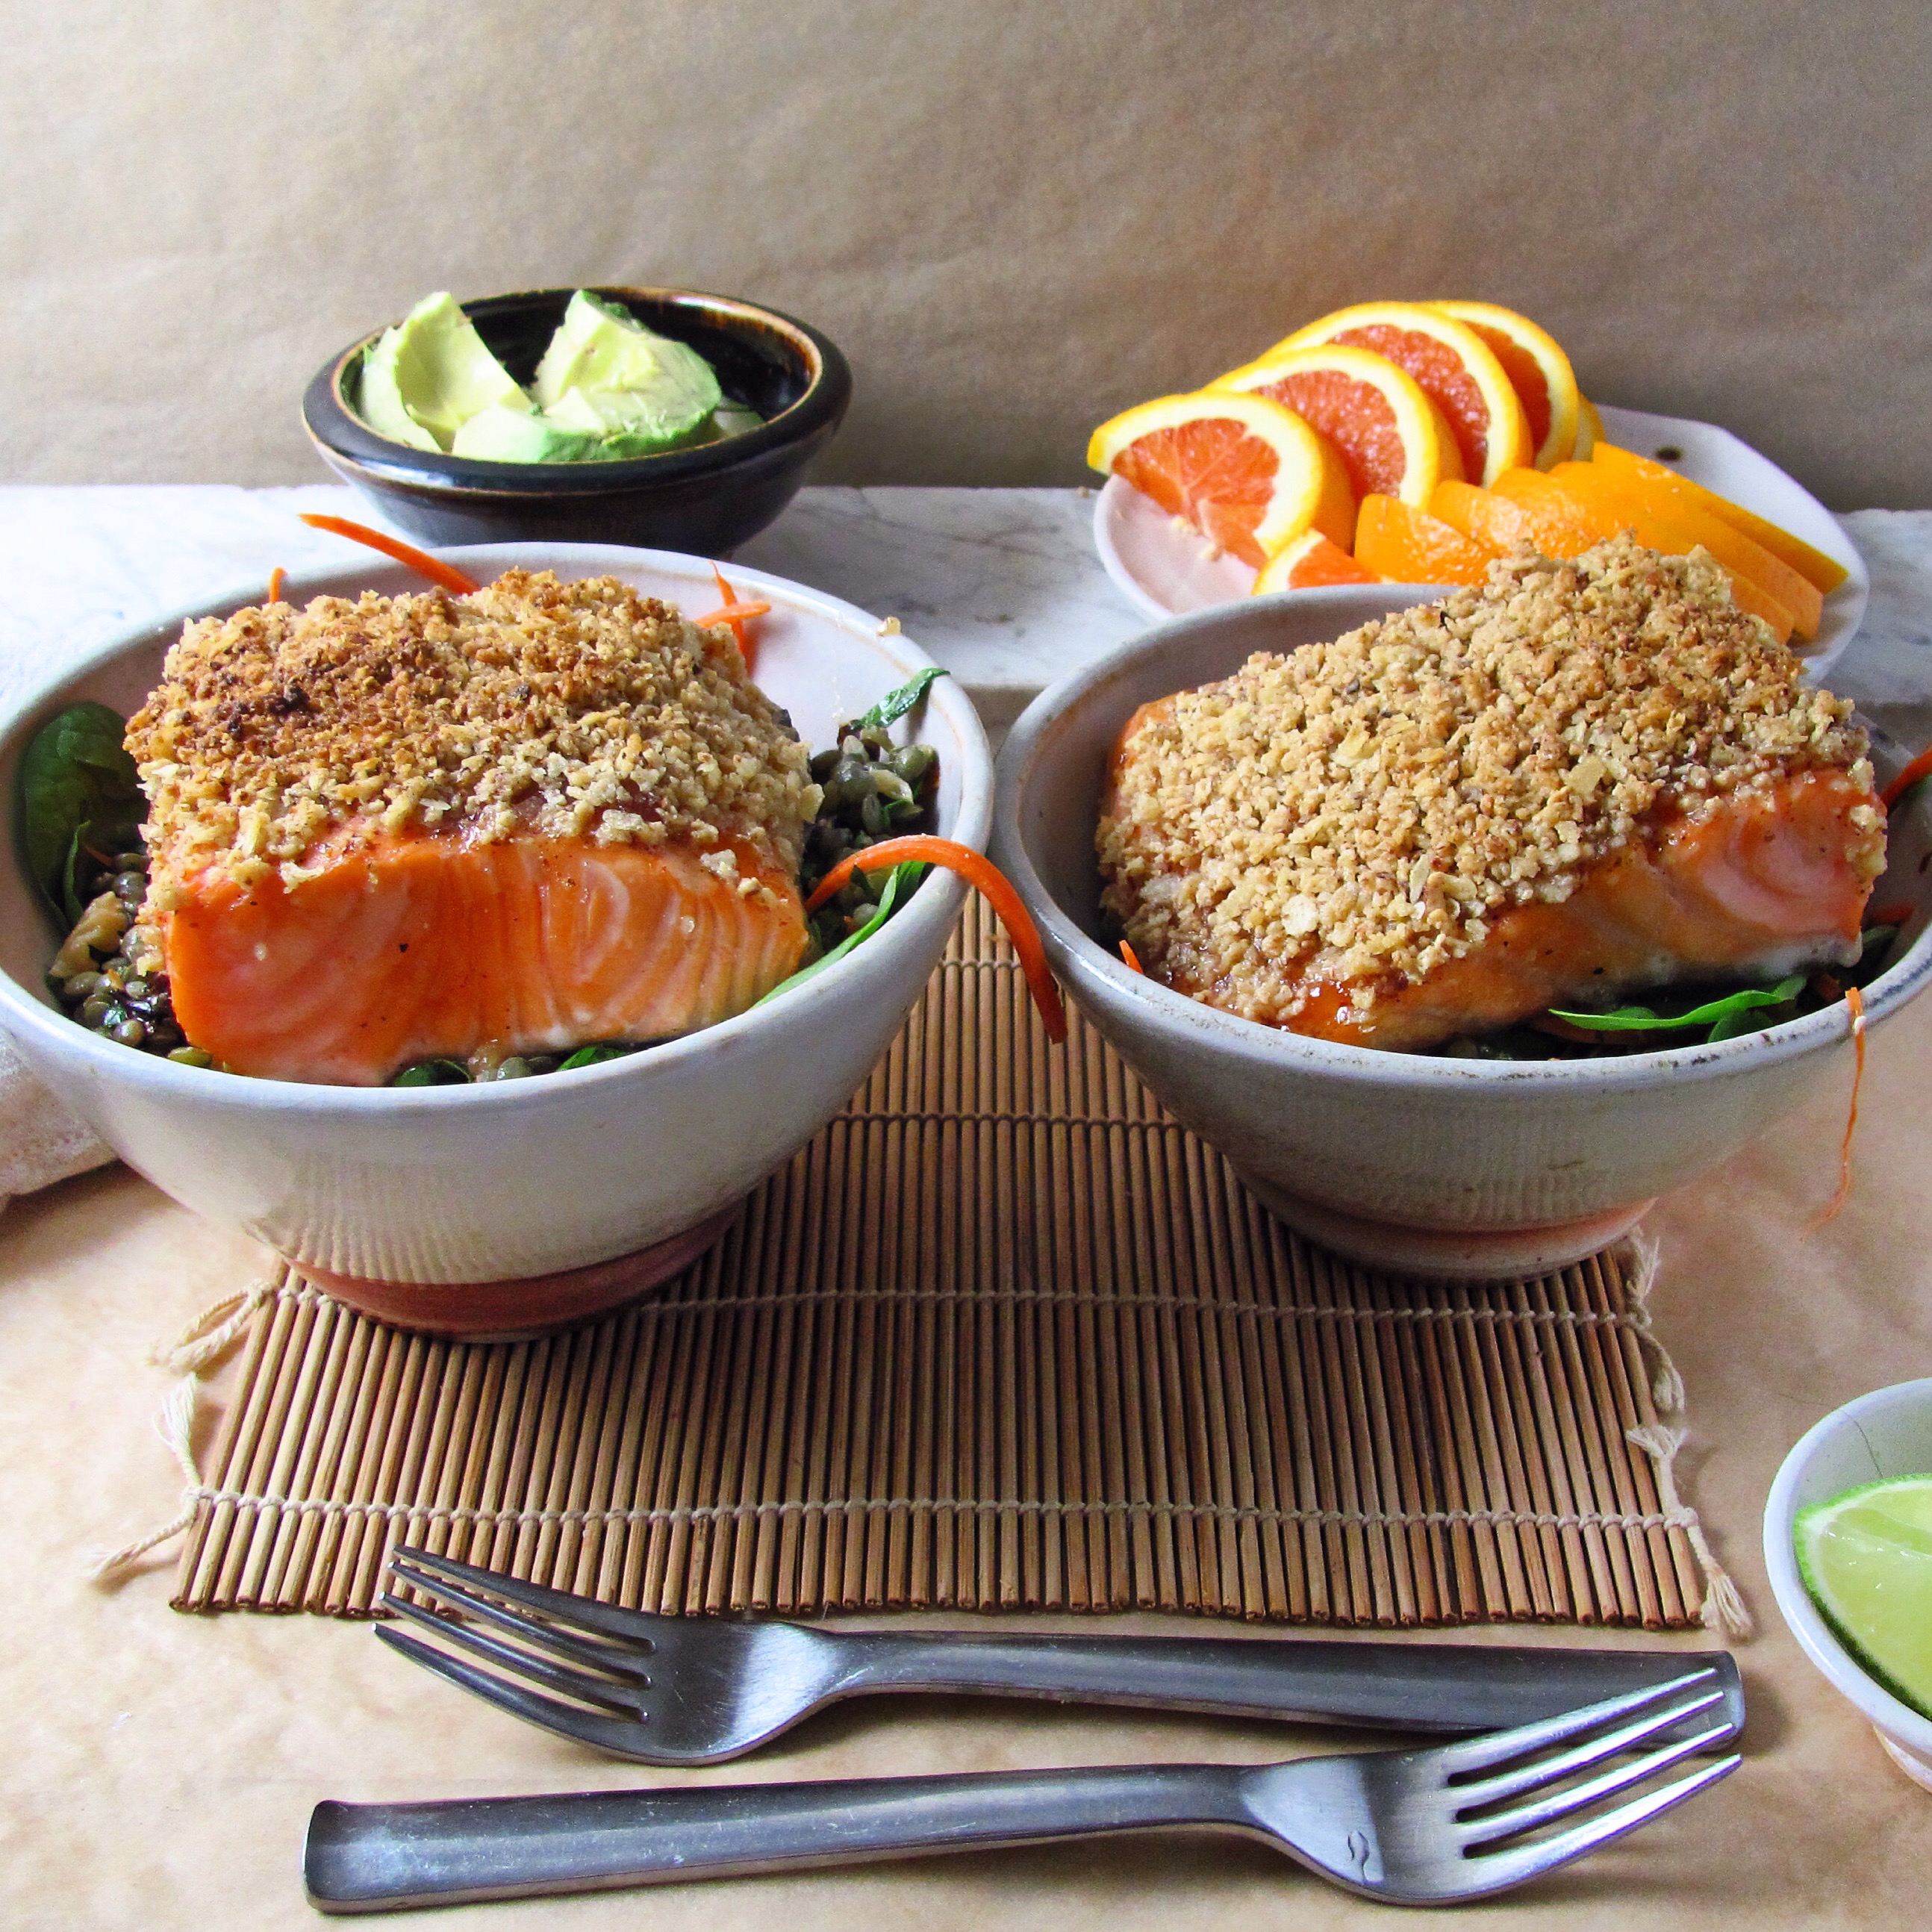
So, yesterday, I sent Bob to our fish market to buy some slamber for supper. The preparation is an old favorite, and I served it over a lentil salad because salmon and lentils taste amazing together. I am so happy to share this recipe with you, I am going to tell you how to prepare the lentil salad as a bonus. Notice that there is a little apricot subtheme going on here.

IMG_4409

IMG_4416

IMG_4417

IMG_4412

Potato Chip Salmon

I usually use Cape Cod kettle chips for this recipe. But I inadvertently bought the salt and vinegar version, and the result was wonderful. So, your choice!

If you want to preseason the fish, start the recipe in the morning. The fish can also be completely prepped, crumbs and all, and stay in the fridge for a couple of hours before baking.

Serves 2-4

1 pound very good, fresh salmon filet, cut into 2-4 pieces
2 tbs. apricot preserves
2 tbs. country dijon mustard
1 cup potato chips
¼ cup roasted almonds
salt, sugar, and pepper, to taste

Preheat the oven to 450°.

I like to preseason my fish, which gives it a light cure. This is not necessary, but it gives a good flavor and an amazing silky texture to the flesh. Sprinkle both sides of the filets with salt, sugar and pepper. Let the fish stand in the fridge, uncovered, for one to 10 hours if you have time.

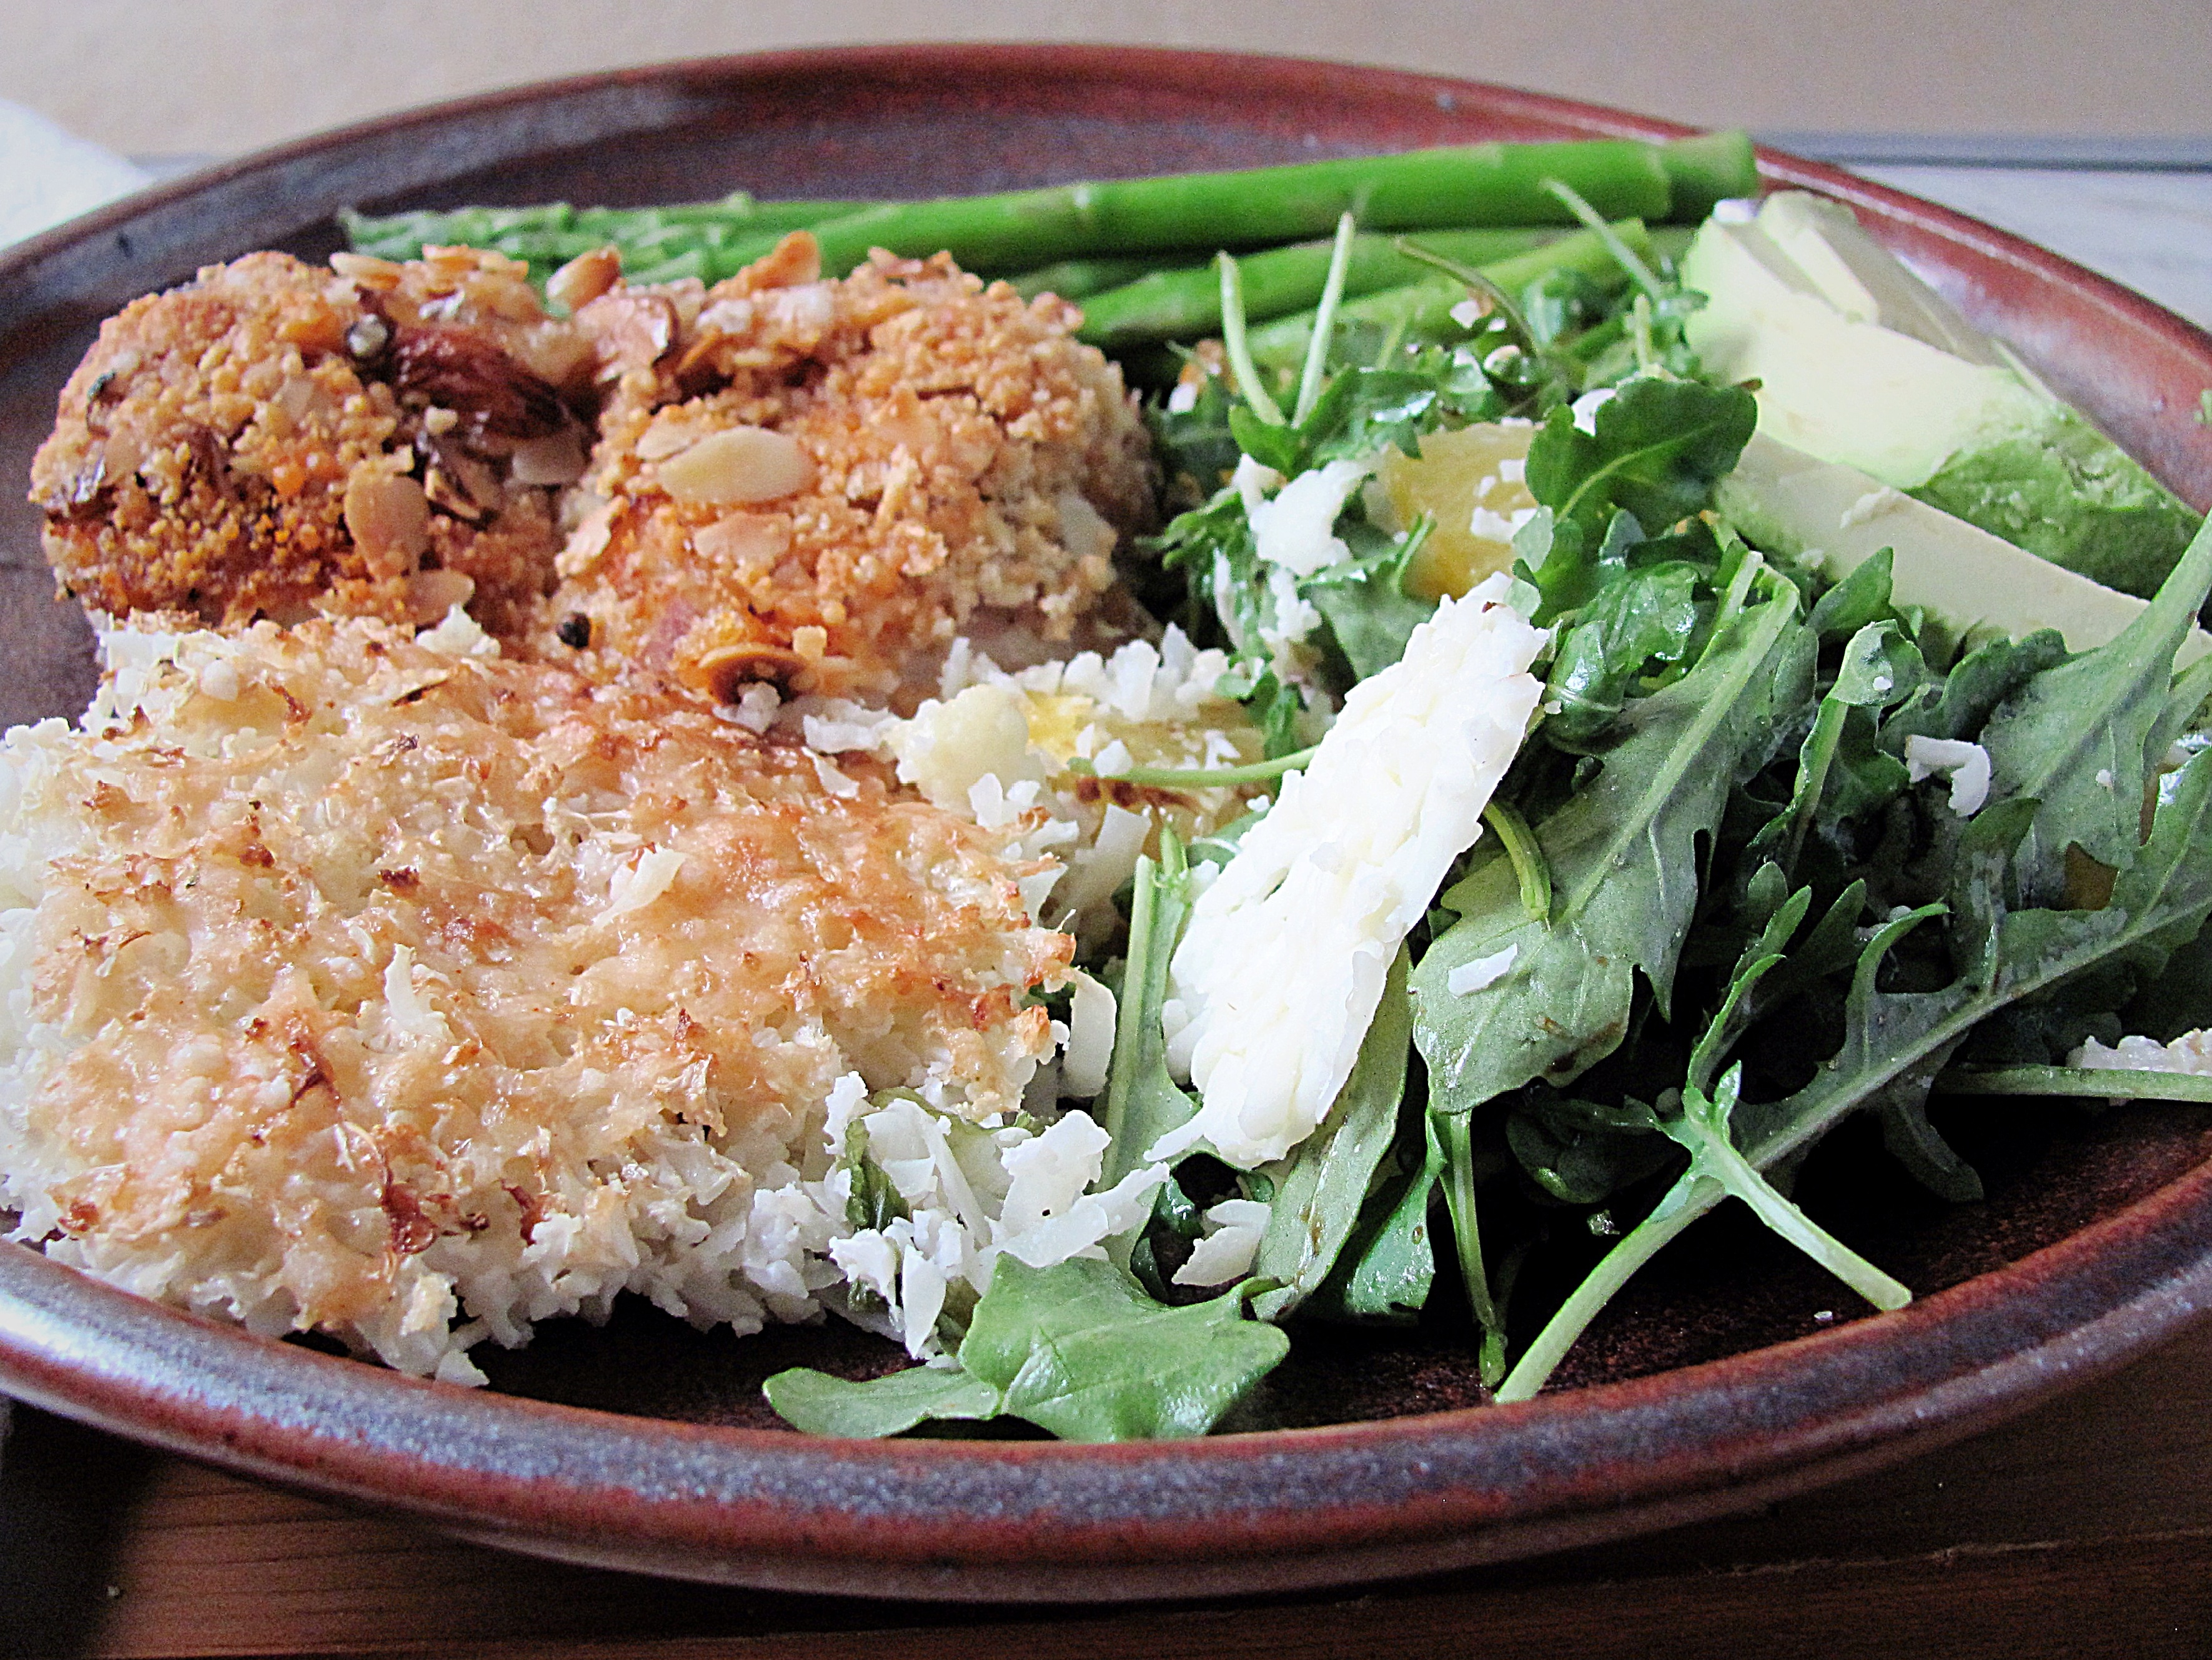
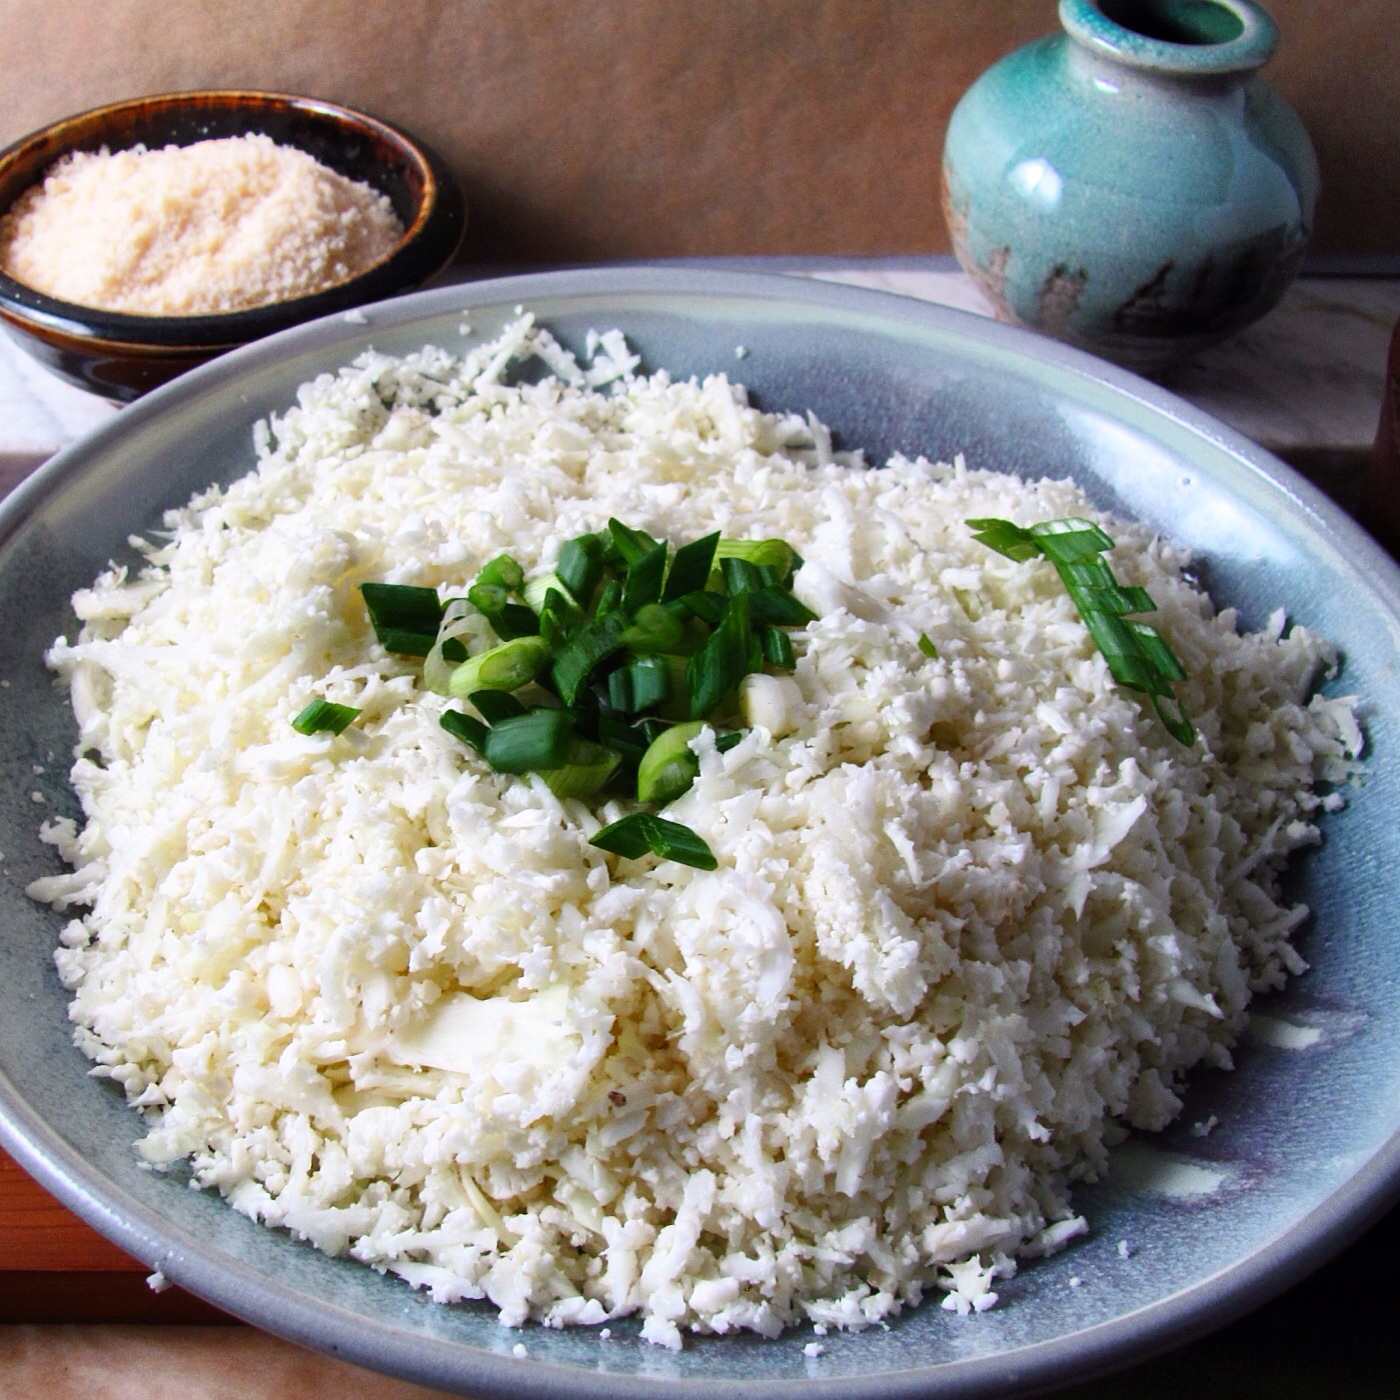
Mix the preserves and the mustard. Grind the potato chips and almonds in a food processor until you have uniform, small crumbs. Put the fish on a parchment lined baking sheet. Spread the mustard mixture over the flesh side of the fish and then sprinkle with the crumbs, pressing gently to adhere.

Pop the fish in the oven. Immediately turn the temp down to 275°. Roast for 10-12 minutes depending on how done you like your fish and how thick it is. I like salmon quite rare, so I do barely 10.

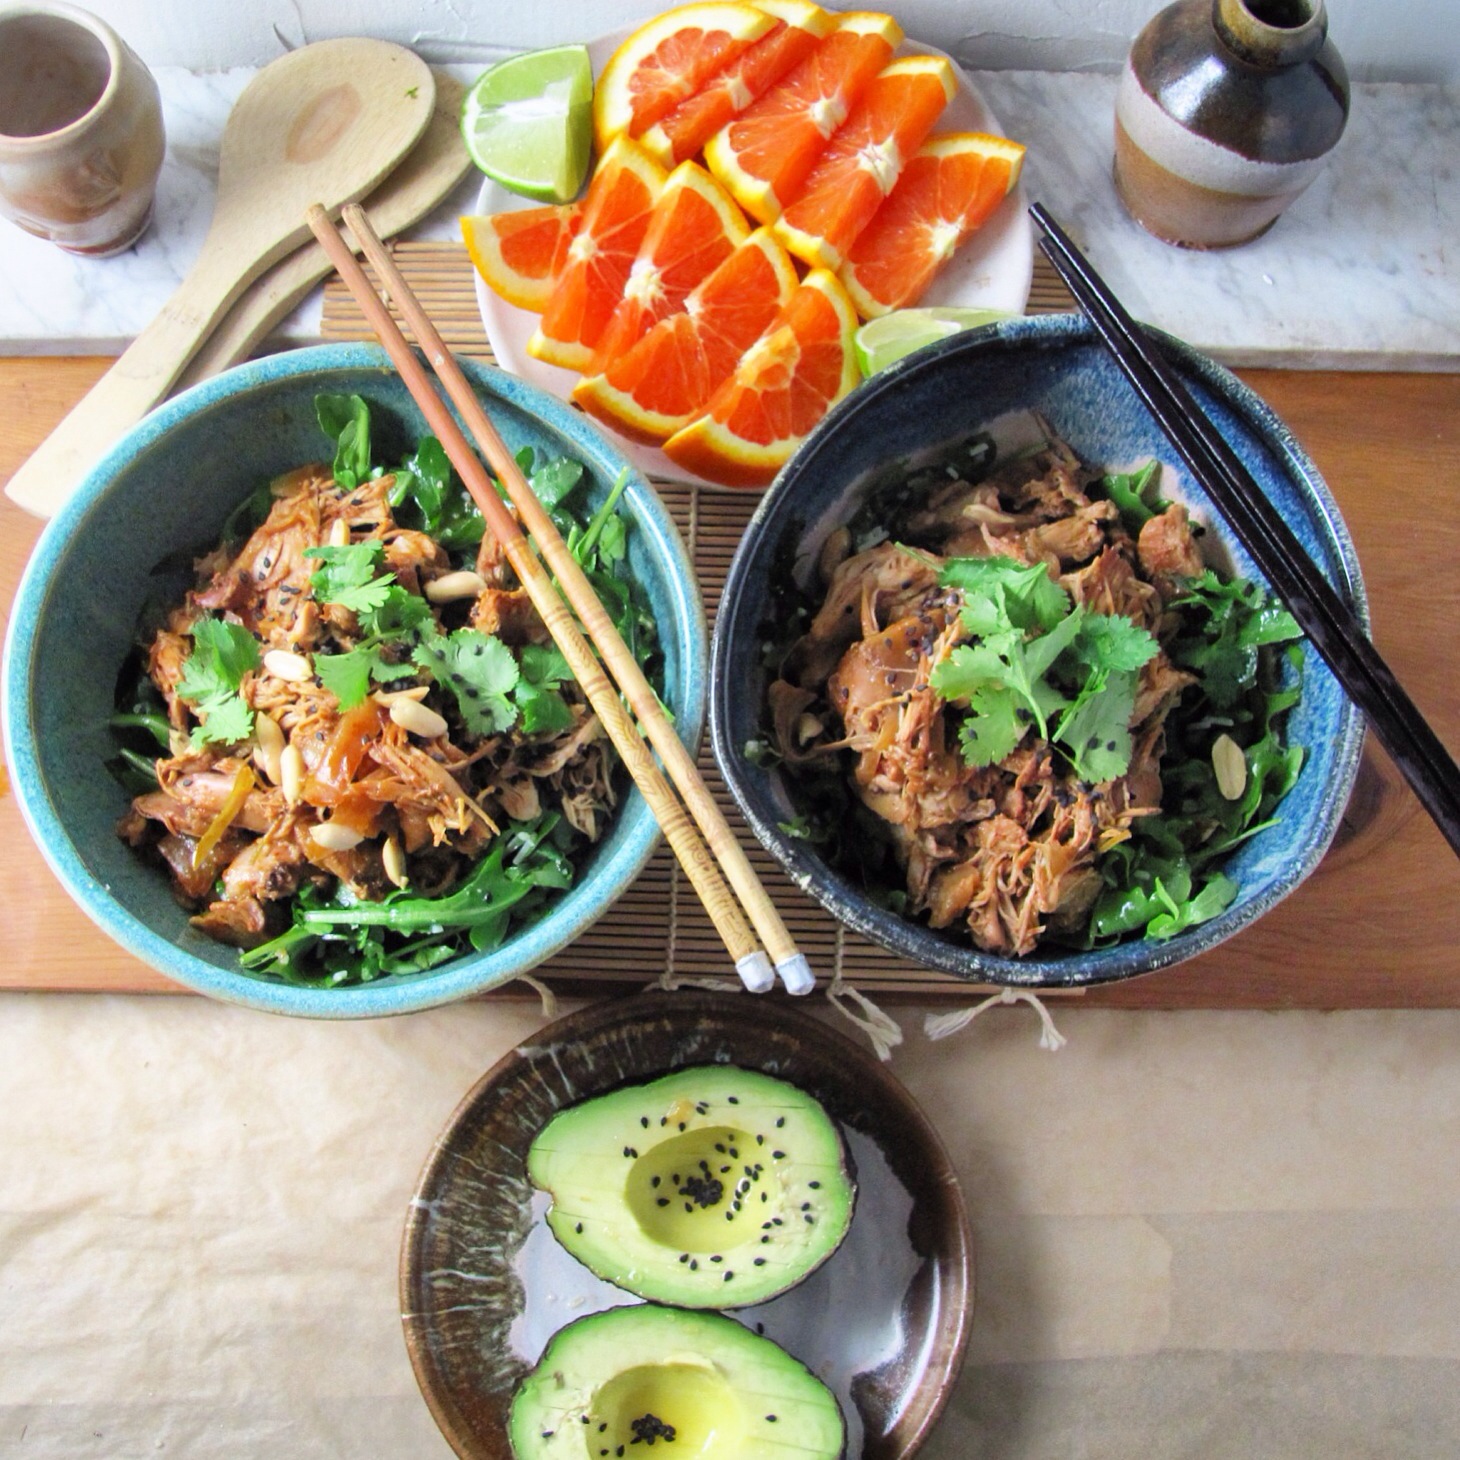
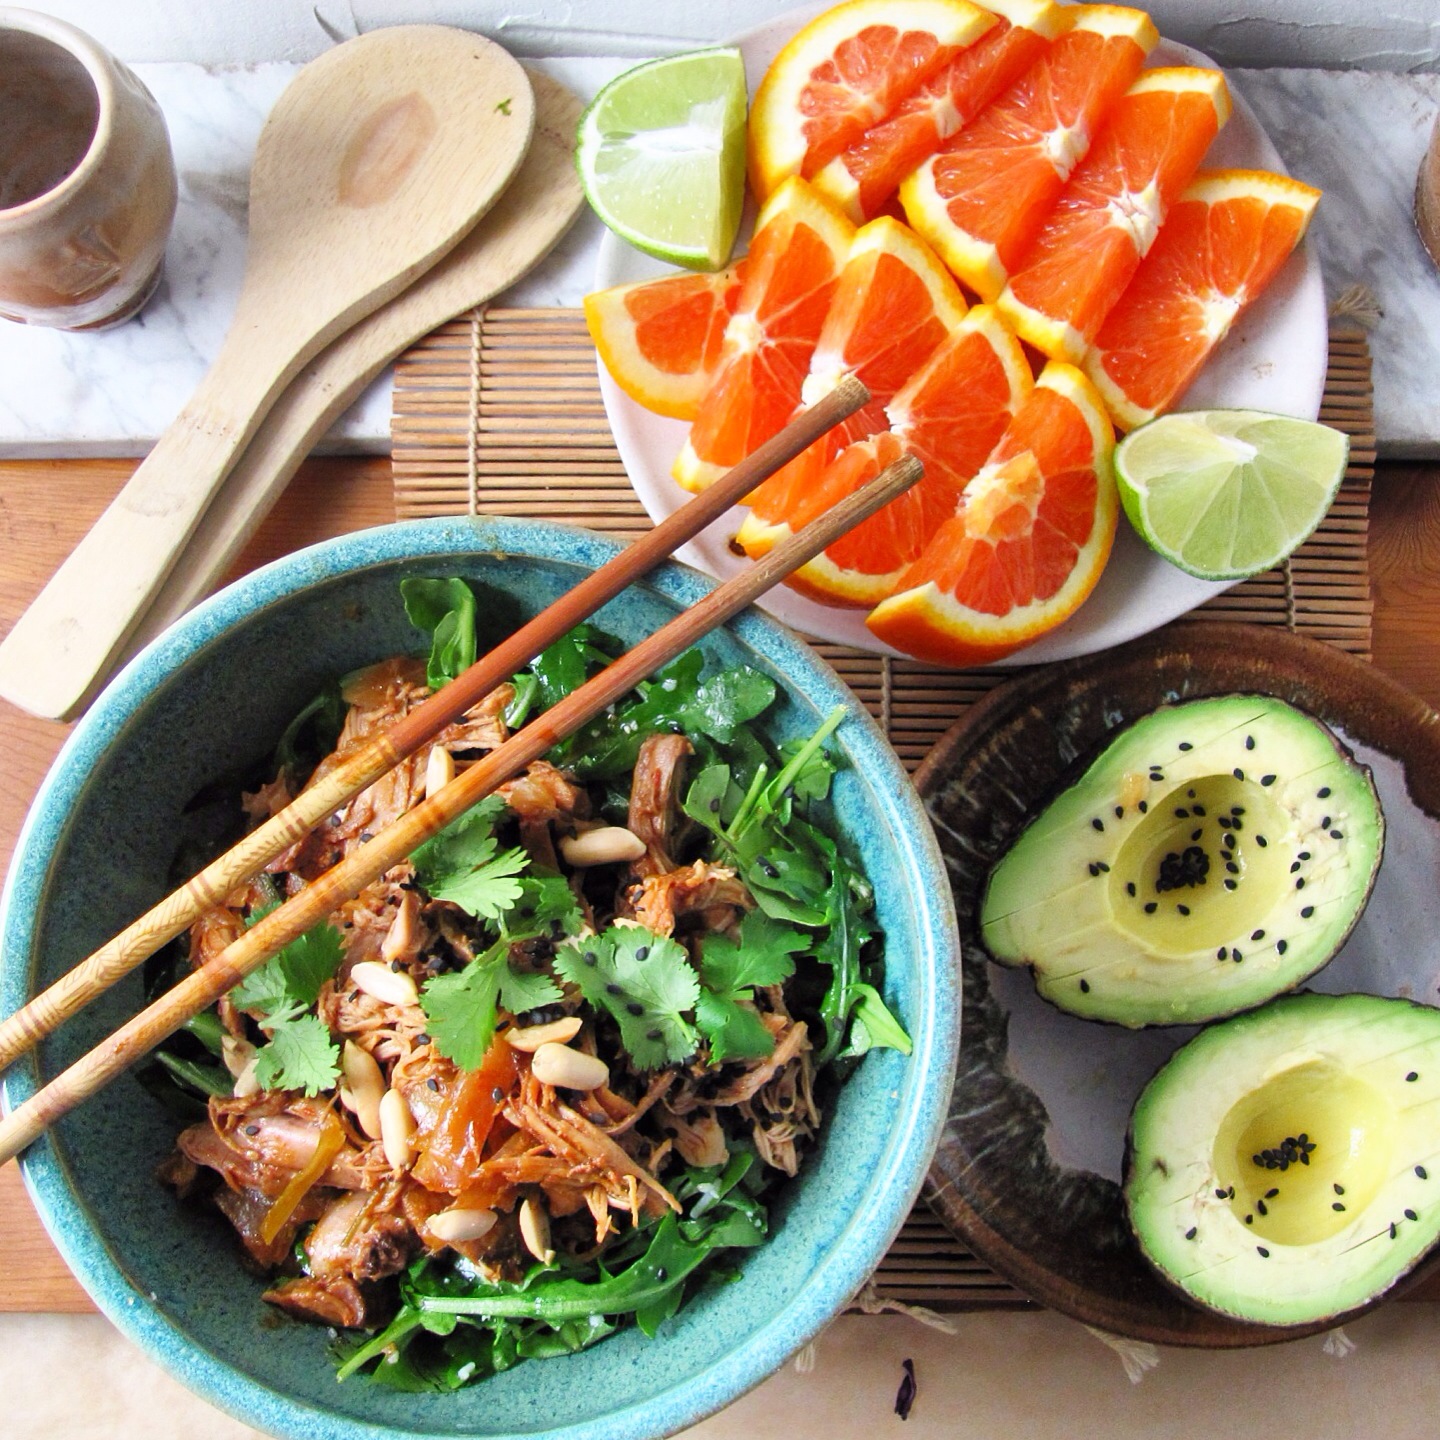
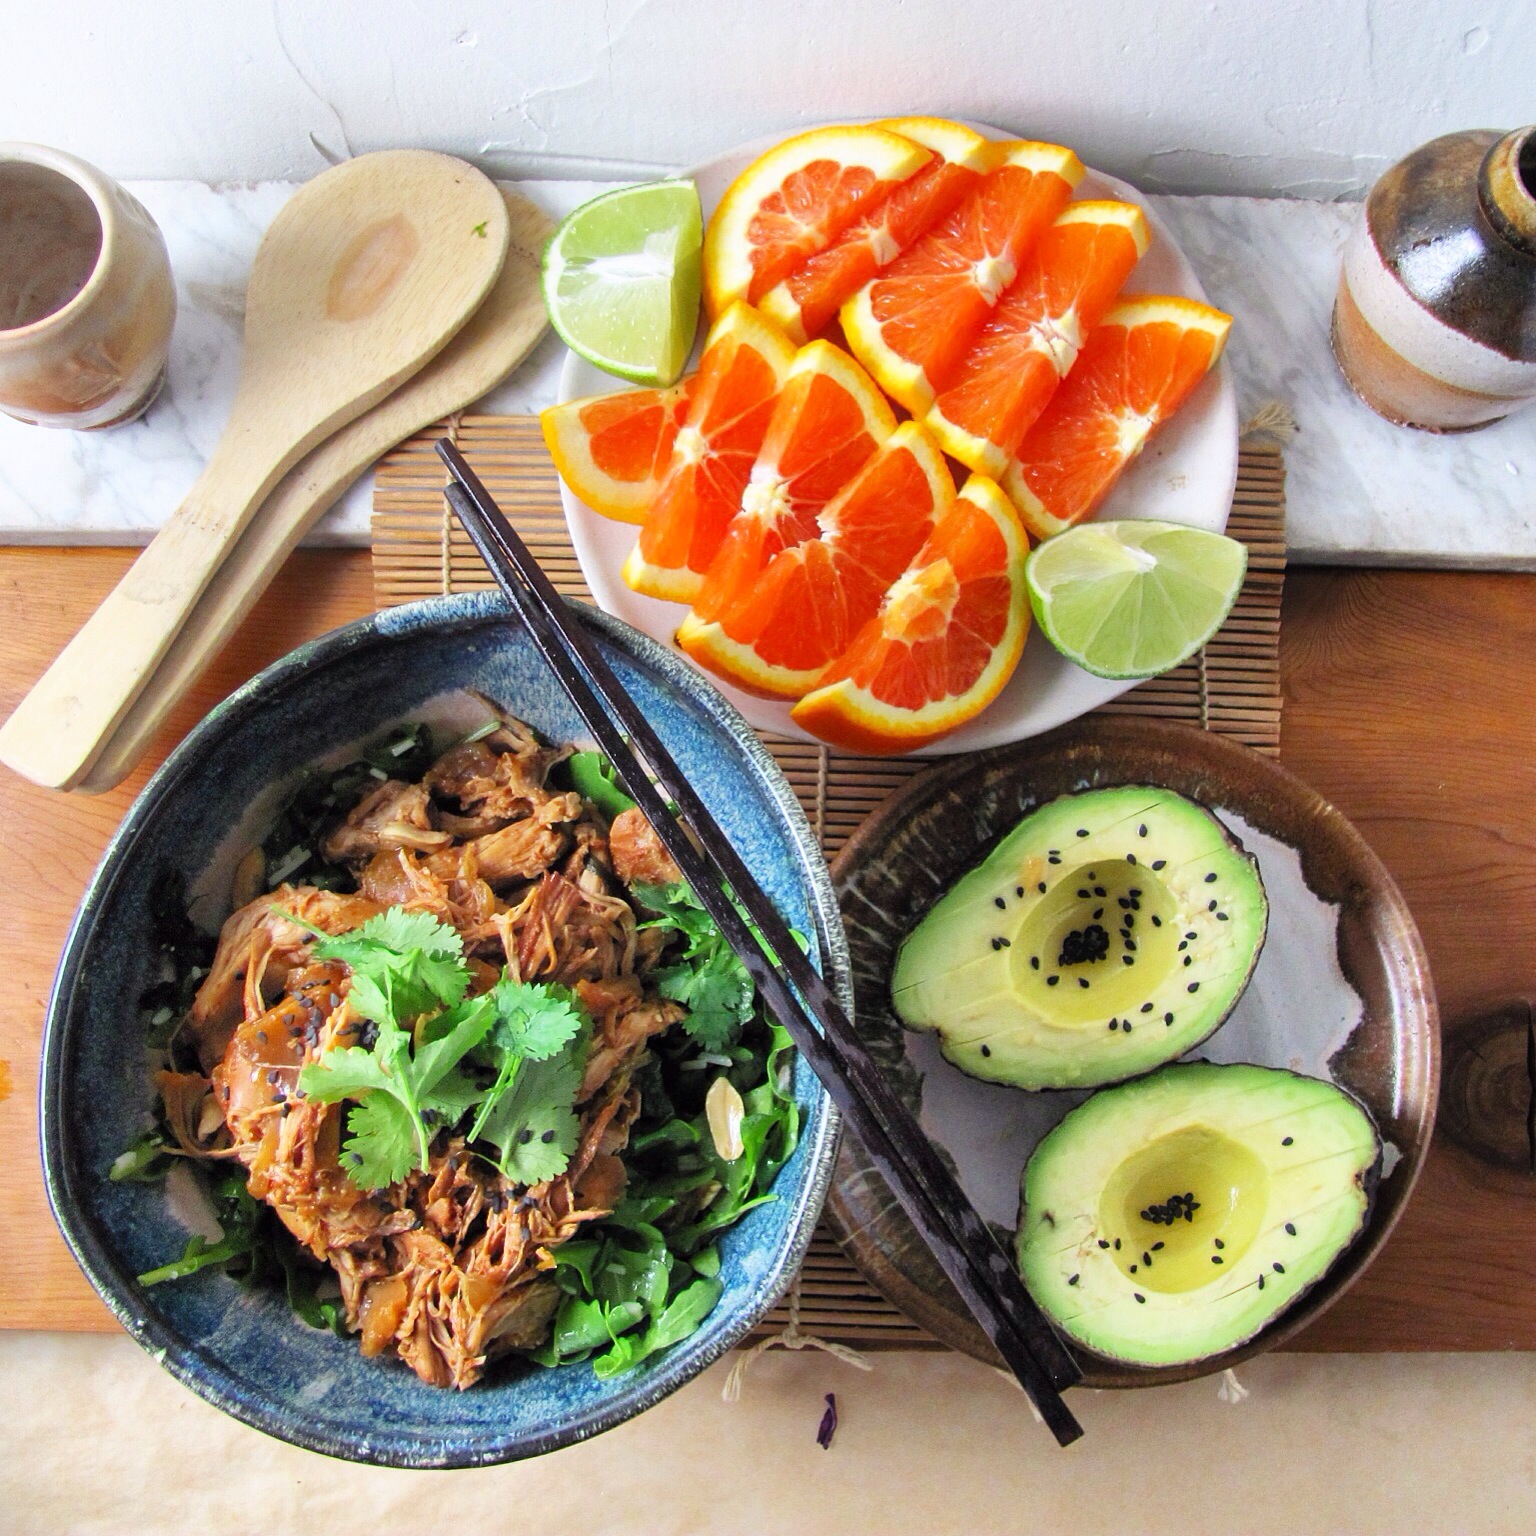
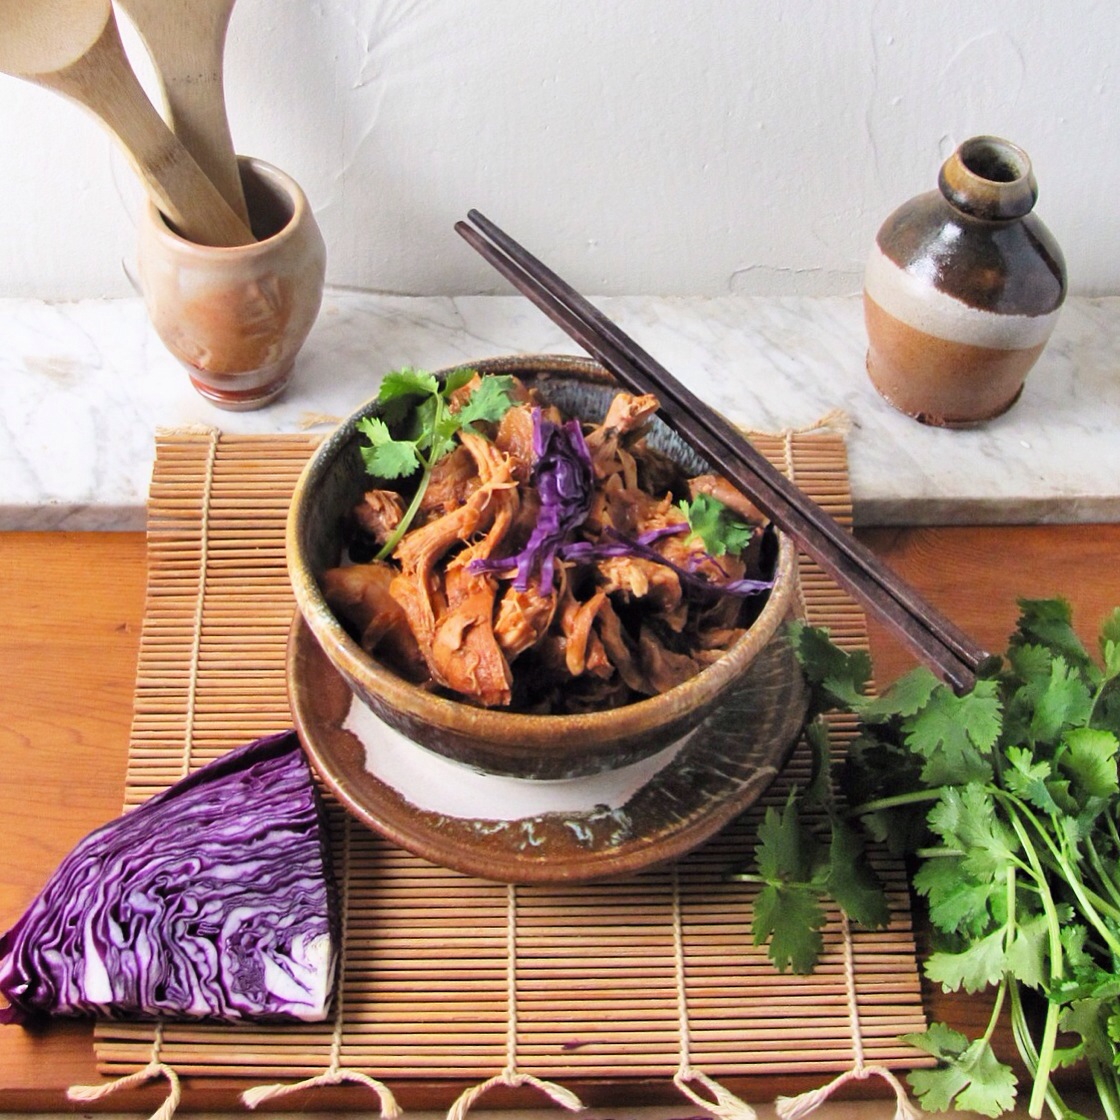
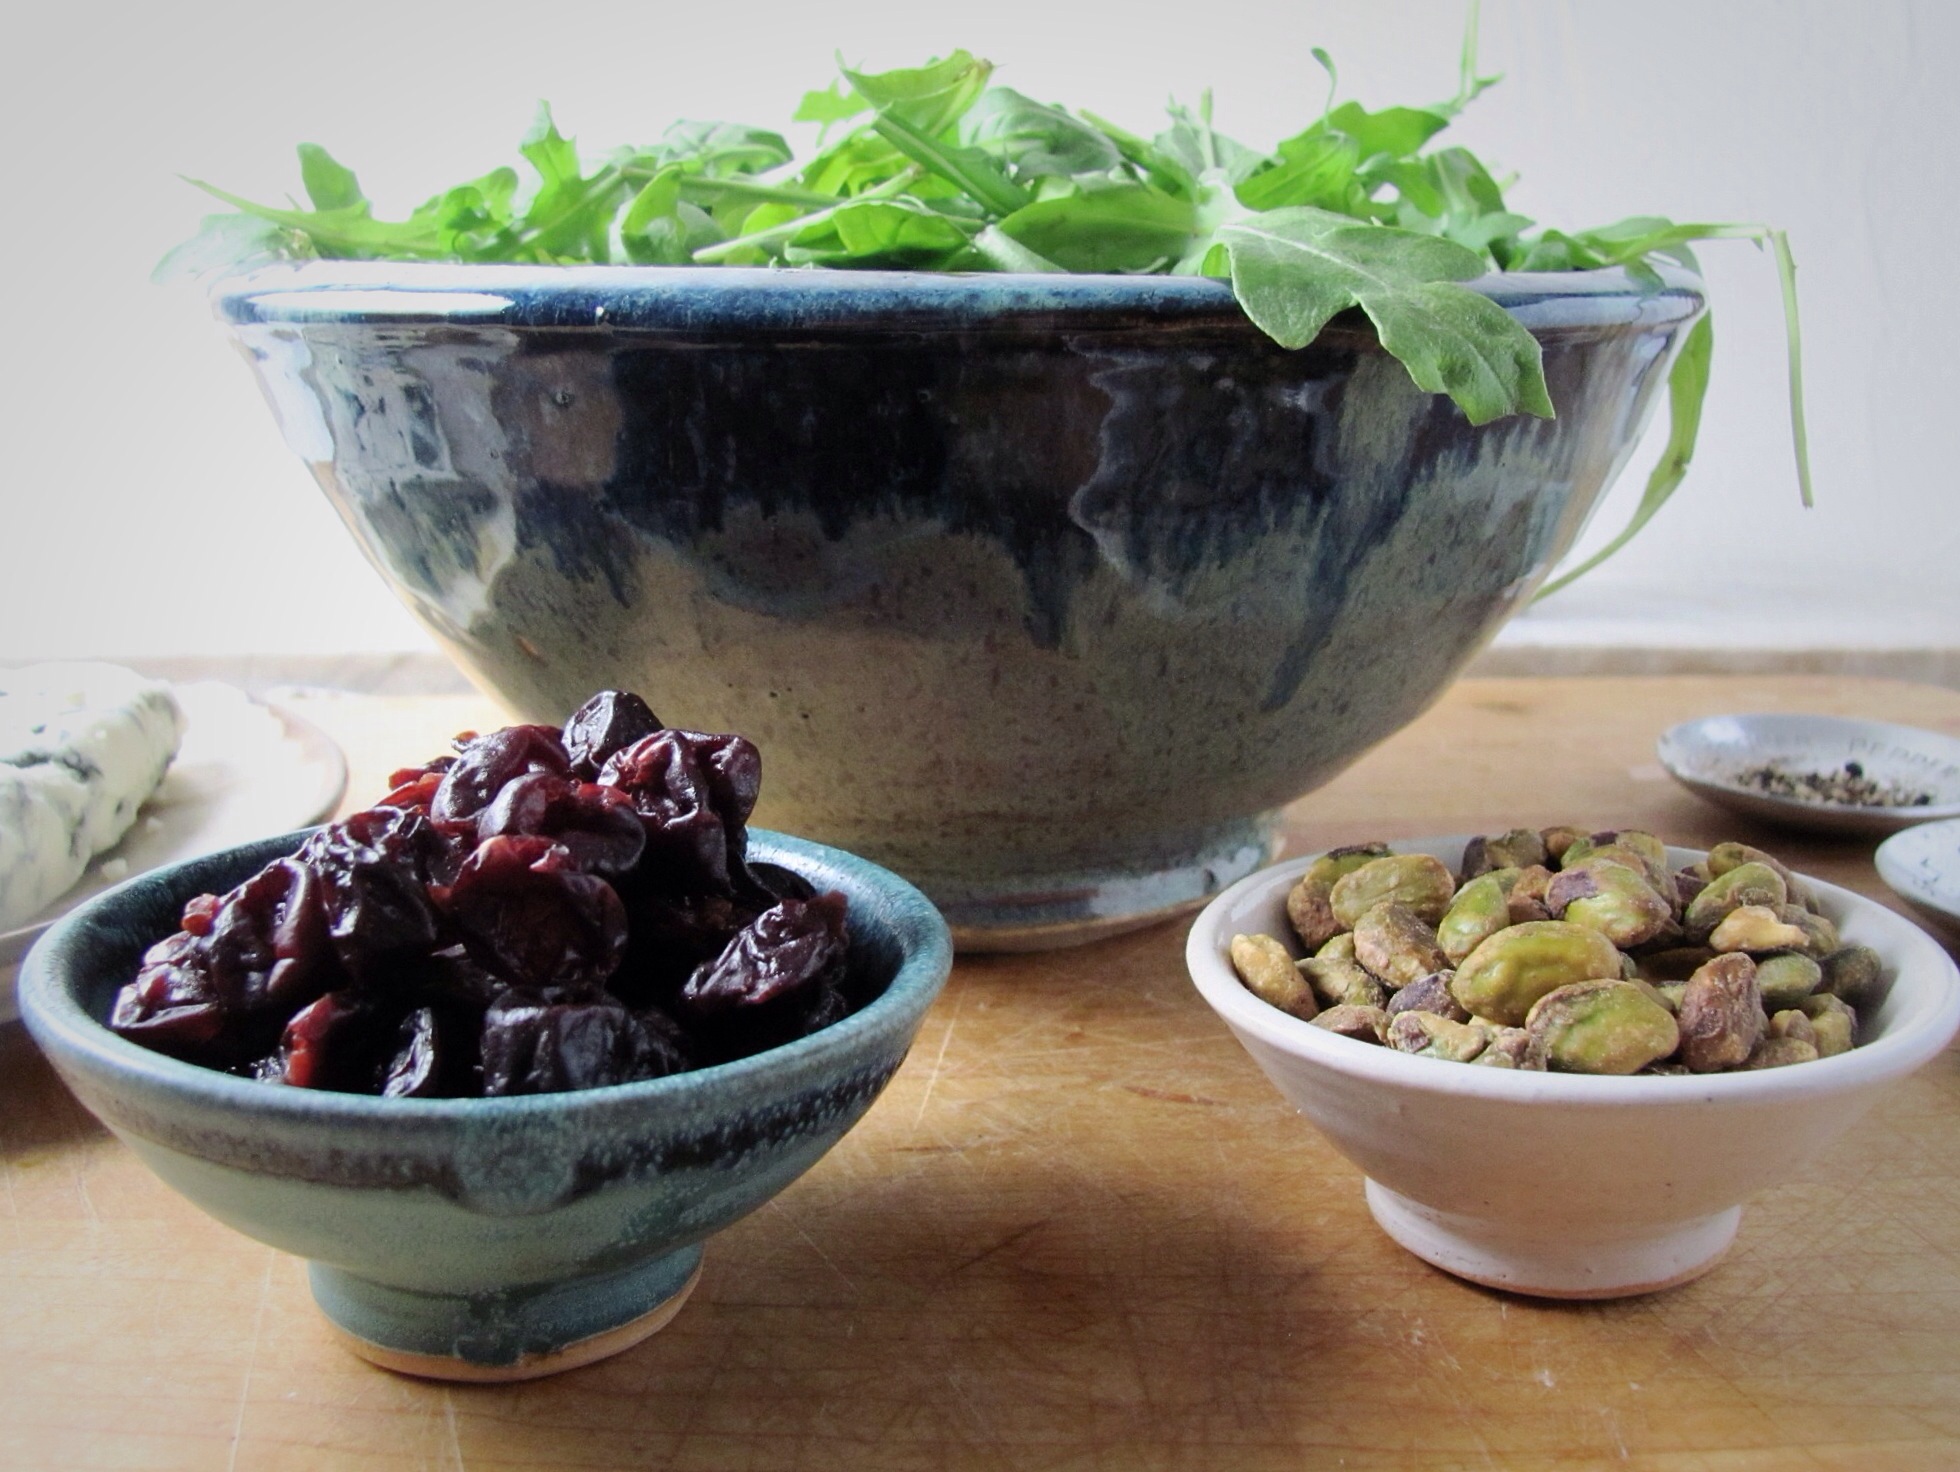
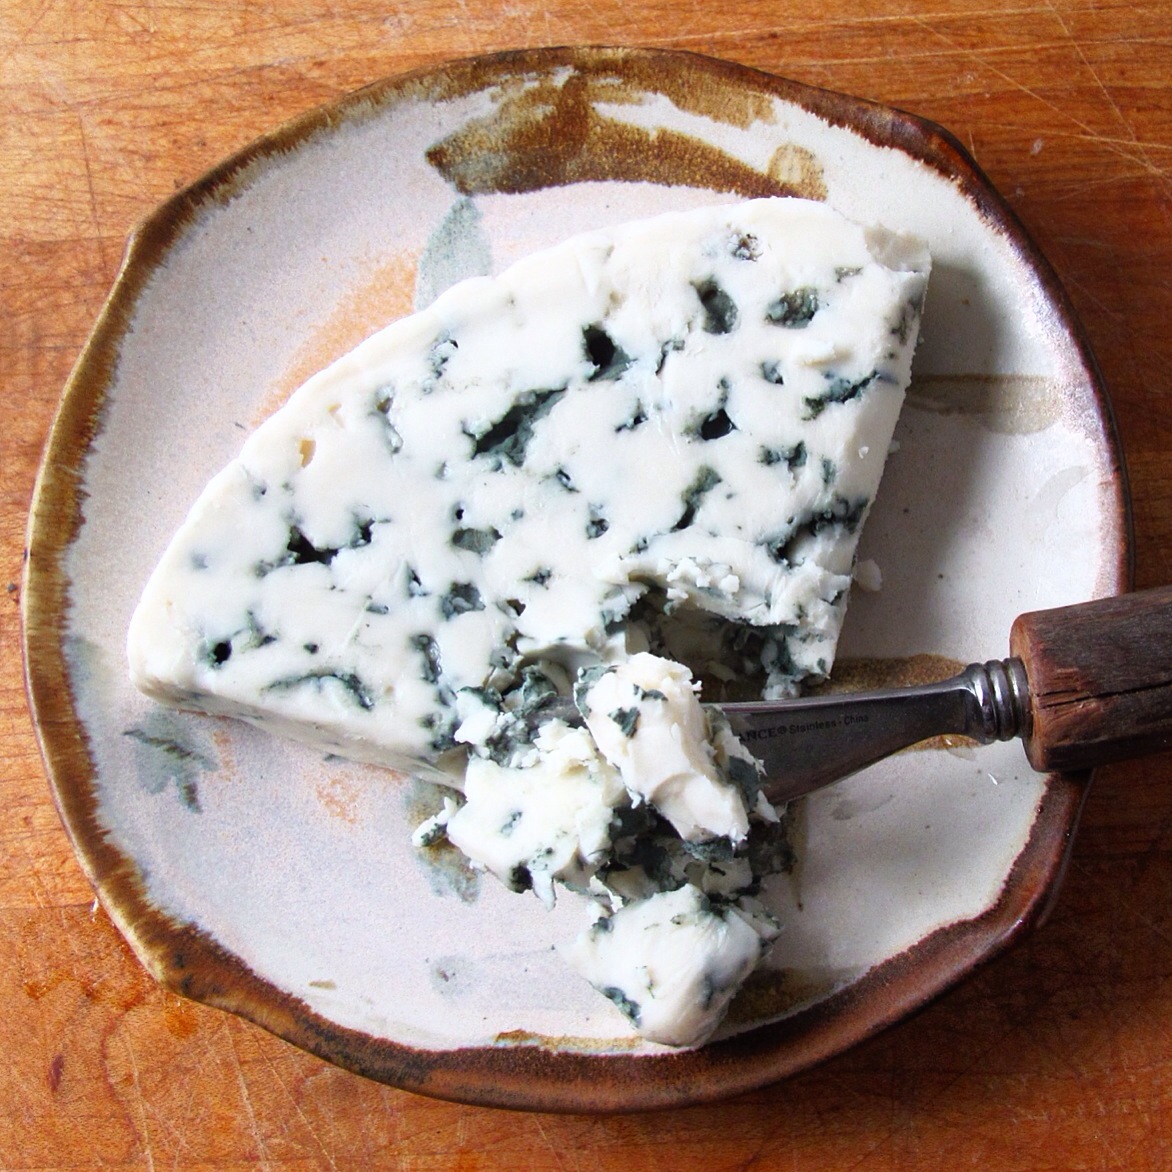
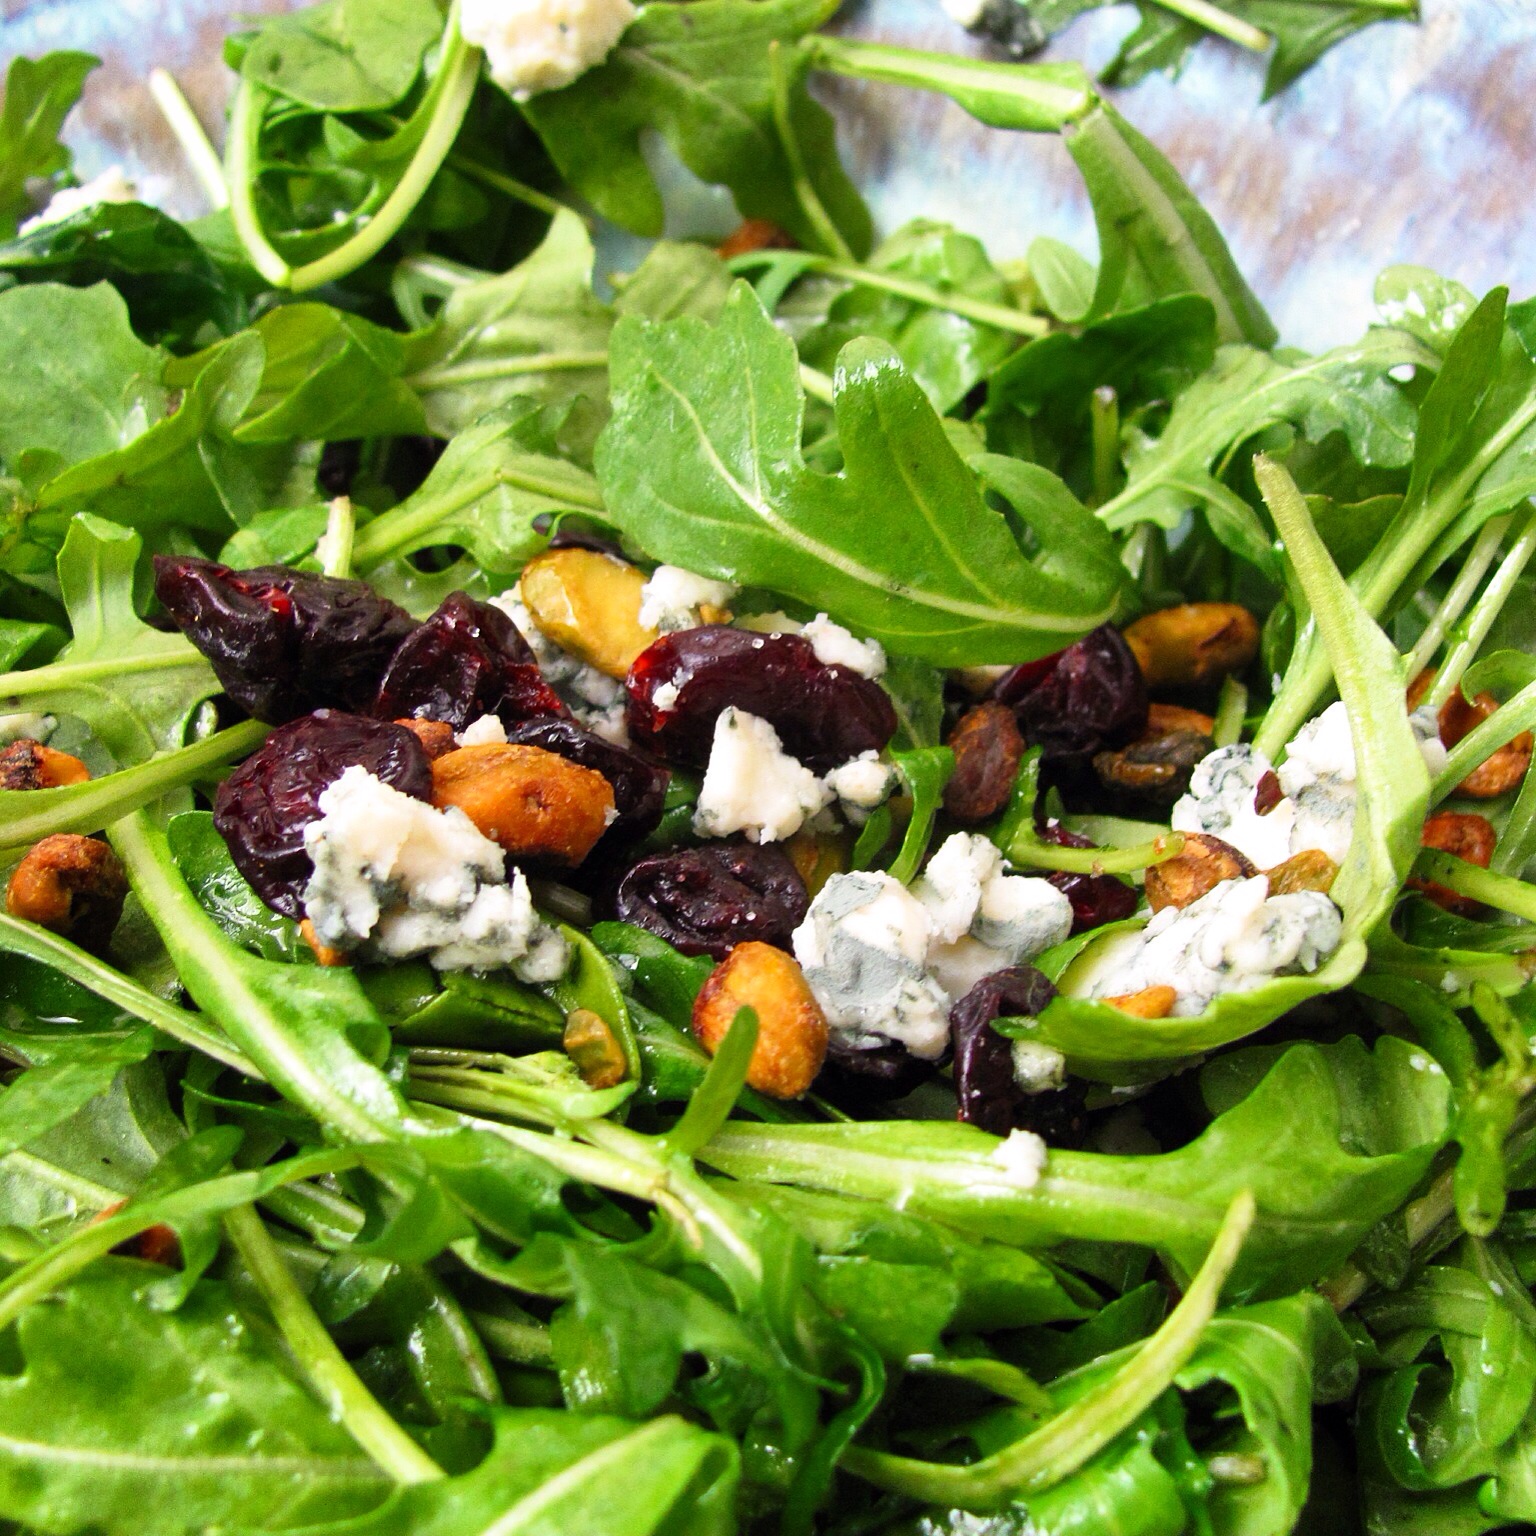
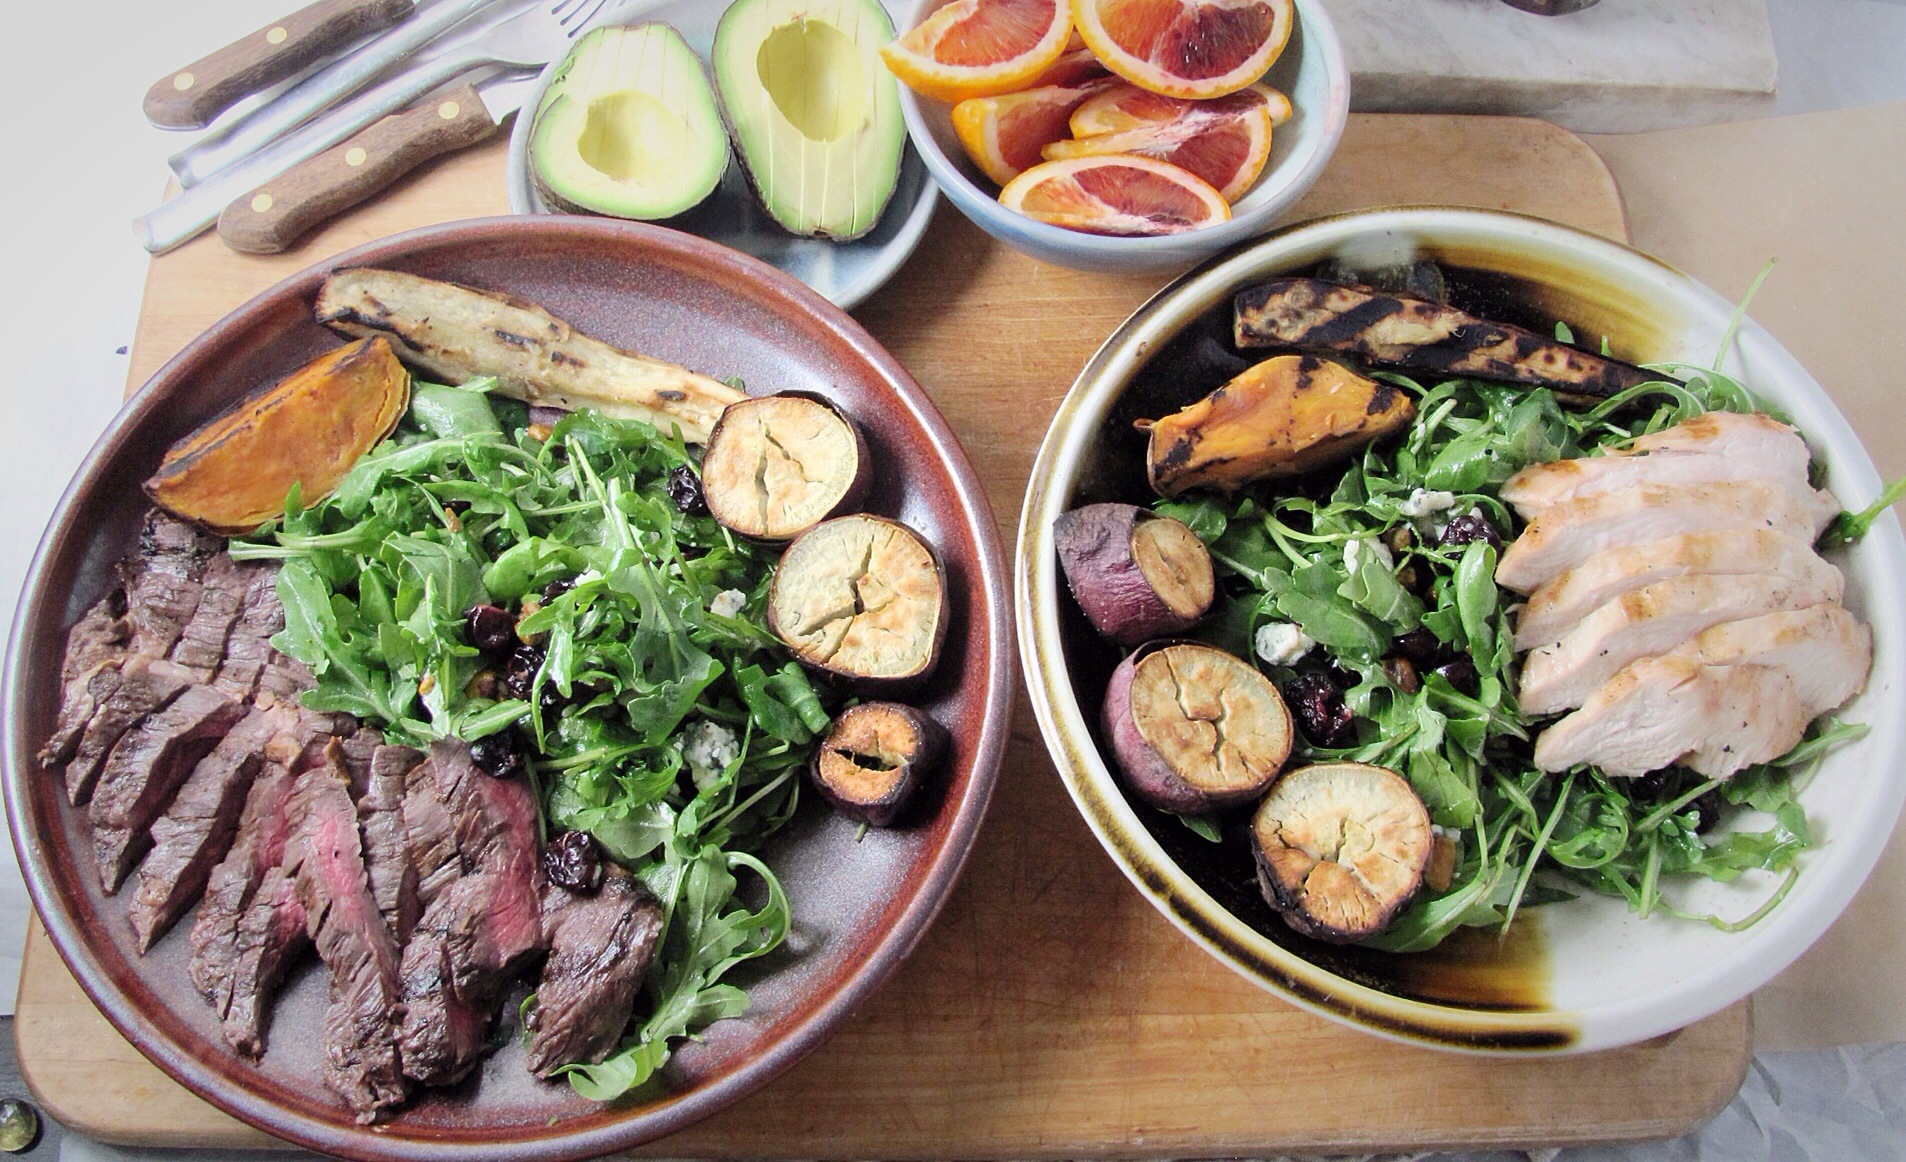
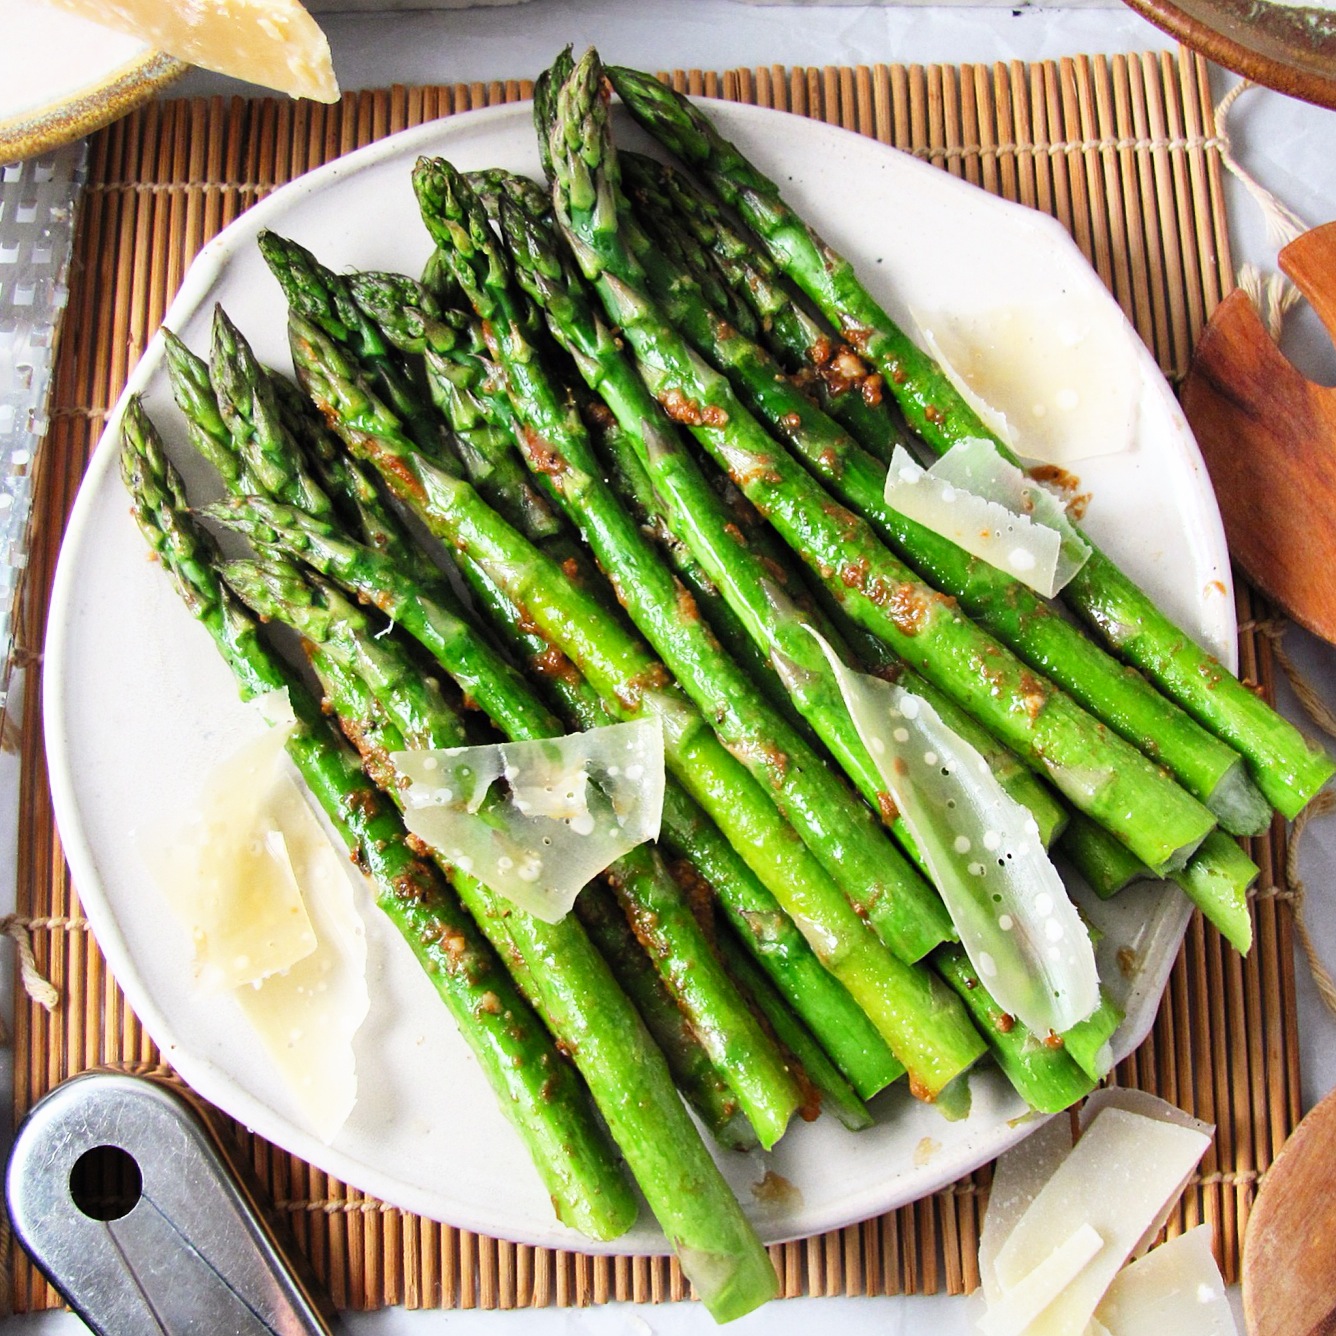
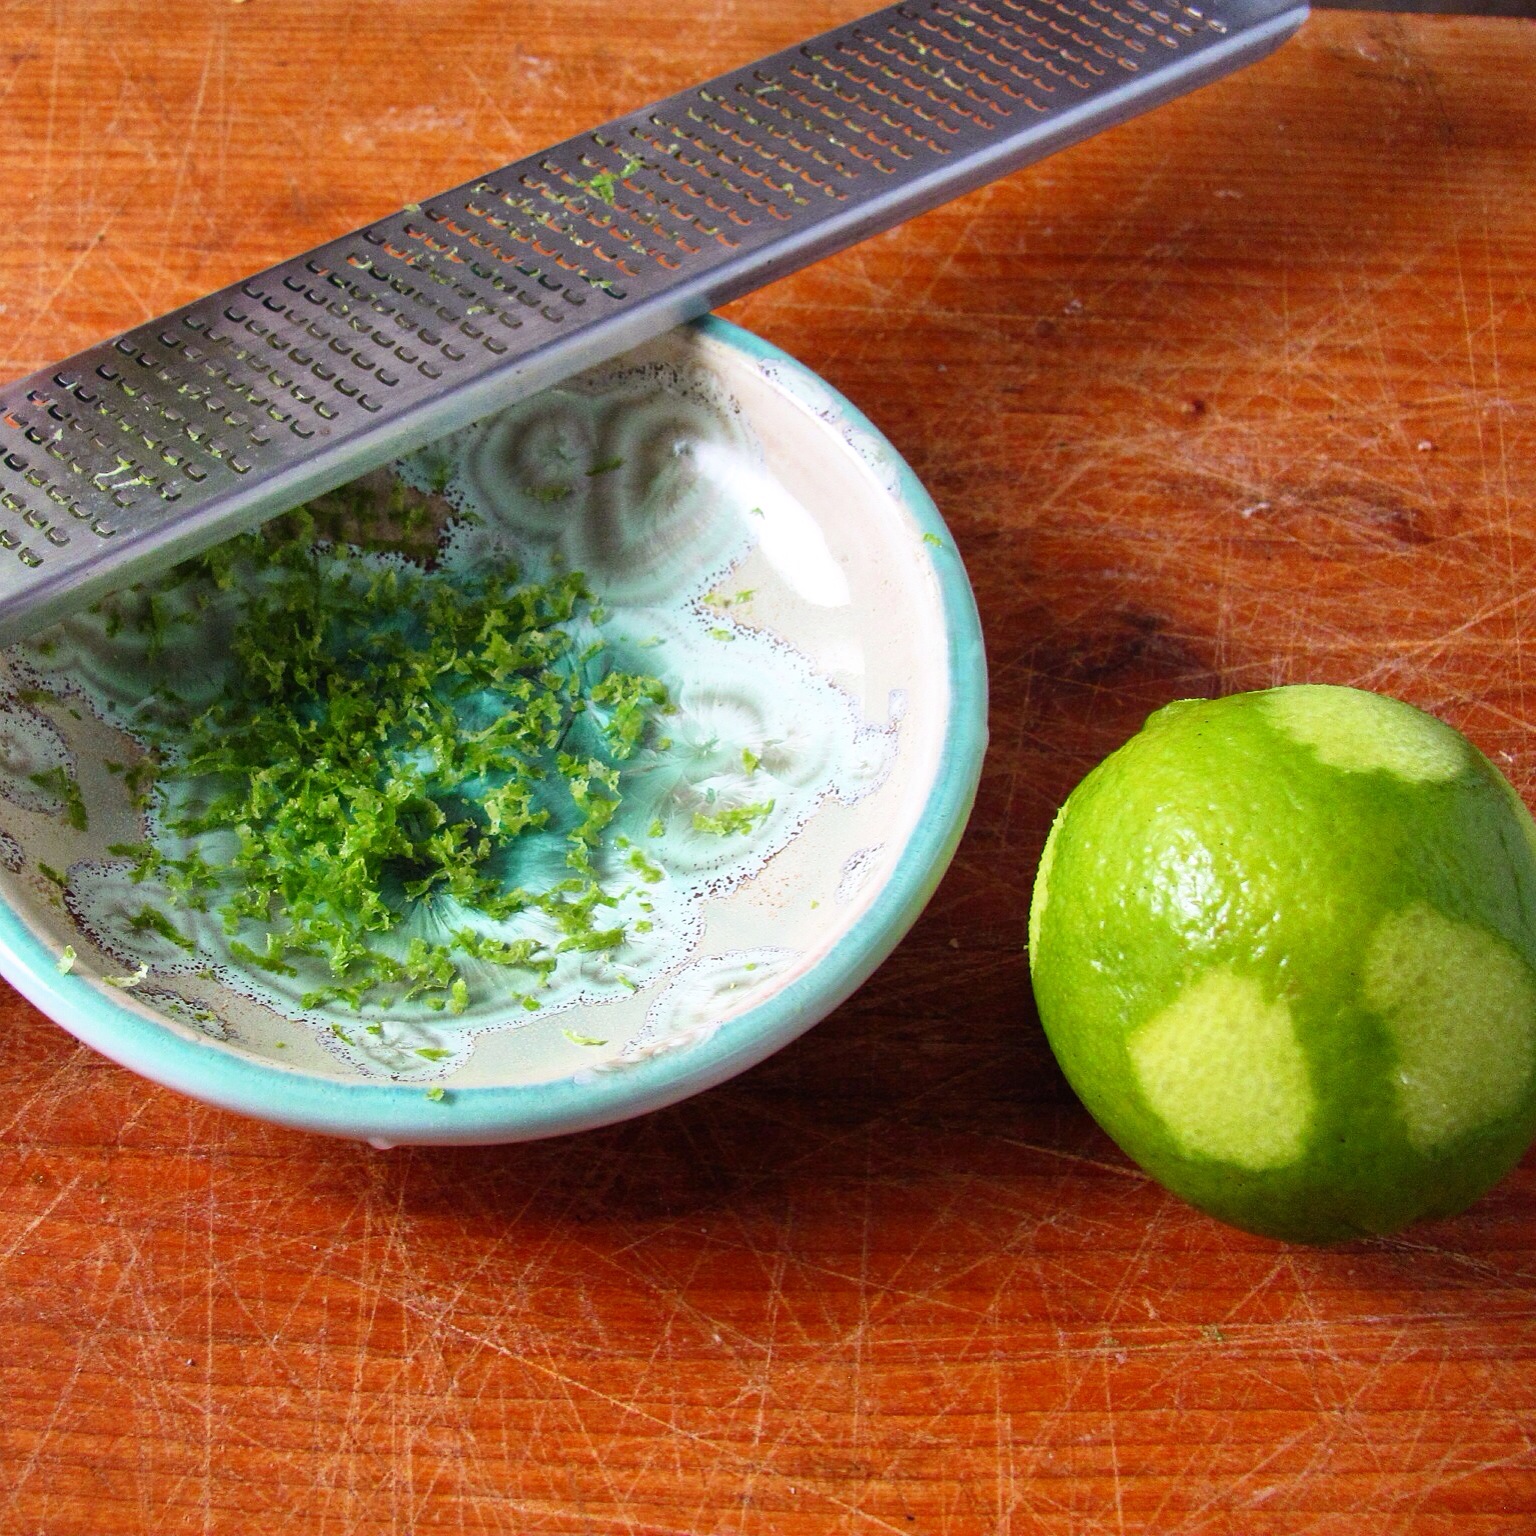
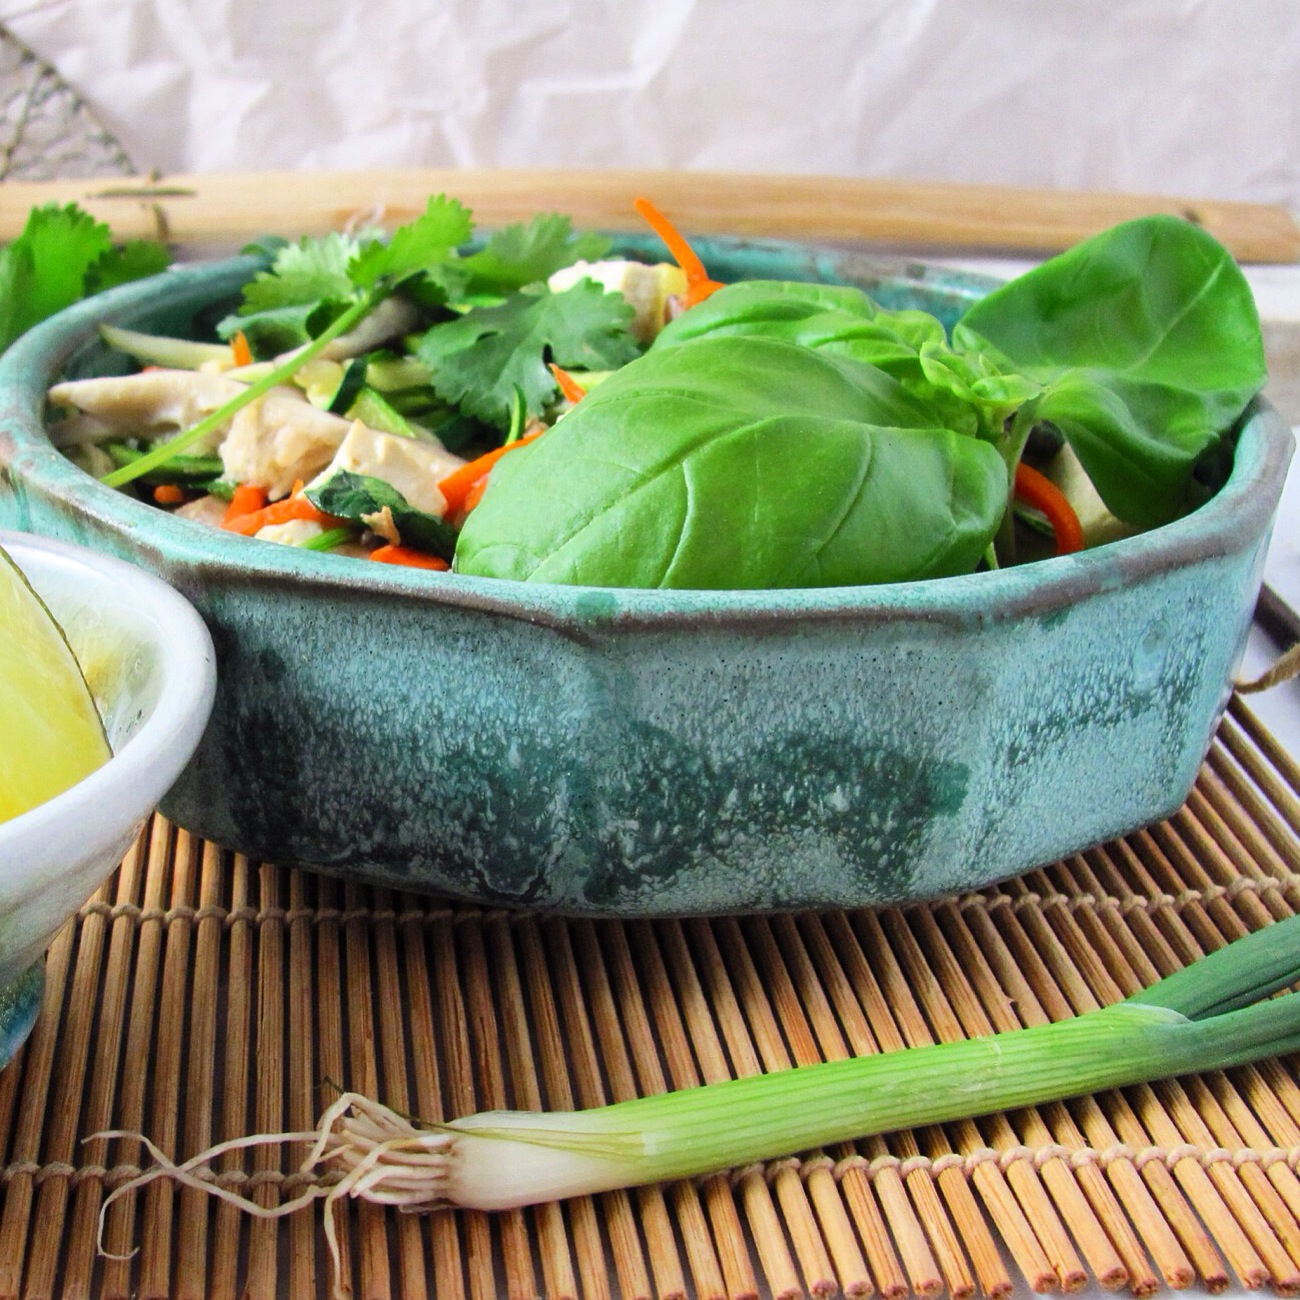
Serve immediately with lemon or lime wedges. I love avocado with salmon, it perfectly complements the buttery quality of the flesh. And it’s great on a bed of lentils or lentil salad, but would also be good over Arugula Salad or Kale Salad.
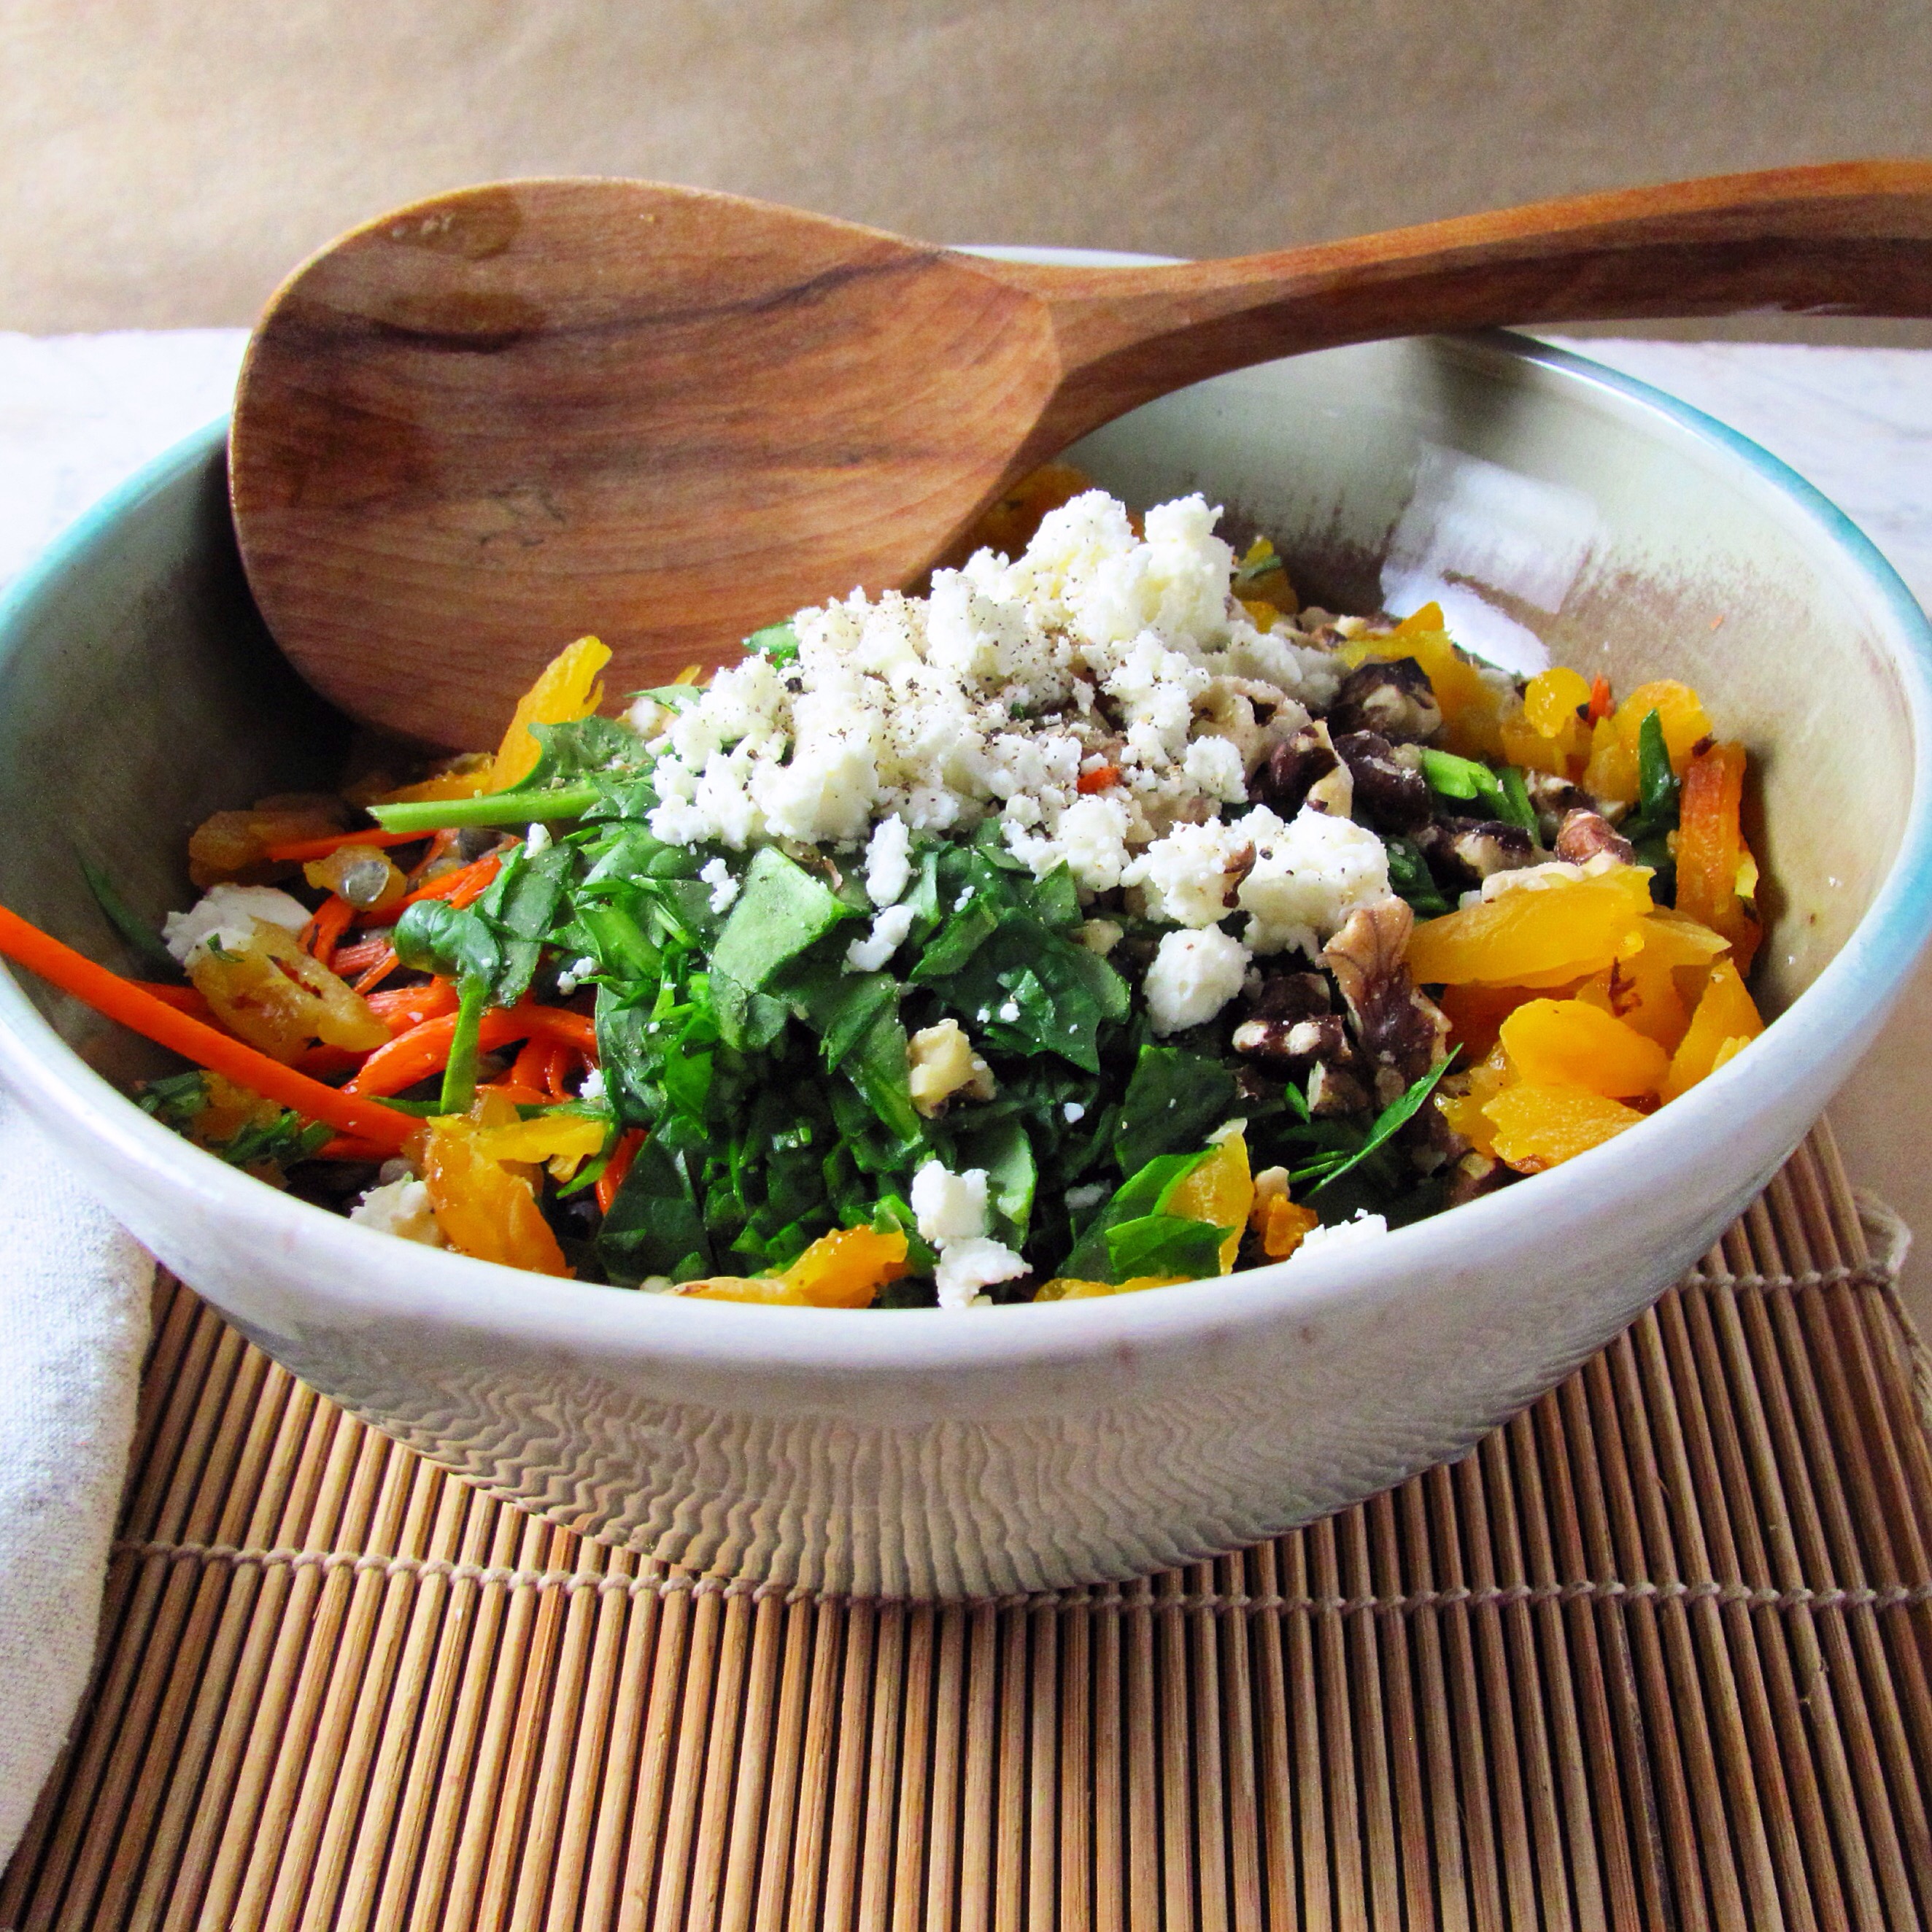
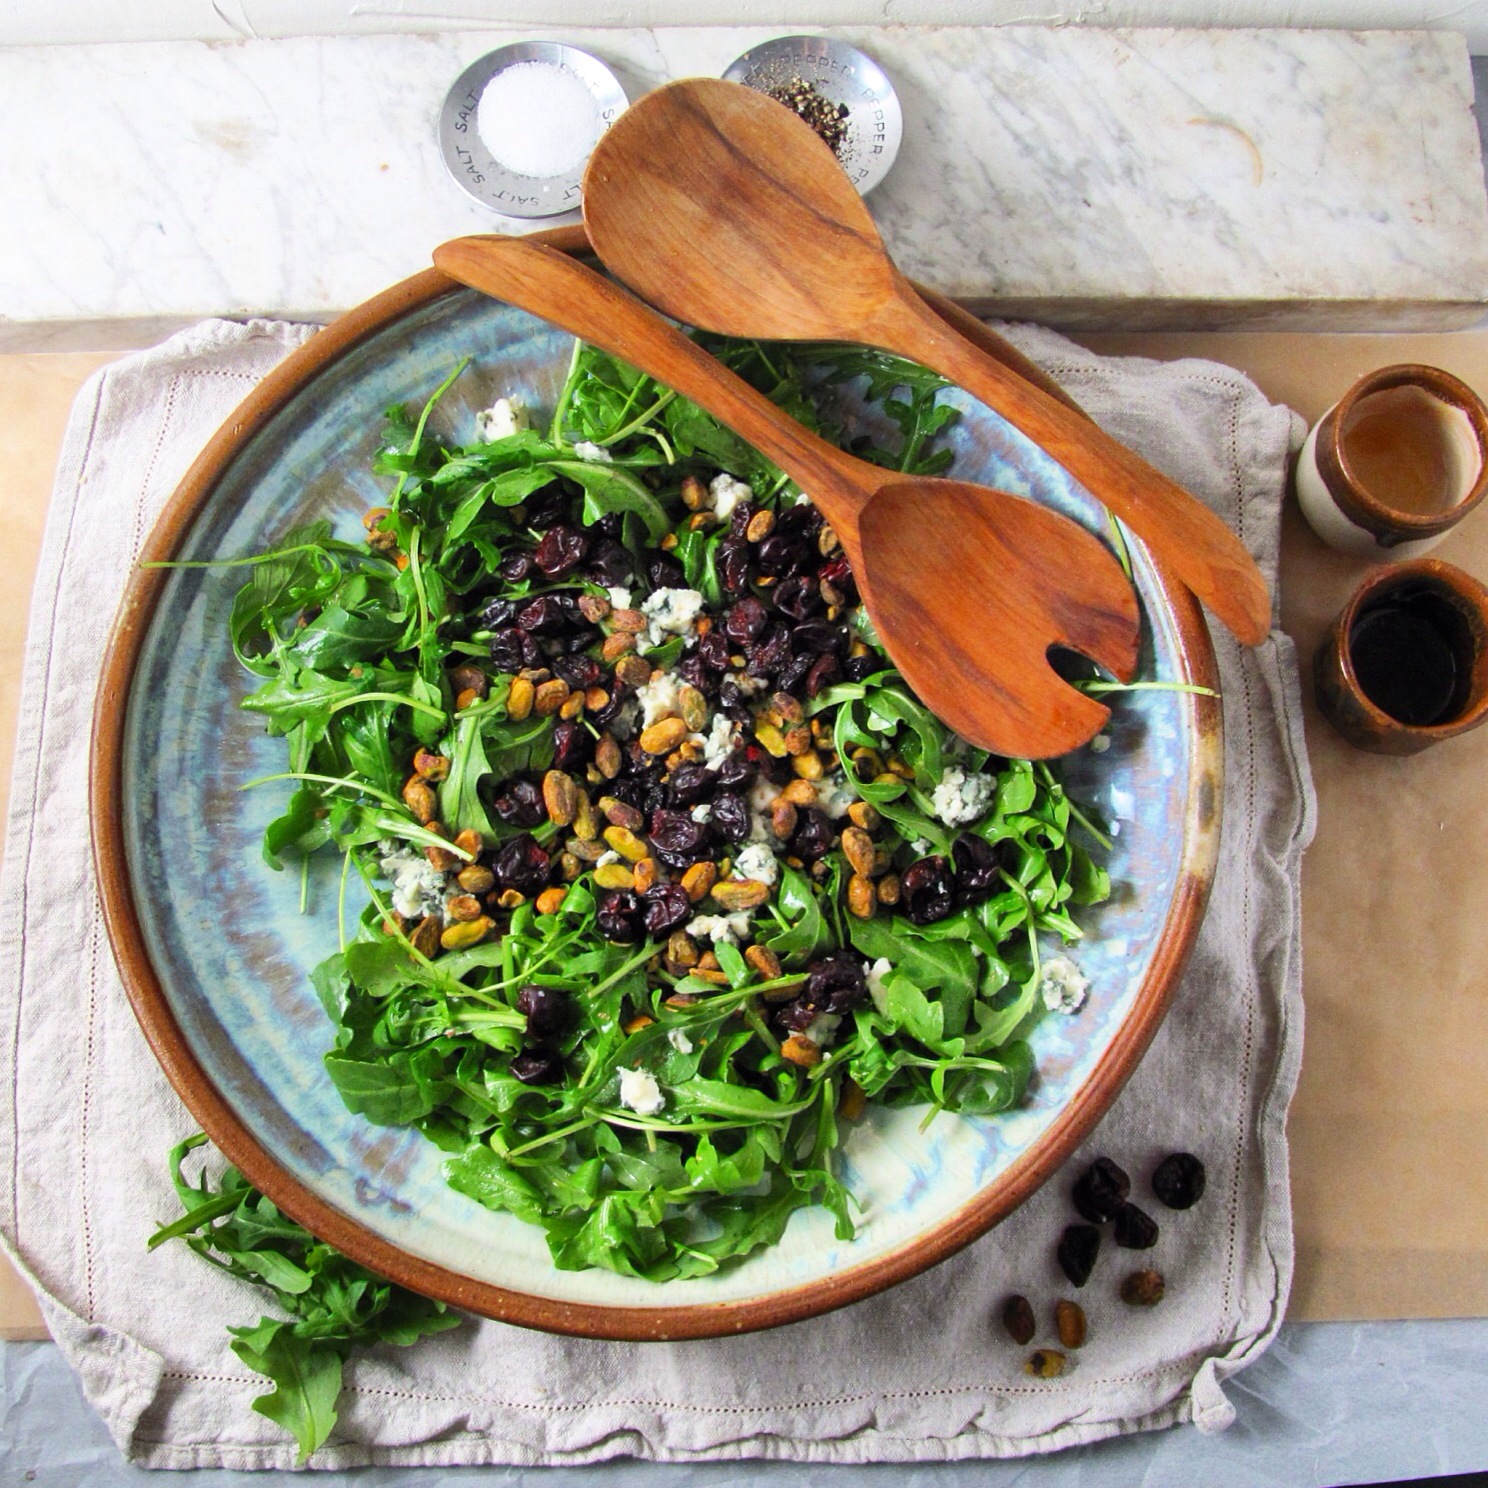
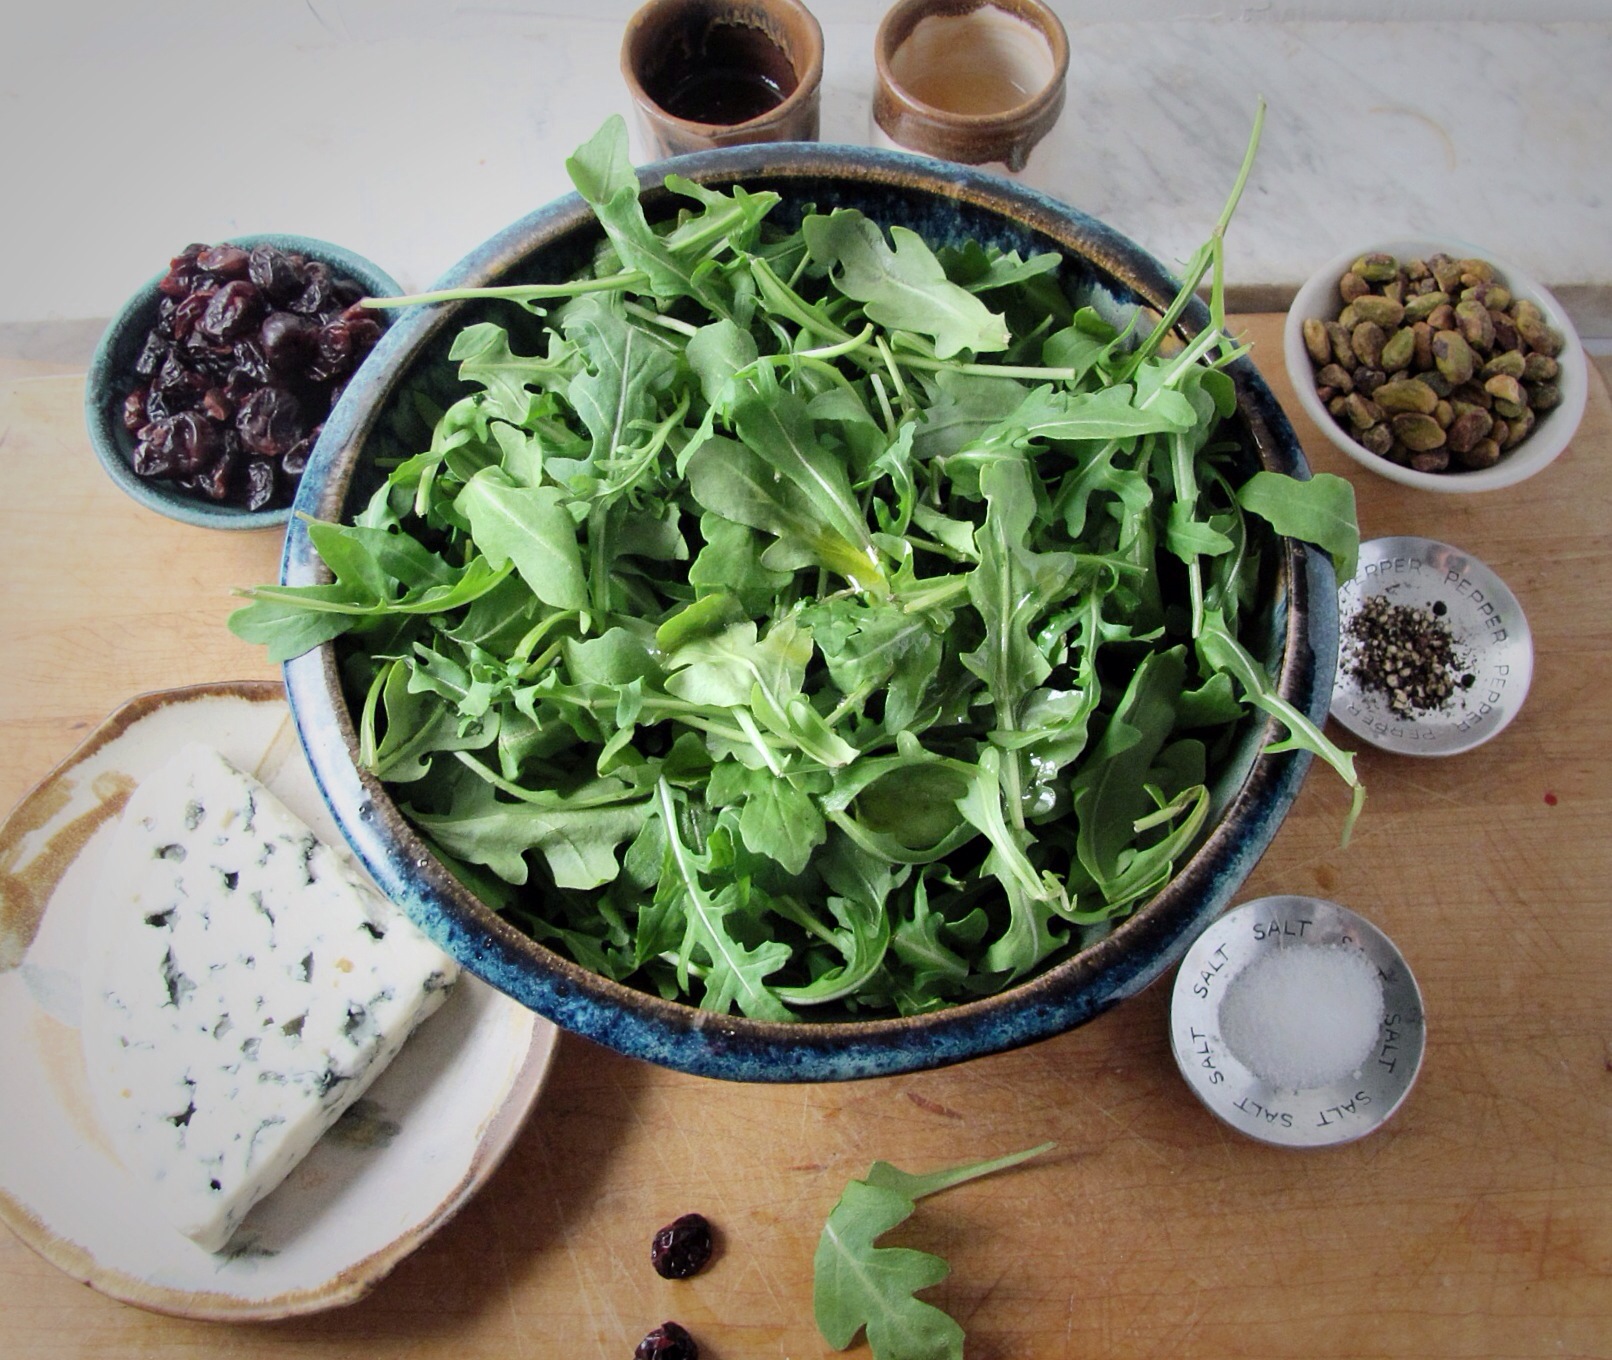
IMG_4402

Lentil Salad

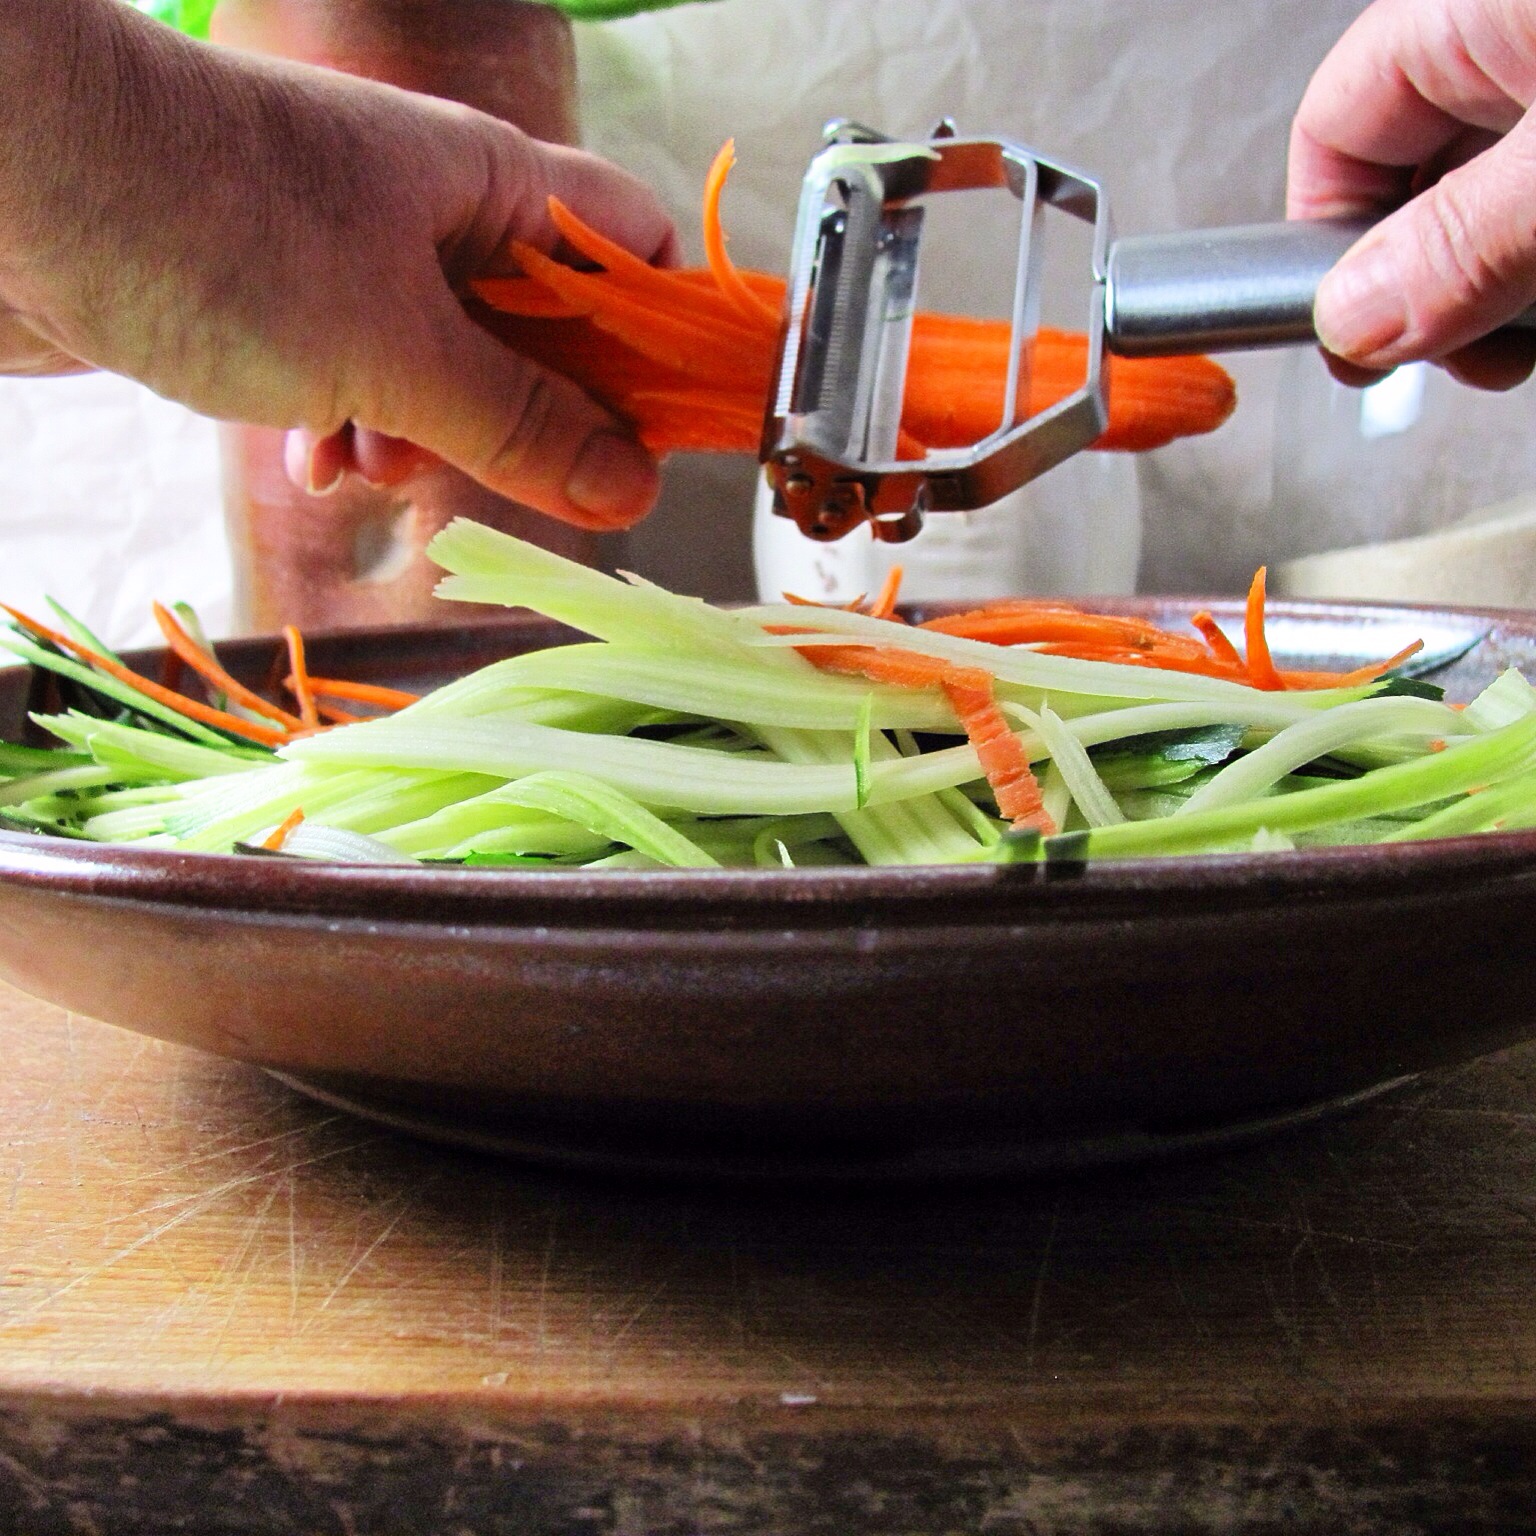
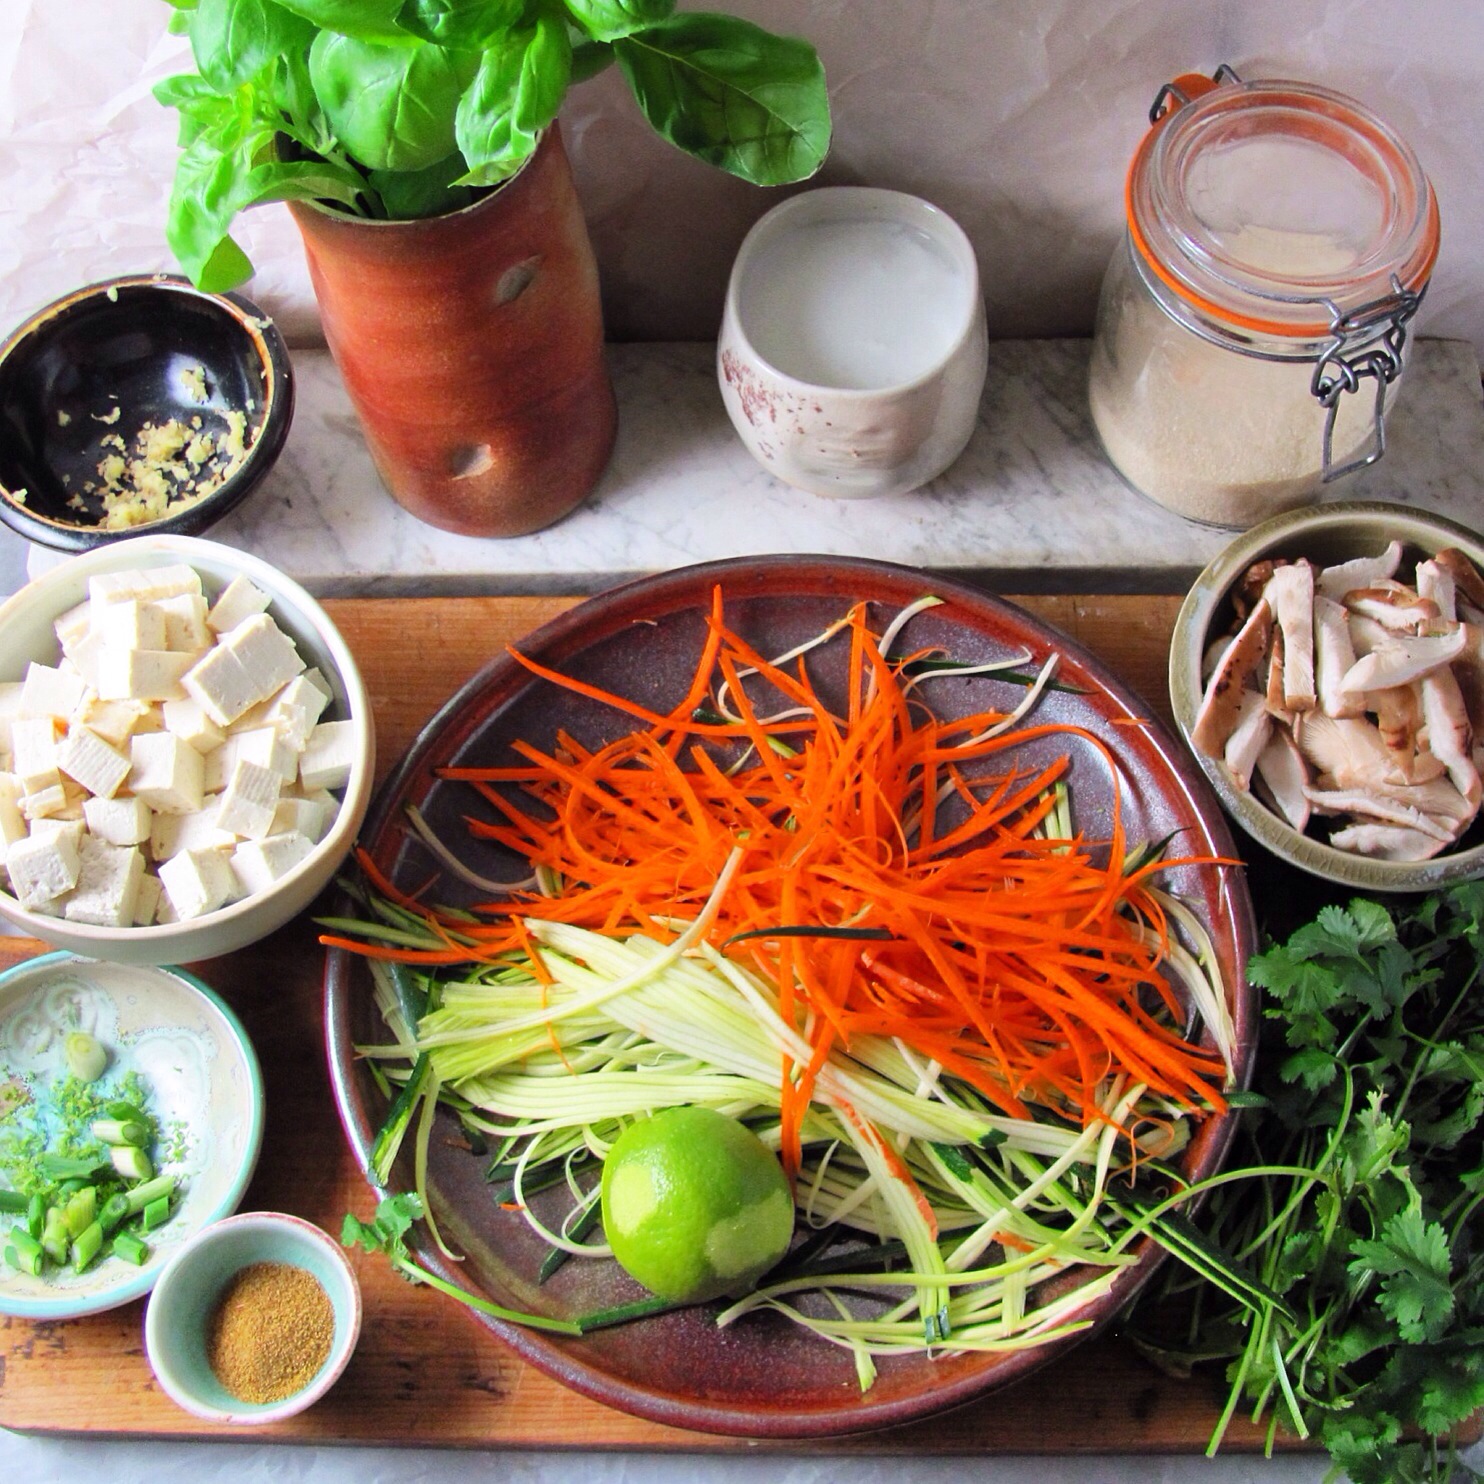
I prefer French green lentil, but you may use your favorite, the black belugas are very nice. And I like to brine them so the texture is perfect. Either way, start with perfectly cooked lentils, dress them lightly with your favorite oil and vinegar. I like xv olive oil and white balsamic vinegar, some salt and pepper. Now, add some chopped spinach, toasted walnut pieces, diced dried apricots (soak them in a little hot water first if they’re not really plump and soft), grated or “noodled” carrots, and crumbled feta cheese. Take a picture before you toss everything together.

IMG_4413

IMG_4411
biggerfish
IMG_4499
slammin

Posted in entree, main course, supper | Tagged , , , , , , , | 10 Comments

Hasselback Sweet Potatoes

IMG_4384

IMG_4385

IMG_4387

It still doesn’t really feel like spring here in the woods, but the light has changed and I feel some hope; finally, there is a sense of forward momentum here in the construction site from hell. The last couple of weeks have been effortful for me physically, but there has been enormous payoff, so in spite of being tired and sore, I am aware of feeling accomplishment and satisfaction.

You already heard about my two recent projects: the sanding of kitchen floor boards and preparation for Empty Bowls. Both were intense, requiring concentration and lots of hours of moving, lifting, and coordination (not my best thing). And, I am proud and happy to say that both were successful!

I told you about the sanding of the floor boards in the arugula salad post. This weekend, the floor was installed and finished. It was challenging because we had to avoid walking on it for several days. The fumes were pretty strong, so we opted to sleep in the basement. That meant that every time we needed something from upstairs (or needed to go to the bathroom), we had to walk out in the snow, around the house, and in the front door. I only slipped on ice and wrenched my back once. I am happy to report that the floor is gorgeous! I like it so much that I’m not sure I want counters and cabinets; I’m contemplating advocating for a dance hall or a yoga studio.

Due to the snow, Empty Bowls was postponed a day. My energy and optimism failed me briefly on Saturday afternoon while I was trying to get ready while dealing with fatigue, back pain, fumes, inconvenience and cold. I was convinced that all my work was for naught and that no one would show up after all. I was tired and cranky and had a little pity party for myself. But my worry was unfounded. My bowls were a big hit. We don’t have numbers yet, but I know our contribution to our recipients will be substantial. A huge thank you to everyone who participated!

IMG_4395

IMG_4377

IMG_4382

IMG_4383

I am giving you a recipe that is similar in spirit to these projects. It is not difficult, but it requires some focus and concentration. Taking the time and care to do it correctly will result in satisfaction. Unlike my projects, however, it is not backbreaking. Well, it’s not backbreaking if you have counters. If you are working on an old tabletop perched on a cardboard box in the basement, I can’t promise anything!

Hasselback Sweet Potatoes

Hasselback Potatoes originated in Stockholm, Sweden in the 1700’s at a restaurant called Hasselbacken. The original Hasselback was a white potato, cut into slices, but not all the way, so the cuts fanned out a bit and gave a novel appearance and some contrasting texture. I am by no means the first person to do them with sweet potatoes, but I haven’t found anyone so far who has created exactly my version.

Our supermarket carries these wonderful organic baby sweet potatoes. The packages say organic japanese yams or jewel yams. I doubt this label is in any way accurate; I’m pretty sure they are sweet potatoes. Some packages contain orange skinned and others purple skinned little roots. The flesh of the orange ones is orange. The flesh of the purple ones is white. Both are wonderful; the purple ones taste a little like chestnuts.

If you can’t get baby sweet potatoes, make this with the smallest ones you can find; you may need to adjust the cooking time.

This recipe serves 2, multiply as much as you like.

4 small or baby sweet potatoes, washed and dried
2 tsp. nut oil*
¼ cup macadamia nuts, finely chopped**
1 tsp. sugar***
salt and pepper

*I sometimes keep macadamia nut oil around and it would be great here. But right now, I have almond on hand, so that’s what I am using. Walnut or hazelnut oil would also be great, as would coconut. But I don’t think anything terrible would happen if you used peanut or olive, either.

**I have been having a major love affair with mac nuts since our trip to Kauai a couple of years ago. And the food police are now saying they are great for us. But you could happily substitute walnuts, almonds or hazelnuts.

***I am using organic can sugar for this sort of thing. But you could use refined white sugar if that’s how you roll, or brown sugar or coconut sugar. Or if you don’t use sugar, skip it. Or use honey or maple syrup.

Preheat the oven to 350°. If you are using a toaster oven, don’t preheat it because everything will burn and be ruined in seconds. Line a baking pan with parchment.

Now, here’s the concentration part: cutting the potatoes. It will help you if you use a couple of chopsticks (see my picture), but it’s not absolutely necessary. Make sure you have a good, sharp knife. I think a paring knife gives the best dexterity. Line up the chopsticks on either side of the potato so they will stop the knife from going all the way through it. Make cuts about ¼ inch apart, stopping a bit more than 2/3 of the way. This is fun and a good way to practice mindfulness. You could plan some sweet potato hash for the next day in case you mess up a few.

Now, place the potatoes on the parchment and fan out the cuts a bit. Brush with the oil and sprinkle with the nuts, sugar, salt and pepper. Try to get the stuff into the cuts, but don’t make yourself crazy. If you do make yourself crazy, call me at the dr deb office.

Now, bake for 35-40 minutes or until the potatoes are tender.

Serve hot, gathering up all the fallen, toasty nut bits and sprinkling them on top.

IMG_4384
IMG_4386
IMG_4392

Posted in roasted, side dish, vegetable | Tagged , , , , , , | 5 Comments

Slow Cooker Soy Honey Pulled Chicken

pulled chicken

IMG_4340

Do you have a slow cooker? I never have, until now. You see, I have these rules…and one that I take very seriously involves kitchen unitaskers. If you think about it, the best kitchen tools are those that do lots of tasks. Like a knife. Best tool. You can use it to cut, peel, scrape, defend yourself…see my logic? You already know I own an old, cracked, food processor and a tragically beaten, refurbished standing mixer and I use them for lots of things. But I shun things like rice cookers and ice cream or yogurt makers. Don’t worry, I won’t lose respect for you if you are the proud owner of an apple corer; I’m just not likely to run out and get one.

I realize it’s a very arbitrary rule and many things (like the mixer) fall into a questionable category. And the slow cooker is one of them. Granted, you can only use it to cook slowly. Or more slowly. But you can use it for lots of different dishes including desserts. And I’ve been curious for years.

Ultimately, I caved when I concluded that neither this winter nor our renovation are ever going to end. We eat one pot meals most nights and both the toaster oven and the hot plate are difficult to regulate. We are trying to be frugal (understatement of the year), but I discovered that I could buy a new, well-rated cooker for less than twenty bucks. Finding an unoccupied electrical outlet in the basement was more of a challenge than purchasing this little appliance! I have now done some experimenting and I think this simple little device is going to be my friend. And if I don’t use it once I have a new kitchen, I know either Megan or Brian will be happy to inherit it!

One last note before I get on to the recipe. Check out my crispy chicken post. Notice the picture of raw chicken? I was ambivalent about including it. I don’t think raw meat is pretty, and I like the blog to be attractive, what with all the nice pots and everything. But I also wanted to show you how to cut the strips of meat. After I published the post, my wonderful daughter appeared to disapprove of that photo, and when I asked her why, she gave me a suggestive look. I didn’t get it. She explained: “vagina.” Well. OK! That takes my favorite hashtag (#foodporn) in a whole ‘nother direction! Maybe not so much with raw chicken in this post!

IMG_4334

IMG_4348

IMG_4333

IMG_4339

IMG_4337

Slow Cooker Soy Honey Pulled Chicken

I love to use cilantro stems and roots to flavor sauces. I often keep some in the freezer. But if the cilantro you buy is rootless, just mince up stems and leaves instead.

2 packages boneless, skinless chicken thighs (preferably organic)
¼ head cabbage (I like red, but white, savoy or napa are fine), finely shredded
½ can tomato paste (I like Muir Glen organic)
2 scallions, minced
1 tbs. minced fresh or candied ginger
3 tbs. hoisin sauce
1 tsp. asian sesame oil
3 tbs. soy sauce (gf if that is a concern)
2 tbs. honey (optional)
1 small bunch fresh cilantro, washed and dried
pinch hot red pepper flakes

Garnishes: extra minced cabbage, extra sesame oil and/or hoisin, hot sauce or sriracha, peanuts, sesame seeds, scallions, cilantro leaves.
Put the cabbage in the bottom of the cooker insert, then lay the chicken on top. Mix all the rest of the ingredients up to and including honey in a bowl. Pour that over the chicken. Mince up the cilantro stems and a few leaves and put them and some pepper flakes on top.

Cook on high for 4 hours or low for 6. Shred the chicken with a pair of forks. Serve.

This is delicious over your favorite grain, noodle, or rice. Or you can make a great sandwich with some sliced pickle and extra cabbage. We like it over arugula salad.

IMG_4341
IMG_4343
IMG_4338

Posted in chicken, easy, entree, main course | Tagged , , , , , , | 6 Comments

Arugula Salad

IMG_4257

IMG_4258

There is so much happening here in our woods, I don’t know what to tell you first! The biggest news is that the kitchen construction is really beginning to move forward. We’ve been so occupied with structural problems, it’s taken the focus off the creative part of the process. But last week, I got to have some real fun. With power tools!

We rented a belt sander and I used it to bevel the edges of 440 square feet of white oak floor boards. Brian was home for spring break; he and Bob “fed” me the wood and then stacked it. It was a huge project, but working as a team, we finished in 9 hours. The floor guy is coming today to install it!

After the sanding project, I turned my attention to getting ready for Empty Bowls, which happens this Friday! I loaded the bisque Sunday, glazed and loaded the kiln starting at 5 am Tuesday, fired in the evening. The kiln cooked yesterday while I worked at the dr deb office, and I got up at 4:30 this morning to unload my treasures! I have 30 soup bowls to donate, plus a big pasta bowl for silent auction. I hope to take some pictures later and post them on my Empty Bowls page and on Instagram and Deb’s Pots Facebook page.

And in the middle of all of this, Sam showed up to crash here for most of the week. It has been such a joy to get to spend time with him! The best part so far happened the other afternoon. I was putting away some laundry, and I heard my son’s voice in his bedroom across the hall. Brian left Sunday to head back to GWU for his final two months of college! It was Sam in Brian’s bed; the two friends were Skyping, hatching up a plan to travel to Europe after graduation. More details on that exciting possibility as the specifics develop! I stopped in to say hi to them, truly happy for their presence in my life.

IMG_4253

IMG_4252

IMG_4251

Tonight, a few of Sam’s Geneseo friends will be joining us for supper. I haven’t done much entertaining lately, what with no kitchen and 3 feet of snow on the ground. But it didn’t take long for me to figure out what I can manage in my makeshift basement studio cooking space. I am going to cook up a big pot of tomato sauce and some pasta, good bread, and one of my famous, fabulous, arugula salads.

IMG_4255

IMG_4254

IMG_4256

If you follow me on Insta, or if you’ve ever had a meal in my house, you’ve met my salads. We have them almost every night. Over the years, they morph; today I am giving you my current version.

Arugula Salad

This recipe functions as a basic template; change the type of leaf, vinegar, oil, nut, fruit, and cheese and you will be able to create an endless variety of wonderful salads.*

Right now, I am using supermarket prewashed baby arugula. But when I can get greens from the farm market, they are my first choice. I am a fan of the salad spinner for cleaning and drying greens. When I am at the beach and don’t have the spinner, I wash leaves in a big bowl and then put them in a pillowcase. I go outside and do my helicopter imitation; I love watching the droplets fly in the sunlight as my lettuce gets dry! Then I pop the pillowcase, greens enclosed, into a plastic bag until supper. All kinds of leaves store well, washed, wrapped in a cloth inside plastic.

12 oz baby arugula
¼ cup white balsamic vinegar
¼ cup good xv olive oil
1 tbs. agave or honey
1/3 cup crumbled Roquefort
1/3 cup toasted pistachios
1/3 dried tart cherries
salt and freshly ground pepper, to taste

Choose a beautiful salad bowl big enough to hold all the ingredients with extra space for tossing. Put the arugula into the bowl, sprinkle with salt and pepper, and then drizzle the vinegar, oil and agave over the leaves. Toss gently but thoroughly to coat all the greens with the dressing. Then arrange the other ingredients over the top. Bring the bowl to the table and toss once again just before serving.

*Nice variations:
mixed baby lettuces, romaine, butter lettuce…fresh herbs
good aged balsamic vinegar
local honey
walnut or almond oil
stilton, aged parmesan, smoked gouda, goat cheese or good feta
tricolor raisins, dates, fresh apple, fresh pear, or orange segments

IMG_4259

IMG_4261

IMG_4260

This salad makes a full meal with the addition of some extra protein. I often make supper out of salad with some grilled chicken for me, steak for Bob and half an avocado each. A piece of roasted salmon or halibut is nice on top of salad as are some sauteed shrimp, baked tofu, or fried eggs. And a plate of salad with stuffed mushrooms is just wonderful!

IMG_4269

Posted in salad, side dish | Tagged , , , , , , | 7 Comments

Cauliflower Hash Browns

IMG_4200

IMG_4189
image

We eat low carb-ish in the winter…did I tell you this already? And we still have an empty space where the kitchen used to be. Did you notice I didn’t say “where the new kitchen will be?” That’s because we still have a long way to go and I don’t want to get too attached to the outcome, yet.

Brian is home for spring break. Yes, I did make him a new flavor of ice cream. You’ll have to hop over to Chickpea and Rutabaga to find out the flavor. I refuse to tell you here whether or not it involves…bacon…But I digress. He is low-carb-ish also. Oh, you knew that already, too, because of the Zucchini post. I’m sorry, this renovation is starting to get to me and I’m repeating myself!

Before Brian travelled to New York from Washington, DC, we did what we usually do. We discussed the upcoming week of eating. I had just taught Karen how to make a meat sauce and doing this gave me a craving. As soon as I mentioned it to Brian, he caught my craving. Of course, we love our meat sauce over pasta, but we are staying away from pasta, so our conversation meandered over to permutations of cauliflower.

IMG_4184

IMG_4196

We all love a cauliflower puree. And we also really like “cauliflower rice” or “couscous.” But both of these involve lots of batches in the food processor. And let me tell you, the difference between the height of counters and the height of tables is significant! Even for a shorty like me! Try working lots of batches in the food processor on a tabletop; it’s not a healthy back activity So, I was looking for an alternative. And my problem solving resulted in a brilliant solution. If I do say so myself! The grating disk!

You must try this. It is so easy, so simple, and so good. Then, write me a comment and thank me because I am a genius. A humble genius!

IMG_4181

IMG_4187

Oh, before I get on to the recipe, I need to ask you for a favor again. Well, it’s the same favor I asked you in the last post. You can do it again. Or if you didn’t already, you could do it now…nominate Deb’s Pots for a Saveur Blog Award. You can do multiple nominations if you do on in each category that might apply. Nominate here.  Tomorrow is the last day. Thank you so very much!

And for those of you who are local, our annual Empty Bowls event is coming up! I’ll be there with lots of new bowls. Please join us March 20, 5-8 pm (Warwick Valley High School) for a cup of soup and help feed the hungry in the Warwick/Orange County Community.

IMG_4195

IMG_4198

IMG_4199

IMG_4201

hb

Cauliflower Hash Browns

You could grate the cauliflower on a box grater, but if you have a food processor with a grater, use it for this, it’s sort of like a small miracle. I’m giving instructions assuming that you are situated for a miracle. If not, just ignore me and grate by hand.

This is great as a “bed” for your favorite sauce, chili, or stew.

Make it vegan or paleo: omit the cheese.

1 head cauliflower,washed and trimmed
½ cup parm
olive oil for greasing
salt and pepper to taste

Preheat the oven to 375°. Set up the food processor with a grating disk.

Cut the cauliflower into big chunks that will fit the feed tube of your food processor. I have a wide feed tube on my ancient, cracked machine. Cutting the head into eighths works perfectly. Just pop them into the tube and create fluffy mounds of white in a fraction of a second. If it reminds you too much of snow, you might have to wait a few months.

Grease a 9 x 13 baking dish with olive oil. Toss the fluffs with salt and pepper and distribute evenly over the bottom of the dish.

Bake for 15- 20 minutes or until browned on top and cauliflower is cooked. Serve immediately. Top with extra cheese.

IMG_4189
IMG_4197

Posted in baked, easy, side dish, vegetable | Tagged , , , , , , , | 7 Comments

Black Sesame Loaded Oatmeal Cookies

IMG_4127

IMG_4126

Are you a baker, or a cook?

I have been both for very close to 50 years, and the distinction has always made sense to me. People always say you either prefer cooking or baking. And, until very recently, I would say I thought of myself as primarily a cook. I have always enjoyed both, but I felt I had to choose, so I chose cooking.

The reasoning, as I understood it, had something to do with precision. Cooking is more holistic, organic, and intuitive; baking more precise, like chemistry. And when faced with these distinctions, I clearly fell into the cooking camp. I love to throw in a little of this and a little of that. I don’t usually measure. I am a language more than a math person. I have always loved to bake, but I never felt quite as competent at it. Similarly, in the studio, I feel a bit more competent as a thrower than as a glazer.

IMG_4118

IMG_4119

But in recent years, I have gravitated more towards baking. Someone gave me a batch of sourdough starter, and I began making beautiful, delicious breads several times a week. As soon as I have a full size oven again, I will do a sourdough post. Meantime, I am making Mindfulness Bread in the toaster oven (it doesn’t rise, so the toaster oven works well enough). And I have always loved baking quick breads, and the occasional layer or sheet cake. But my favorite baked goods are cookies.

I have been famous in Warwick for my chocolate chip cookies for years. Yes, I know I told you I was famous for my ice cream…well, cookies too. I remember, oh, a dozen years ago when Sam had a crisis because he’d given up chocolate for lent and I, unknowing, baked cookies for his weekly sleepover. There was a late night phone call to his dad, Father Scott. I know Scott had a private chuckle, but solemnly, he told his son that God would understand and that he would learn a lot either way. I wrapped the cookies to be put into the freezer for the end of lent. And Sam learned about his relationship with God, about integrity, about delay of gratification, about his kind and loving dad, and about friendship. Since then, I have made sure that every time Sam walks into my house, I have freshly baked chocolate chip cookies for him.

IMG_4124

IMG_4123

IMG_4129

My dad adores my oatmeal cookies. I make them for him on special occasions. I bring him a big batch and he puts them in the freezer and takes one out every night until they are gone.

We celebrated Dad’s 80th birthday a couple of weeks ago and I baked him his favorite cookies. And an interesting thing happened. Usually, my kids prefer their cookies with chocolate chips, no nuts or other ingredients to mar the purity of the chocolate/brown sugar/vanilla experience. But they tasted these oatmeal, chocolate chip, raisin, walnut cookies and loved them. Brian thinks it means he’s an adult now.

So with this new recipe, I took it a step further with the addition of black sesame seeds. These cookies are really interesting, with a slight savory quality from the sesame, a salty note, and a tang from the sour cherries. The recipe is an adaptation of one from Cook’s Illustrated. They are fat and chewy and nutty. I hope you love them!

IMG_4128

Black Sesame Loaded Oatmeal Cookies

If you can’t find black sesame seeds, hulled or unhulled white ones are fine. And feel free to substitute raisins for the cherries and walnuts or almonds for the pecans.

These are really great served with homemade ice cream. Sprinkle the ice cream with some black sesame seeds, too!

¾ cup all purpose flour
¼ tsp baking soda
½ tsp baking powder
¾ tsp salt
1 cup rolled oats
½ cup toasted pecans, chopped
½ cup tart dried cherries
½ cup bittersweet chocolate chips
¼ cup black sesame seeds, plus 1 tbs. extra for sprinkling
6 tbs. unsalted butter, softened
¾ cup brown sugar
1 egg
1 tsp vanilla

Cream the butter and sugar, preferably in a stand mixer. You may do this by hand or with a hand held mixer, but the stand mixer makes the job a snap. Add the vanilla and egg and beat to combine thoroughly. Add the flour, baking powder and soda and mix slowly to combine. Add the remaining ingredients (except the sprinking seeds) and mix until everything is evenly distributed.

Use a 2 tbs portion scoop to form the cookies, and place the cookies on a cookie sheet; sprinkle with the remaining seeds. Put the whole sheet into the freezer until the cookies are solid, at least 2 hours. Then put them into a big zip top freezer bag and bake as many as you want at a time.

When you are ready to bake, preheat the oven to 350°. Line a baking sheet with parchment and place 8 cookies on the sheet, staggered. You may bake 2 sheets at a time. Bake for 15-18 minutes or until they just begin to show a hint of golden color. Cool for 5 minutes before removing from sheet. Serve with milk or ice cream.

PS If you haven’t yet, I would be so grateful if you would take a minute to  nominate me for a Saveur 2015 Blog Award. They are encouraging nominations in more than one category, so choose all you think apply. And thanks! So very much.

IMG_4130

IMG_4133

Posted in baking, chocolate, dessert | Tagged , , , , , | 6 Comments

Best. Stuffed Mushrooms. Ever.

IMG_4084

IMG_4087

Why are foods with stuffing so incredibly appealing? In every cuisine in the world, there are dishes involving something stuffed into something else. Pierogi’s, bao, tortellini, empanadas, stuffed eggplant, peppers, cabbage. Need I continue? And then, of course, there is the controversy over whether or not to stuff the Thanksgiving turkey…

My speculation: I think there are a lot of reasons for the appeal. Most stuffed foods are, in fact, better than the sum of their parts, at least if they’re done properly. So there is the element of transformation. You take a lowly mushroom, saute’ the stems and some other things, pop the resulting mixture into the cap and bake it, and you have something party-worthy.

IMG_4093

IMG_4092

But I’m a psychologist who is also a potter. I am a huge fan of containers. We all started our very lives in a container and I think there is a wish inside of each of us to be safely contained, all warm, floaty and protected, once again. As a potter, I make vessels to hold objects, flowers, drink, food. As a psychologist, I try to provide a safe environment in which my clients can safely express their darkest fears and emotions. As a wife and mother, I do my best to offer a haven for my loved ones when they are sad, overwhelmed, or scared. When I am distressed, I want nothing more than to be held inside the strong arms of my partner, to feel held…to be…contained.

IMG_4068

IMG_4081

So, I guess it’s no surprise that I love to stuff stuff. On the blog, so far, I have given you Unstuffed Cabbage, but this is my first recipe for something with a filling. I can assure you (I know you are worried), it won’t be the last!

IMG_4060

IMG_4063

IMG_4085

IMG_4088

IMG_4086

Best. Stuffed Mushrooms. Ever.

Did you know that portobellas are overgrown creminis? Or creminis are immature portobellas? The ones I found for this recipe are in between; about two inches across (maybe they are teenagers?). It is easy enough to adapt my instructions for larger or smaller mushrooms; just adjust the cooking time slightly.

6 big cremini mushrooms, about 2 inches diameter (or equivalent), rinsed and air dried
1 tbs. olive oil
1 garlic clove, minced
1 thick slice of your favorite bread, preferably Mindfulness Bread, lightly toasted
¼ cup toasted almonds
¼ cup dry white wine
1 oz dried porcini mushrooms
2 cups baby spinach, cleaned and dried
1/3 cup grated parmigiano reggiano*, plus ¼ cup extra for topping and garnishing
3-4 cherry or grape tomatoes, diced
salt and pepper to taste

*You may grate the parm using a microplane or any fine grater. But my favorite way to do it is to cut it into rough chunks and throw it into the food processor fitted with the steel blade. Run the processor until the cheese is finely ground. Some people might tell you that it loses flavor if you store it in this form, but I think you can get away with keeping it in a closed container for a week or so.

Preheat the oven to 375°. Rinse the dried mushrooms and place them in a small bowl. Pour the wine over them and microwave for 50 seconds. Set aside.

Gently, pull the stems out of the mushroom caps. Roughly mince the stems; place the caps, stem side up, on a parchment lined baking pan.

In a medium sized, heavy bottomed pan, saute’ the mushroom stems in the olive oil over medium heat for 2-5 minutes. Add the garlic and stir; warm through. Now, throw the porcini and any liquid in the bowl into the pan. Cook over high heat for a few minutes. Add the spinach and cook until the leaves wilt. Season with salt and pepper. Let this mixture cool for a few minutes.

Meanwhile, crumble the bread into rough chunks and throw into the bowl of a food processor fitted with the steel blade. Pulse to break down the bread. Add the almonds and run the processor until both almonds and bread are finely ground. Now, add the vegetables and pulse about 8 times. You want everything finely minced, but you still want a little texture; use my pictures as your guide. Now, dump everything into a bowl and add the 1/3 cup cheese and tomatoes and stir. Top with half the extra cheese.

Fill the mushroom caps. Bake for 15-18 minutes or until the mushrooms are cooked and the filling is browned. Serve with the remaining cheese.

These are great hot out of the oven, but they are also wonderful warm, or at room temp. We had them as part of a light supper with a little arugula salad and a fried egg.

Oh, before you go off to buy the ingredients, would you do me a little favor? It will take just a couple of minutes…would you hop over to Saveur’s website and nominate the blog:  https://debspots.com/blog/for a 2015 blog award? I will be so grateful!

IMG_4059
IMG_4089
image

Posted in appetizer, party, side dish | Tagged , , , , , | 2 Comments

Umami Bomb Asparagus

IMG_4014

aspargawk

If you ask me which one of my children is my favorite, I will not answer you. I love each of them so much, so completely and pervasively, the question is not even relevant. Ask me my favorite color and I will hesitate. There are so many choices: sage, celadon, olive, lime…I don’t remember where I read this, but it applies to me: “I love any color as long as it’s green.”

Ask me to tell you my favorite vegetable. I love vegetables, almost all of them, even okra. I am not a huge fan of bok choi, but I’ll eat it. I have limited affection for the taste of radishes, but they are so gorgeous, I eat them anyway. But I do have a favorite: asparagus. In March, when the supermarket asparagus are plentiful, fresh, and inexpensive, I tend to serve them every day. Everyone in my family likes them, too, so they don’t mind (when I first met Bob, he said he didn’t like asparagus. But that was before he tasted mine). And when Cheryl (Rogowski) has asparagus at the farm market, I show up at exactly 9 am when the market opens and help myself to the best looking of the stunning specimens she has in the basket. Local asparagus is, to me, a reason to celebrate.

IMG_4007

IMG_4008

I don’t think I’ve ever met an asparagus I didn’t like. I often serve them simply steamed, just naked in their green perfection. I trim them, soak them in cold water in a big pot, then pour off all but ¼ inch of the water. I put the pot on a high flame, cover it and let it come to a boil. I toss the asparagus around a few times, let them cook for about 3 minutes, and then serve. They are great with a little balsamic and olive oil. And I love to dip them in a mustardy egg salad and munch away until all the salad and all the asparagus are gone.

IMG_4010

IMG_4009

Grilled asparagus in summer are hard to beat. Just coat with a little oil, salt and pepper and throw them across the grates so they don’t meet a fiery death. Roll them around a few times and cook until they are bright green and charred in spots.

Asparagus sauteed in a pan over high heat are great, with or without a little oil. And stir fries are pretty awesome. A few steamed and quickly chilled spears are great in any veggie platter; try them with my Sriracha Lime Sauce, Tahini Sauce with Herbs, or Hummole.

IMG_4011

Oh, and while we are on the subject of favorites, let me tell you my favorite of the taste sensations: sweet, sour, bitter, salty and umami. Many people, including all babies and young children, prefer sweet. I don’t have that much of a sweet tooth. I’m an umami woman all the way! If you’re not familiar with the concept, or you want to know more about it, Megan did a wonderful piece about umami for our blog, Chickpea and Rutabaga; take a look!

I believe I invented the recipe I am sharing with you today. I don’t remember when or what inspired me to think of this combination. But it is genius. If you only try one of the recipes you have seen on my blogs, I encourage you to choose this one. It is ridiculously simple and easy and the whole is stunningly better than the sum of its parts. And that is saying a lot because the parts are very, very, good. Brian would say that this asparagus recipe is unfair to all other asparagus recipes.

IMG_4012

IMG_4013

Before I give you the recipe, I want you to know that the pottery you see in this post (with the exception of the vase holding the asparagus upright) just came out of the kiln. The pieces are all stoneware, fired to cone 6 in oxidation; all of them were thrown on the wheel here in my little basement studio this winter.

Umami Bomb Roasted Asparagus

If you want to serve these as a side dish, hide them until you are ready to put them on the table. If anyone gets a bite, they will all be gone before you get them across the room. These make a great appetizer course. And a fine lunch or light supper with a poached or fried egg or two on top.

Look for asparagus that look bright and fresh with nice, tight tips. Avoid any that look dry, wrinkly or mushy. Smell their little heads like you would an infant. If they smell funky or ammonia-y, don’t buy them. Store them in the fridge in a plastic produce bag but leave the bag open. Or upright in a half inch of water with a plastic bag for a hat. Don’t store them for more than a day or two.

1 lb. perfect, fresh asparagus
¼ lb parmigiano reggiano*
2 tsp. good olive oil
2 tsp. soy sauce

*If you are a paleo dieter or vegan who does not eat parm, use your favorite substitute or simply omit.

Snap the woody bottoms off the spears where they break naturally and place them in a bowl or pot of very cold water for a few minutes or up to an hour. Preheat the oven to 450°

Use a vegetable peeler to shave the parmesan so that you have some nice pieces for garnish; set aside. Now grate the rest of the cheese. You can do this with a microplane or in a food processor. It is okay to cut it into chunks and grind with the steel blade. This qualifies as grating in my opinion.

Take the asparagus out of the water and roll them in a towel; get them really dry. Line at sheet pan with a piece of parchment and put the spears in a big pile in the middle. Drizzle the pile with the oil, the soy sauce and the grated cheese. Now, roll them all around to get them fairly evenly coated. In this process, you will also coat the parm, which will create nice bits for even more umami goodness.

Now, distribute the spears in a single, even layer. Bake for 10 minutes or until they are bright green and the cheese is brown and crisp.

Put them on a pretty plate for serving. Distribute the extra crispy bits on top and garnish with the parm shavings.

IMG_4019
IMG_4016
IMG_4018

Posted in gluten free, low carb, paleo, side dish, vegetable, vegetarian | Tagged , , , , , , | 12 Comments

Blackberry Apple Crumble

IMG_3911

IMG_3914

Warning: This post contains complaining. It also contains a very nice recipe. Feel free to go directly to the recipe.

The kitchen renovation has been rough. This is not the first time we’ve had construction done on our house, so we knew to expect disruption, mess, loss of privacy and inconvenience. We had no way to anticipate that we were going to discover that our house was built incorrectly, badly, nonsensically, and that everything would be affected by major structural problems. I don’t say this lightly; it is as if our house went in for routine surgery and the surgeon found metastatic cancer.

IMG_3916

IMG_3898

We have been stalled for about 6 weeks now, completely gutted. At various points, we have had no walls, flooring or ceiling in the room that was once a kitchen. I have been doing food prep in the basement, but the guys have had to rip out much of the ceiling there, too. Sometimes, I have no water or electricity. The vacuum system has been disabled for weeks and there is no power in the center of our home so it is like a big black hole at night. Bob and I are both very worried about the massive additional expense.

IMG_3896

IMG_3877

All of this is challenging;  I am usually able to maintain my emotional equilibrium by running or cross country skiing. Most winters I am out no matter what the conditions. But this winter has been so brutal, I am worried for my safety.  As I type these words, the temperature outside my window is 8 degrees below zero; so I am relegated to the elliptical, located under hanging, exposed wires.

I have said this before, I am not a stranger to true tragedy, so I do manage to keep perspective most of the time. I still trust our team, and we all continue to work well together. Sadie is getting used to the commotion and venturing into the demolition zone more frequently.

IMG_3899

IMG_3917

IMG_3900

IMG_3906

Bob was at meetings in Washington, DC this weekend. I took the opportunity to glaze and fire a kiln load of new pots. You can see some of them in the Gallery; more to come.

My tech angel and beloved friend, Mary was kind enough to invite me over for a wonderful dinner in her warm, beautiful kitchen with her beautiful daughter and kind husband. I knew she would understand if I came empty handed, but I wanted to bring dessert. Mary is eating vegan and gluten free, so I developed a delicious fruit crumble based on what I had on hand. At the end of a long day of glazing and loading pots during a snowstorm, the last thing I wanted to do was go food shopping. Thus, this recipe was developed.

Yes, I baked it in the toaster oven. And yes, you may use your real oven!

IMG_3912

IMG_3907

Blackberry Apple Crumble

Serves 2-4

I used a honeycrisp apple, my winter favorite. Use your favorite baking apple. For inspiration, look at Apples, or More Apples. I don’t peel, but if apple skin bothers you, get out your peeler and have at it.

1 pint blackberries, washed
1 apple, cut into chunks
¾ cup cane sugar or brown sugar
juice of ½ lemon
1 tsp vanilla
3 tbs. coconut oil
1 cup oats
1 tbs. sesame seeds
1/3 cup walnuts
2 pinches salt

You will need an oven proof bowl or baking dish that is roughly 6 inches across. Preheat the oven to 350°.

Put the apples and blackberries in a mixing bowl and toss them with ¼ cup of the sugar, the lemon juice and a pinch of salt. Set this aside while you work on the topping.

Place half of the oats, the remaining sugar, pinch of salt, and the coconut oil in a food processor (I use my mini for this). Pulse until everything is evenly coated with oil. Add the walnuts and pulse to break them up. Add the rest of the oats and the sesame seeds and process just to combine.

Put the fruit into the baking dish and toss with ¼ cup of the topping mixture. Then, cover with the rest of the topping. Bake for 35-40 minutes or until nicely browned and apples are soft.

This would be lovely topped with something creamy like whipped cream or ice cream or yogurt. We had it plain, but engaged in a conversation regarding our curiousity about vegan whipped cream (made with coconut milk). I may try that when I have a kitchen. I’ll keep you posted.

Leftovers are amazing reheated for breakfast.

IMG_3913
IMG_3908

Posted in baking, breakfast, dessert, pottery | Tagged , , , , , , , , , | 4 Comments

Thai Coconut Chicken “Noodle” Soup

IMG_3838
IMG_3825

Do you like to eat alone? I haven’t done a formal study, but I will tell you something interesting that I’ve observed in my years as a psychologist in the dr deb office. People who are well adjusted and happy enjoy eating with other people and also like to eat alone. People who have emotional difficulties fall on the extreme ends of the continuum. They may feel very uncomfortable without a dining companion; those people will never go to a restaurant without a date and even a bowl of soup solo in bed feels like a challenge. On the opposite side of the spectrum, lots of folks with eating disorders or social anxieties dislike being observed taking nourishment. Those folks vastly prefer to dine in solitude.
IMG_3835
IMG_3834-0

I have spent most of the last two decades of my life raising a family. Making sure we ate home cooked food together most nights was a priority for me. Consuming meals as a family was an enormous pleasure for all of us. But two nights a week, I worked late, so Bob usually ate with the kids and I had a plate when I got home. Brian used to tease me that I always ate weird combinations of things like beets or chickpeas and rutabagas.
IMG_3840
IMG_3833
IMG_3832

When I was a small child, I began tradition of preparing my solitary eats with the same care and attention as I lavish on meals with others. Like lots of other people, when no one else is watching, I sometimes put together some strange stuff. I seem to remember my favorite “home sick from school” concoction involved spaghetti and ketchup.

Bob has to travel for work a few times a year. When that happens, I try to think of things to make for myself that I love but don’t get to have when we’re together. There are only a few foods he really dislikes: coconut, and brothy soups. He hates anything coconut flavored or textured. I adore coconut. I like coconut sorbet and ice cream, I drink coconut water after my run, I sprinkle coconut flakes on my yogurt. As for broths, Bob only enjoys soups that are thick and hearty and more like stew.  I love grandma’s chicken soup with or without noodles, vegetable soups that have a clear base and are chock full of veggies, and minestrone type soups. The sorts of bowls my mother refers to as “belly wash.”
IMG_3836
IMG_3826

When he is away, it is my chance to feast on the things I like without having to make something separate for him. I try to make a point to practice mindfulness while I cook and eat. Today, I made a big pot of chickeny broth filled with coconut, vegetables and tofu; it is warming, flavorful, and comforting. I’m going to nourish myself this weekend while I load and unload a bisque kiln full of pots, mix glazes, glaze and glaze fire. It will be a ton of work and I am looking forward to being well fed.
IMG_3828
IMG_3829

Thai Coconut Chicken “Noodle” Soup

This soup is gluten free, high in protein and very low carb. It would be delicious with the addition of soba, rice, or whole wheat noodles. If you are vegetarian or vegan, simply leave out the chicken and substitute vegetable stock. If you are paleo and/or don’t eat tofu, the soup is wonderful without it.

Serves 3 or 4 (or one, for 3 or 4 days)

1 ½ lbs. organic chicken thighs, boneless and skinless
1 scallion, sliced
2 tbs. coconut oil
1 tsp ground cumin
1 tbs. grated fresh or candied ginger
grated zest of 1 lime (use the naked lime for garnish)
2 tbs. organic can sugar (optional)
1 quart chicken stock (I use organic swanson’s)
8 oz. coconut milk, preferably organic
4 cups baby spinach leaves
2 medium zucchini
2 medium carrots
8 oz shiitake mushroom, sliced
1 lb. tofu, drained and cubed
salt and red pepper flakes to taste

garnishes: lime wedges, cilantro, basil, mint, peanuts, sriracha or other asian hot sauce

Cut the zucchini and carrots into “noodles.” You can use a spiralizer or a julienne peeler. If you don’t have either of those, cut the veggies into the thinnest strips possible with a knife. Or, make “ribbons” with a regular peeler. You will have a “core” that becomes difficult to use (you run into the zucchini seeds and the carrot gets too small). You can save them for something else (juicing, compost, stock) or toss them. I diced them up and added them to the soup with the mushrooms.

Melt the coconut oil in a big pot over high heat. When it is shimmering, add the chicken and scallion and let them cook for a minute or so. Then put in the cumin, ginger, and lime zest and sugar (if you are using it) and toss everything around. Brown the chicken for a few minutes on one side and then turn and brown on the other for a few minutes. Add the mushrooms and toss everything around. Cook the mushrooms for a few minutes and then add the coconut milk and the stock and bring to a boil.

Reduce the heat and simmer until the chicken is cooked through; this should take about 10 minutes. Now, use tongs to take the chicken out and put it on a plate. Let the chicken cool until you can handle it and cut it into big chunks.

Put the spinach into the simmering soup and cook until it wilts. Now add the tofu and the “noodles” and raise the heat until the liquid comes back to a boil. Add the chicken to the pot and cook until it is heated through. Take it off the heat and serve in beautiful handmade bowls with the garnishes.

Serve with love and eat mindfully, alone or with loved ones.

IMG_3841
IMG_3829

Posted in gluten free, low carb, lunch, main course, paleo, soup, supper, vegetarian | Tagged , , , , , , , | 7 Comments