Pickled Red Onions

D838B366-1B23-48A0-A180-BCDC33BB9B30

8CAB0CCA-43A6-475D-BC96-E865BC4B29C3

46F7F443-92BF-43B3-BB04-D3FBE6CE7D3B

4F67F0C2-97EF-4559-B7B8-CBFE75AF1A53

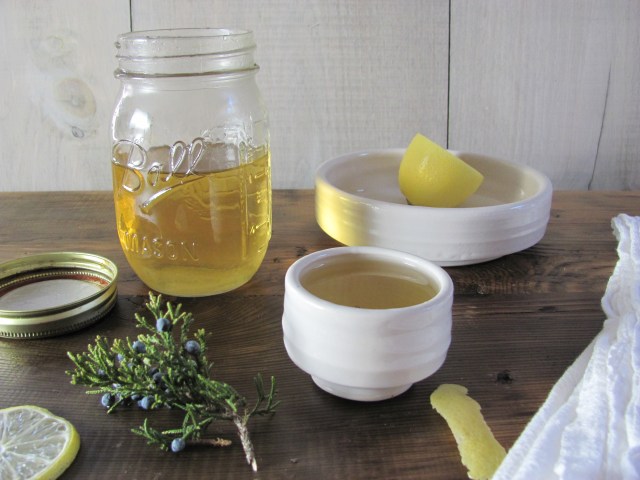
We arrived early for our anniversary (32 years!) dinner at Blue Hill at Stone Barns. Thirsty after a walk in the field (yes, we pilfered quite a few ripest blackberries), we had enough time for a cocktail at the bar before our seating.

35A00CD6-08CF-4484-9A7D-935C838A1D85

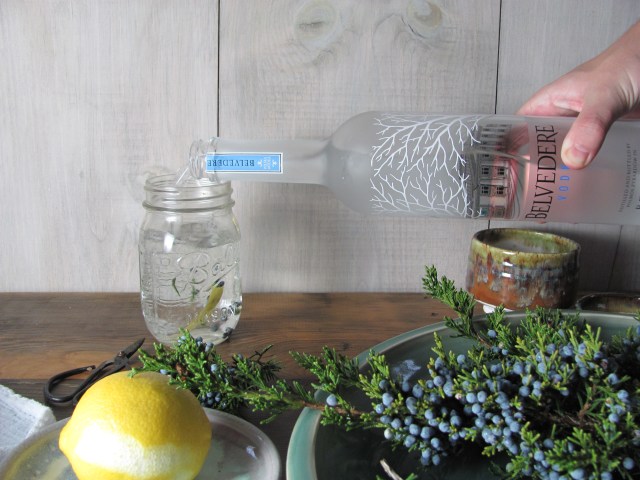
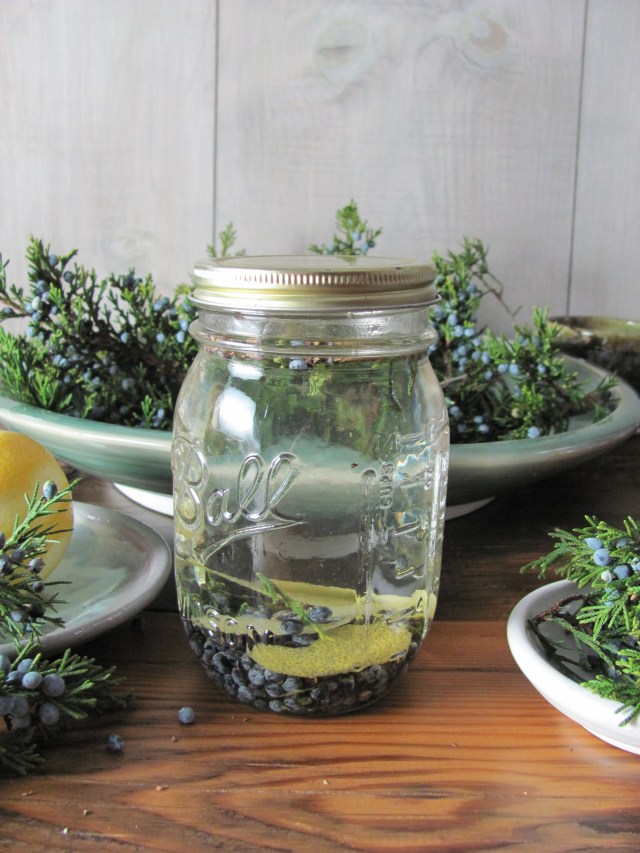
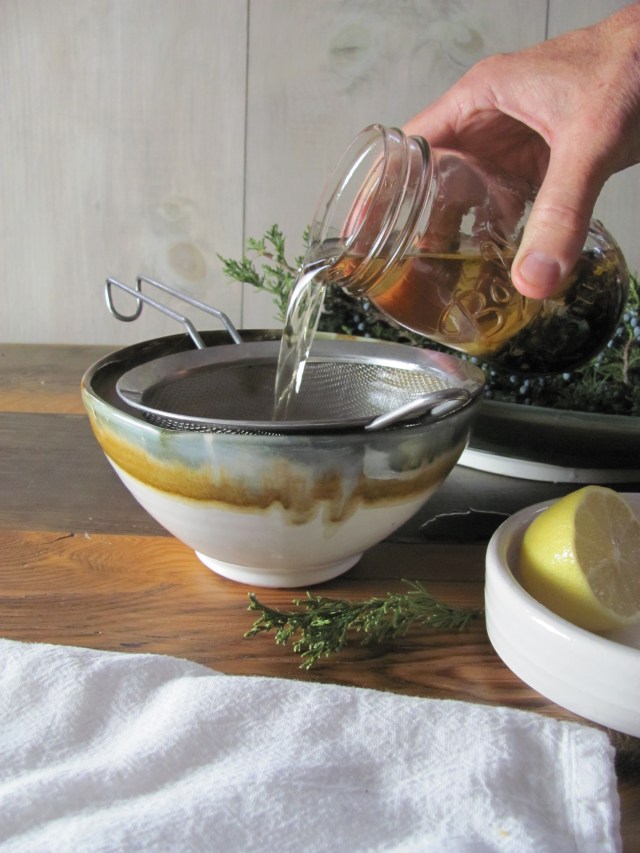
Watching the bartender, I was intrigued by what he was making for an incredibly famous looking gentleman to my left. I inquired. The answer was, “a Gibson with a pickled ramp.” Of course, we had to try this! The drink was a revelation. You can be sure that next spring when I visit my newly identified patch of ramps (sorry, it’s a secret), I will be pickling some to have with my homemade gin.

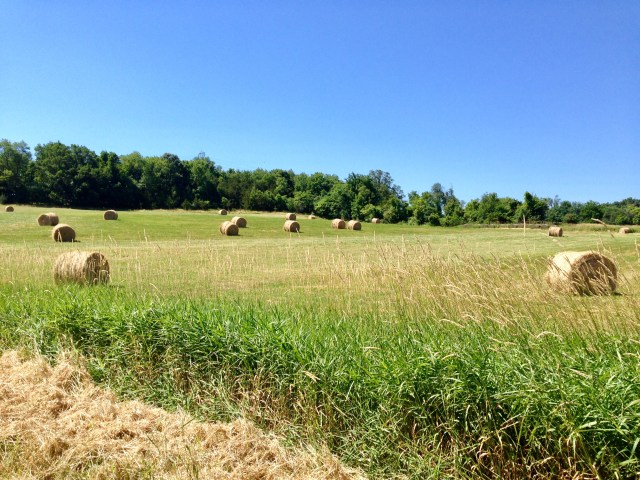
But how to use this brilliant idea in the meantime? Something seasonal…I started with  garlic scapes. Very good. But then I got inspired by the idea of some color. Yes. Red onion. And what could be more appropriate here in Warwick with the onion fields in full flourish here in Pine Island’s Black Dirt?

I think the resulting Gibson was even better than the one at Blue Hill. And certainly prettier. But then, as I do, I got a bit carried away with pickled onion production. It was just a matter of time before I started exploring other uses for my new favorite ingredient. They found their way into a quesadilla, a dip, and quite a few salads. I know you’ll enjoy them as much as we do.

DE5CBB12-9880-4F2B-BFB2-CD17A514E2FD

Pickled Red Onions

Makes about ½ cup, multiply as you like.

I think these are so pretty with all the pink color. But feel free to use white or yellow onions. I’m sure they’d be wonderful with a sweet variety, like a Vidalia. This makes what I feel is a perfectly balanced pickle, with plenty of sweetness to offset the sour and salty. But you may vary the type of vinegar, amount of sugar, or salt to your taste.

1 red onion, sliced
½ cup white balsamic or cider vinegar
1 ½ tbs. cane sugar
1 tsp. salt

Place all ingredients in a small saucepan and bring to boil over high heat. Use immediately or pack into a jar and refrigerate.

Below, I’ll give you a few recipes to get you started on your pickled onion journey. Further down, you’ll see some more ideas. I’m sure you’ll think of lots of other possibilities and hope you’ll post them for me in comments.
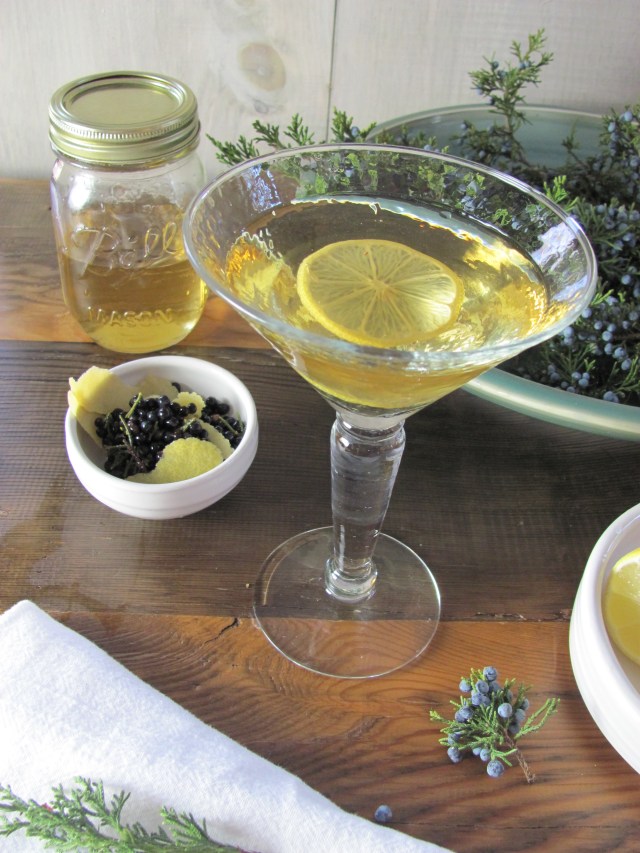
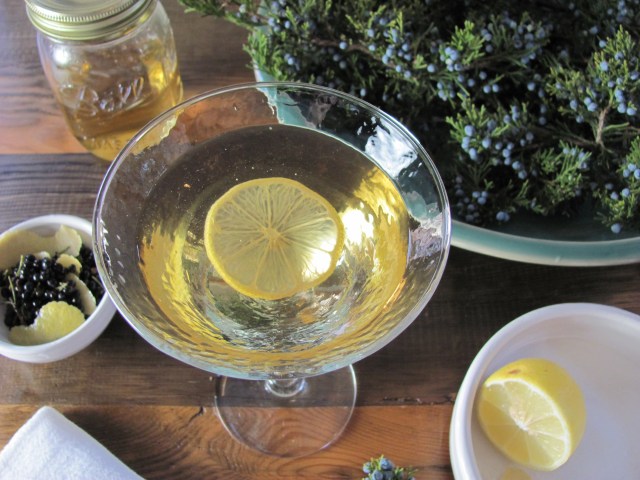
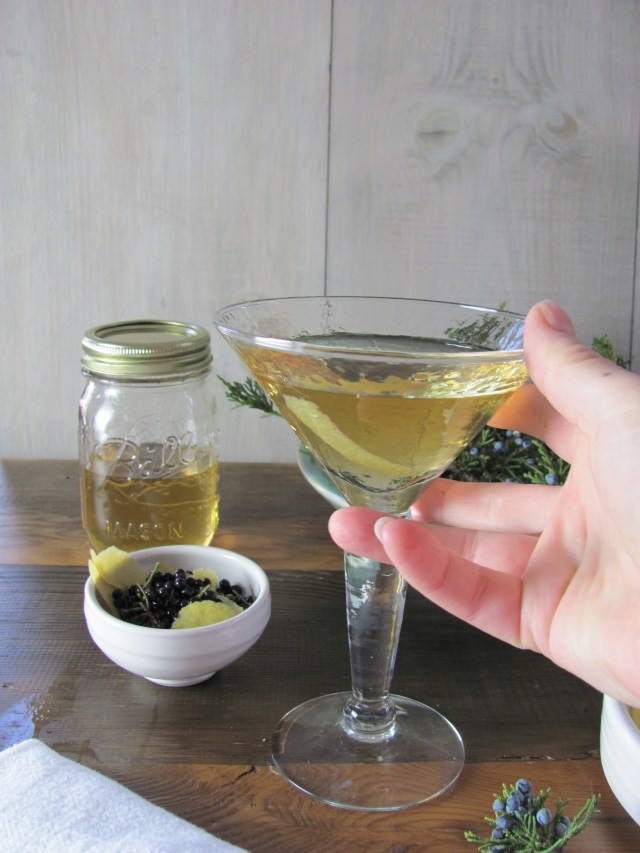
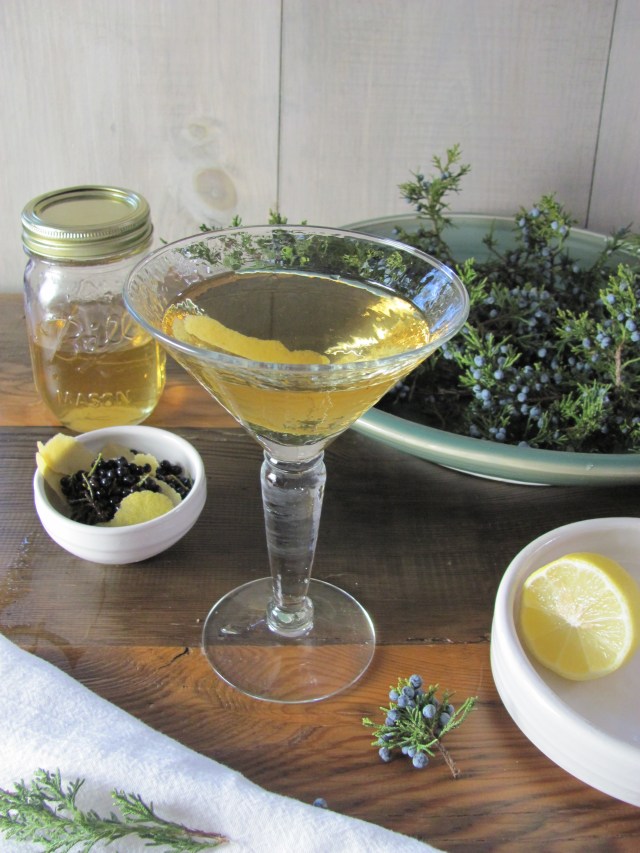
301D089B-AD42-4040-87F9-2A0D5CF7FDCE

Red Onion Gibson

Makes one cocktail.

1 shot gin, we like Tanqueray, or make your own
½ tsp. dry vermouth
1 tsp. pickling liquid
garnish: pickled onions

Place 1 cup filtered ice cubes in cocktail shaker or jar. Add liquid ingredients. Stir for at least a full minutes. Use a cocktail strainer to pour the drink into a well-chilled, beautiful martini glass. Garnish with a piece of onion. Make another one for a loved one. Clink.

4CD1A290-F223-4C5A-A8FB-C84C3CF573E7

Red Onion Sauce or Dip

This is terrific with Corn Fritters. Or serve alongisde raw or lightly cooked, chilled veggies or chips. Slather it on grilled meats, poultry, veggies, or mushrooms. Serve it with cold or hot steamed or grilled seafood. It is amazing on a turkey or roast beef sandwich or with Crispy Chicken, oven fried potatoes, or Zucchini Fries.

Makes one cup-ish.

1/3 cup mayo
1/3 cup sour cream
juice of ½ lemon or lime
dash hot sauce
1/3 cup drained Pickled Red Onions, minced
salt and pepper, to taste

Mix all ingredients to combine and refrigerate for at least ½ hour to allow flavors to marry.

09AEDC31-DD85-4403-9BC9-FE694E4B25D9

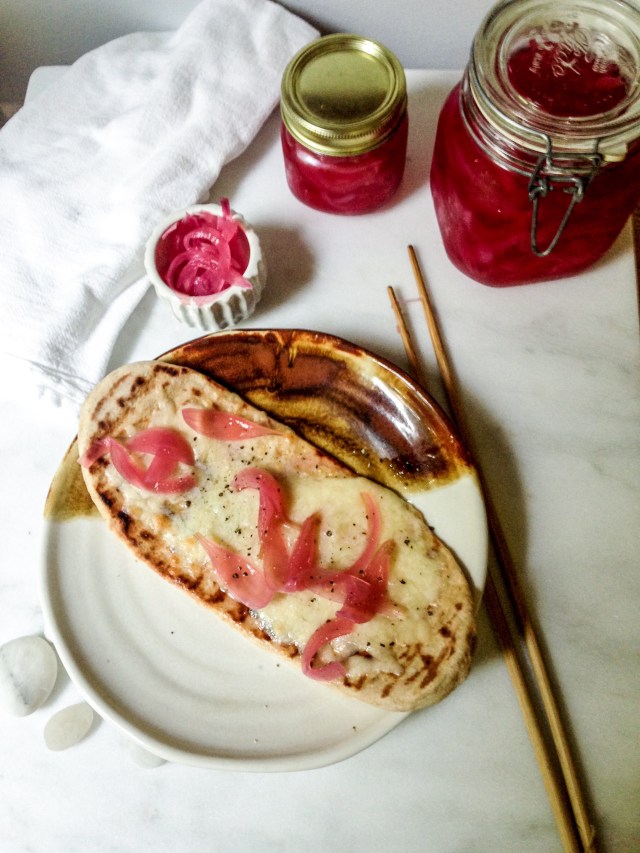
Quickie Pickled Red Onion Pizza

1 naan, pita or tortilla
1/3 cup cheese of choice
2 tbs. drained Pickled Red Onions

Place the flatbread on the rack of your oven or toaster oven. Top with the cheese. Toast or broil until the cheese is melted. Top with onions.

pickled


Other ideas:

Bagel, cream cheese, smoked salmon, pickled onion.
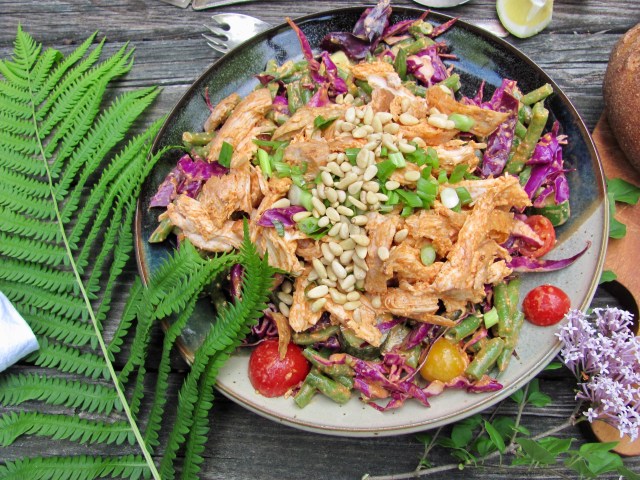
Top a simple green salad with feta, walnuts, pickled onion.
Stir into a cold grain, such as barley or farro, for a quick salad. Add pine nuts and raisins.
Toasted pita, hummus, pickled onion.
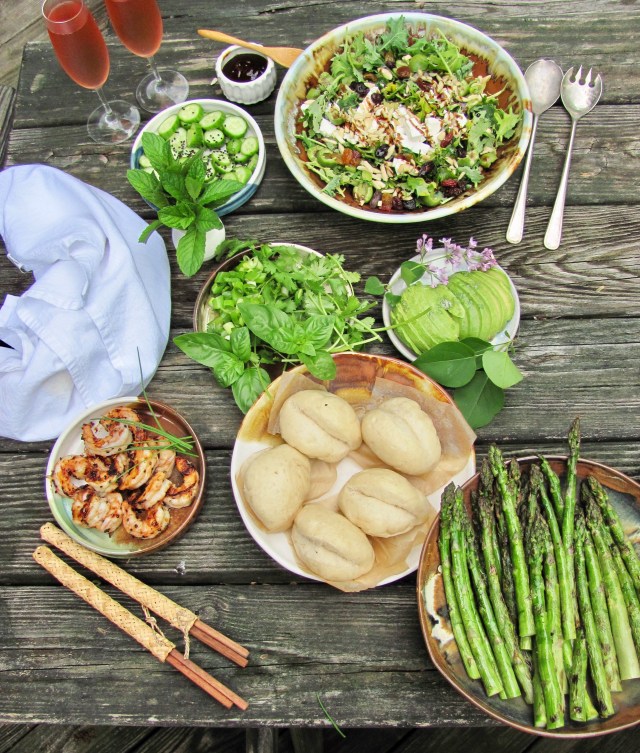
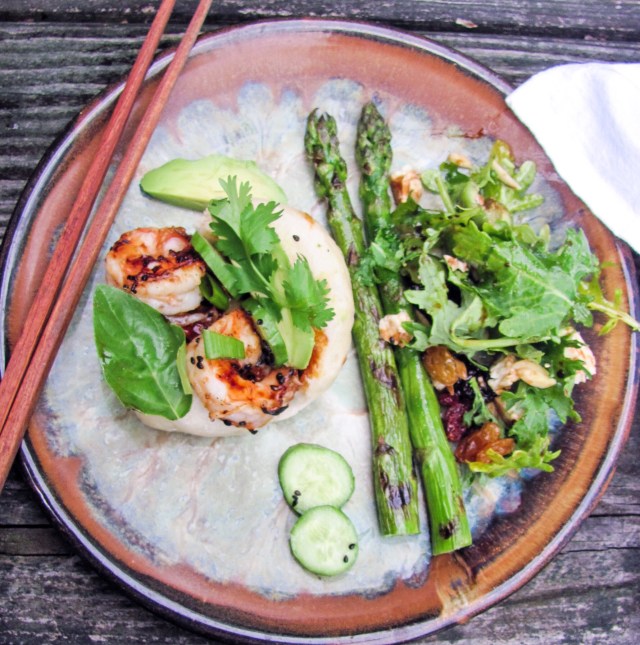
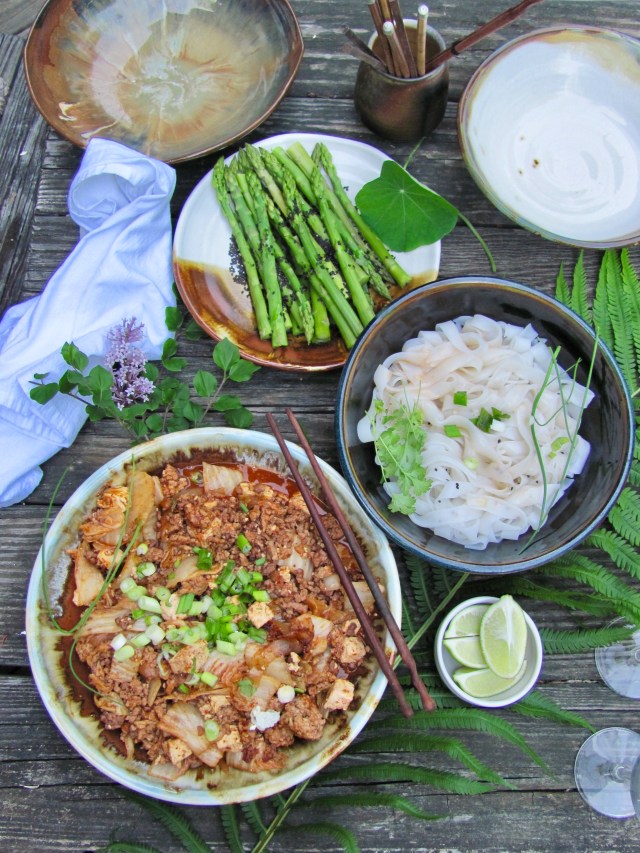
Top steamed veggies, like asparagus, broccoli, or green beans.
On a steak.
Add to your cheese board.
Garnish a stew.
Garnish a Roasting Pan Supper.
Topping for Turkey Chili. Or Veggie Chili.
Filling with sour cream for a baked white, yellow, or sweet potato.

And, in memory of my dear dad: whitefish salad on a toasted raisin bagel. Add onions. Insist that the sweetness of the bagel works perfectly with smoked fish and everyone must try it.

Blog note: The gorgeous watercolor above was painted by my amazing daughter and favorite artist, Megan McGrath. Thanks, Meg!

Posted in appetizer, condiment, easy, gluten free, snacks, Uncategorized, vegan, vegetable, vegetarian | Tagged , , , , , , , , , | Leave a comment

Mapo Tofu and Korean Chicken Salad

img_4358

img_4367mapobe4230bf-c4a2-41f8-8508-8f0ef48738fe

Last week, Meg was home and we were talking about cooking and blogging. I remembered out loud that the original idea for DebsPotsBlog was to consolidate my recipes and food ideas in one place for my grown kids, neices and nephews, and their friends and loved ones (hi Max and Amanda!).

Toward that end, I plan to experiment with taking a slightly new direction. I’m going to try to post more frequently and include more of what I’m cooking.

So, dear readers, please leave me comments and let me know what you think as I flail around trying to find a format that makes us all happy!

I’ve fallen in love with Gochujang lately and want to share two fabulous dishes in which it features prominently. Mapo Tofu is on repeat around here. If you google around, you’ll find many different recipes. This one is my very own and it’s splendid. I hope you love it. Korean Chicken Salad is brand new, from Milk Street. It’s easy, healthy, and so satisfying.

Mapo Tofu

This dish is delicious on its own, with rice, rice noodles, or rice cakes.

Serves 4

1 lb. ground pork, preferable humanely raised, organic
1 block firm or extra firm tofu, drained, cubed
1 large onion, sliced
1 tbs. neutral oil
2 tbs. gochujang
1 tsp. Korean hot pepper (gochugaru)
½ small head napa cabbage, sliced
1 scallion, sliced
2 tsp. soy sauce
2 tsp. cornstarch
¼ cup water

Mix the soy sauce, cornstarch, and water, and set aside.

Sauté the onion in the oil for a few minutes. Add the pork and cook for 4-5 minutes over high heat or until the pork starts to firm up and brown in spots. Add the gochujang, gochugaru, and cabbage and continue to cook until the cabbage begins to soften.

Add the cornstarch mixture and stir until sauce thickens. Add the tofu and warm through.

Top with scallions, and serve.

img_5028

img_5022

Korean Chicken Salad

Serves 3-4

This is a slightly scaled down version of Milk Street’s wonderful one-bowl salad meal. Terrific with leftover grilled chicken.

4 oz. green beans, trimmed, cut in half
1/3 cup toasted pine nuts, plus 2 tbs. for garnish
1 small persian cucumber, sliced
1 cup thinly sliced red cabbage
1 cup halved cherry tomatoes
1 scallion, sliced

1 large cooked chicken breast (grilled is great), shredded
1 ½ tsp. gochujang
1 tsp. yellow mustard
2 tbs. water
2 tbs. lemon juice

salt to taste

Dressing: Place the 1/3 cup pine nuts in a mini food processor and grind to a paste. Add the gochujang, mustard, water, and lemon juice and blend.

Mix the chicken with half the dressing.

Cook the green beans for 4-5 minutes in salted water, drain, and shock in ice water. Drain again and pat dry.

In a large salad bowl, combine the beans, cucumber, cabbage, and tomatoes. Add the remaining dressing and toss well. Mound the chicken salad on top. Garnish with the scallions and reserved pine nuts. Serve.

img_5036

img_5034

Posted in chicken, dinner, dressing, gluten free, low carb, lunch, main course, main dish, one pot meals, pork, poultry, supper, Uncategorized | Tagged , , | Leave a comment

Bao Buns

img_4330

img_4320

07f7e16f-eebd-43f8-bbb0-c908b7add2c2There are two loads of laundry in a basket on the floor and a list of patients waiting for return calls. I am in the kitchen slicing scallions and working on a shopping list for a new recipe I want to develop.

In the shadow of months of turmoil, loss, and illness, my peculiar priorities emerge with confusing clarity. I have little energy or patience for work or social obligations. To be in nature, to be quiet, and to nourish myself and my partner well, these needs are strong. I want to run, to walk, to hike, to cook, and to eat.

Comfort foods with strong, bold flavors, that’s what I want now. These plump little buns call to mind my Mom’s favorite dim sum dumplings. On the cusp of pasta and bread, with the appeal and versatility of both, they are chewy, pillowy, and mildly sweet.

I made them on Tuesday and served them that stormy night with crispy nuggets of pork belly, hoisin, and a slew of crunchy and soft additions. Thursday, they got a reinvigorating steam bath, and were filled with grilled shrimp and a similar array of garnishes. Sadie and the hummingbirds kept us entertained on the deck while we munched.

Versions of baozi or bao buns trace back in history to the third century, AD, in China. There are many versions across myriad Chinese cultures. They are often served for breakfast or for snacks. I’ve made a similar dish that is a steamed bun filled with sweet barbequed pork. This style (the bun and fillings served separately) allows for the incorporation of different textures and flavor combinations in every bite.

Here, I give you a recipe for the buns and for the quick pickle that I served on both nights. I also provide links to recipes for the pork belly and the grilled shrimp.

img_4939

9b5ac1b5-d524-4bcf-95c2-9a6c5e82b527

Bao Buns

Thanks to Yi Jun Lo at Food 52 for her mother’s bao recipe, which I used as the basis for mine.

The bun recipe is vegan. If you want to keep the fillings plant based, too, glazed tofu makes a wonderful filling.

2 cups all-purpose flour, plus some extra for rolling out the dough
½ teaspoon baking powder
½ cup warm water
¼ cup cane sugar
1 tsp. active dry yeast
1 teaspoon neutral cooking oil

Combine all ingredients in a stand mixer or food processor and mix or process until a smooth, elastic dough forms. Place in a greased bowl and cover with plastic wrap. Let dough proof for an hour or until doubled in size.

In the meantime, cut out 10 squares of parchment, 4 x 4”.

Divide the dough into 10 equal pieces. Using your hands, roll each piece against a cutting board to create a smooth ball. Let all the balls rest for 5 minutes. Then, working with one at a time (cover the rest with plastic while you work), use a rolling pin to flatten the ball into an oval about 5 inches long and 3 inches wide. Then fold the oval to create a sort of half moon that looks a bit like the tush of a person lying on their side (now you know why they are called buns). Place the little dough butt on a square of parchment. Cover all the finished tushies with plastic and let them proof again for 45 minutes or so. They will be puffy and lush.

Set up a steamer basket over boiling water. Steam the buns for 10 minutes. You may have to do this in batches. Serve immediately. If you need to reheat them, they resteam beautifully in just a minute or so. Or, place them on a plate under a damp towel and microwave for a few seconds until they’re hot. Be careful not to nuke them for too long or they’ll become tough.

The traditional filling for these buns is pork belly. Here is a terrific recipe.

We also like them with glazed grilled shrimp. Here’s a simple and easy recipe.

I served both the pork and shrimp fillings with a simple, quick cucumber pickle. This one comes from Momofuko’s David Chang via Food 52.

img_4948

9fec8783-7066-405e-8bf0-264a2d54a95e

d753823e-86b9-4408-bd9a-10166978635c

4f01f2dd-b68d-4f58-892d-d6e6b450b031

Cucumber Pickle

2 small kirby or seedless cucumbers
2 tsp. sea salt
2 tsp. cane sugar

Combine ingredients in a bowl. Refrigerate for at least an hour before serving.

Additional garnishes and condiments:
Hoisin
Avocado
Cilantro
Basil
Mint
Scallions
Sesame seeds
Chili oil
Sriracha

To serve: Pull apart the fold of the bun and brush on hoisin and/or sriracha or chili oil. Fill with pieces of the pork, shrimp, or tofu and add herbs, avocado, etc. to your taste. Make sure to have lots of sparkling wine or beer and a big pile of napkins. Salad is optional.

baooo

8ee953bb-06e4-4268-b96b-21ce134f0c4f

This lilac bloom was cut from the tree next to our deck. It grew from a cutting taken from the tree we gave my mother for mother’s day when my siblings and I were teenagers. Mom died in March of this year, missing the lilacs she always loved to see bloom for Mother’s Day. I post this here to honor her legacy.

Posted in appetizer, bread, breakfast, condiment, lunch, main, snacks, supper, Uncategorized, vegan, vegetarian | Tagged , , , , , , , | 2 Comments

Irish Brown Soda Bread

img_1452

img_1449

img_1464

img_1453

Once upon a time, I met a tall, blue-eyed, brilliant, funny, young man in the office of an institute of higher learning at which we were both employed. After an appropriate amount of flirtation, I accompanied him to his tiny apartment and never left (insert amused and slightly horrified emoji of choice).

My parents were supposed to have objected because my sweetheart was not Jewish. But the nice Jewish boy I’d intended to marry was permanently unconscious (it’s a long story), so they waived that particular requirement. Not only was Bob a goy, he was Irish! This meant little to me other than that I might get to learn about the food from a different cultural tradition. It is always more interesting and fun to learn about culinary practices from loved ones than from books or restaurants.

While the relationship was a smashing success, the plan to master a new culinary tradition via my marriage, not so much. His mother was a lovely mother-in-law, but she was a terrible cook. When I first met Bob, he thought he hated asparagus. So I made them for myself. He said, “What are those”? I told him. He didn’t believe me. The thought asparagus were limp, soft, and army green.

So, I decided I needed to find a few Irish specialties to perfect on my own. I’ve never been a fan of corned beef and cabbage, and neither has my spouse. We both cringed at the thought of his childhood staple, gray roast beef, mushy boiled potatoes, and canned peas. Hmmm… I looked up a recipe for Irish Soda Bread.

Over the years I’ve made many different versions of Irish Soda Bread. Cook’s Illustrated and Cook’s Country have probably published a half dozen recipes. We’ve never been crazy about any of them.

Just last week, I noticed a post about a new recipe, very rustic, lots of whole grain. Super easy and quick to make. Looked like just my sorta thing. Just in time for St. Pat’s!

This brown quick bread is very rustic. It’s fairly austere. It is decidedly wheaty, with a tang from the buttermilk. The texture is dense. There is a bare hint of sweetness.

We enjoyed it with lots of good Irish butter and raspberry jam. It is good toasted the next day, with marmalade.

Mary (who is the hand model here), and her wonderful mom, Barbara, helped with the baking, and took home an extra loaf. They said it was terrific with apricot jam. It would be equally at home next to a bowl of soup or stew.

img_1451

img_1450

img_1462

img_1463

img_1466

Irish Brown Soda Bread

My recipe makes a loaf half the size of the Cook’s Illustrated version. Since there are only two of us at home now, this was a perfect size for us to eat over two days. Double it if you want an 8 inch, rather than a 4 inch loaf, and bake it for 5 minutes longer.

1 cup whole wheat flour
½ cup AP flour
½ cup wheat bran
2 tbs. wheat germ
1 tsp sugar
¾ tsp. baking soda
¾ tsp. baking powder
½ tsp. salt
1 cup buttermilk

Preheat oven to 375° and lightly grease an 8 inch cake pan.

Whisk all ingredients except buttermilk in a medium bowl. Add buttermilk and stir with a rubber spatula until dough comes together into a shaggy mass. Turn it out onto a board and shape it into a ball.

Place the dough in the prepared pan and use a serrated knife to cut a cross, ½ inch deep, into the top.

Bake until the loaf is lightly browned and firm, 35-40 minutes. Use a metal spatula to loosen the loaf from the pan, cool on a rack for at least an hour before slicing.

img_1454


Posted in baked, baked goods, baking, bread, snack, Uncategorized, vegetarian, whole grain | Tagged , , , , | 2 Comments

Brain Fog Mushrooms

img_1363-1img_1371-1img_1369-1

Tell me the truth. How many times have you executed some stunningly bone-headed maneuver and then looked around, hoping no one was watching? And then rapidly decided to take the episode of solitary mortification with you to the grave? Like this morning when I smeared hemorrhoid cream (instead of dry skin ointment) on the nasty runner’s crack at the top of my big toe.

It’s been a whole week of such incidents. Hormones. At 58, my body seems to be rejecting the idea of surrendering to menopause, and along with other delights, I am experiencing the most profound brain fog in recorded history. If you don’t know about brain fog, you can read about it here. So, while Meg was home this week, she got to watch me stop, point at her computer cord on the floor, and then proceed to trip over said cord. This happened at least twice. I don’t remember exactly how many times, because, brain fog.

Mary and I have been planning this cooking project all week. She needed a vegan finger food to bring to an event with the Bunco ladies. It’s a good thing she is so patient. We had the stuffed cucumber/tomato fiasco. When I was able, finally, to focus enough to generate a new idea, she was kind enough to do the shopping. If I’d had to do it I’m sure I would have taken out a few more of my toes with the cart. Don’t ask.

So, yesterday, we were roasting the mushrooms for this truly wonderful recipe. They needed to be turned. I worried out loud about the wisdom of using my impressive potter’s inversion technique (see 1:06 of this video for an example) because of the hot liquid that the mushrooms had shed. And then proceeded to do it anyway! Mary watched in abject horror as I doused myself, the floor, and the stove, with perfectly seasoned, 450° mushroom broth! It’s a good thing I wasn’t terribly burned because hemorrhoid cream would probably be contraindicated for a burn victim with hormone-related cognitive decline.

But, in spite of the fog, the mushrooms were delicious. Savory, tender, deeply flavored, perfectly seasoned, with a pop of sweet/tangy from the cranberries, they are perfect as a nibble with drinks or a glass of good wine. Mary’s email said: They were a big hit. Everybody said they loved them. Rachel D. couldn’t stop eating them. 😊 There are just enough left over to make a nice lunch for me today. Thank you! I do enjoy blogging and cooking with you.

I guess my dear friend loves me in spite of my compromised intelligence!

img_1374-1
img_1375-1img_1372-1img_1370-1

Brain Fog Mushrooms

The technique here borrows liberally from the wonderful Stuffed Mushrooms at Cook’s Country.

About 40 mushrooms

2 pounds cremini mushrooms
8 oz baby spinach
½ cup walnuts, toasted
2 small shallots, minced
1/4 cup dried cranberries
½ cup panko
3 tbs. xv olive oil, divided
salt and pepper, to taste

Preheat the oven to 450°. Line two sheet pans (or one, if you are a wimp) with parchment.

Prep the mushrooms: Remove and reserve the mushrooms stems; set aside any ‘shrooms that break and 10 or so of the smallest specimens. Arrange the caps cupped side up on one of the prepared pans. Drizzle with 1 tbs. of the olive oil, salt and pepper. Roast for 10 minutes. Carefully pour off and reserve any liquid that has collected in the pan (don’t skip this step even if your brain is impaired). If you feel brave, use the second pan to invert the mushrooms. If my story has scared you, simply use a tongs to turn the mushrooms. Bake for 10 more minutes. Pour off and reserve liquid. Reduce oven temp to 425°.

While the mushrooms roast, prep the spinach. Place in a large bowl, top with a plate, and microwave for 1 minute. Let the spinach cool for a few minutes. Then use your hands to gather the leaves and squeeze as much liquid as possible. Place on a cutting board, and use a large knife to cut the bunch of wilted leaves into small pieces. Gather and squeeze again, extracting as much liquid as possible.

Mince the walnuts and cranberries finely using either a knife or a food processor. Mince the mushrooms stems and small ‘shrooms by hand.

Drizzle the panko with 1 tbs. of the olive oil and microwave for 45 seconds. Stir.

Heat the remaining 1 tbs. oil in a heavy, large skillet. Sauté the shallots for 1 minute. Add the minced mushrooms and sauté over high heat until they are cooked through, about 4 minutes. Remove from heat and add the walnuts, cranberries, spinach, and panko, stirring to combine. Add as much of the reserved mushroom liquid as necessary to moisten (aren’t you glad you didn’t throw it on yourself and the floor?). Season with salt and pepper to taste.

Now for the fun part. Stuff the mushroom caps. We tried to find a spoon that would do the job and wound up using our hands. It’s extra fun if you chat with your friend and snack while you stuff. If you have leftover stuffing, eat it while you clean up the kitchen, even if you didn’t throw mushroom juice all over the place.

Bake the stuffed mushrooms for 7 minutes or so, until they are heated through and just beginning to brown on top. Serve hot, warm, or at room temp.

img_1366-1img_1373-2

This post is dedicated, with love, to Jean Boyer Stow and her infectious laugh. And to the hearts and minds of our beloved sisters and friends who cherish us in spite of our fogginess.

img_1364-1

Posted in appetizer, entertaining, healthy, roasted, side dish, snack, Uncategorized, vegan, vegetable, vegetarian | Tagged , , , | 6 Comments

Chocolate Chip Caramel Pecan Cookies

img_3780

img_4115

img_4082

img_4071

I wrote this recipe last week during the blizzard, but didn’t publish it because I was hung up on a detail. This is somewhat unusual for me because I am not generally the sort of person who gets bothered enough by details to get hung up on them.

The detail had to do with portion scoops. I was quite sure I was confused because of my allergy to math and all things numbers. I carry a lot of shame that, as a pretty smart person with a doctorate, I can rarely work out even the most rudimentary number problem. So I assumed that everyone else understands portion scoops, and that I am just an irredeemable nitwit who shouldn’t try to write recipes.

And then I came across this thread on The Members of ATK , CC and CI Facebook group message board to which I subscribe (it is a source of good info and delight, I encourage you to follow my link and join). It became clear to me that I am not alone in my portion scoop mystification. So I hereby “come out” as a portion scoop nimrod who has been alone in a closet full of confusing utensils when I should have been playing happily with my equally scoop-deficient friends.

It’s a wonderful recipe, based loosely on one I found recently on my favorite food blog, Orangette. Molly’s recipe was a blondie, and based on one she found in one of her favorite cookbooks. Once, you try her recipe, or mine, you may wind up (as I did), putting caramel shards into all sorts of things, like yogurt and muffins. Don’t say I didn’t warn you!

img_4080

Chocolate Chip Caramel Pecan Cookies

makes a dozen big cookies

1/2 cup (1 stick), softened, but still cool
1/2 cup dark brown sugar
1/4 cup white or cane sugar
1 egg
1/2 tsp vanilla
2 cups flour
1/2 tsp salt
1/4 tsp baking soda
1/2 tsp baking powder
1/2 cup dark chocolate chips
1/3 cup chopped, toasted pecans
1/3 cup caramel shards (see recipe below)

You can make these by hand, but I like the stand mixer for cookies, so adapt as you choose.

Whisk flour, baking soda, baking powder, and salt in a medium bowl.

In the bowl of the mixer fitted with the paddle, place the butter and sugars, beat on medium to combine well. Add the egg and vanilla, scraping bowl as needed to get everything well mixed. Now, add the flour mixture and keep the mixer on low to avoid making a huge, floury mess. As soon as the flour is incorporated, add the remaining ingredients and mix until just combined. You’ll want to do a few turns by hand just to get everything distributed.

Use a portion scoop that measures 2 inches across*. Alternatively, scoop with a big spoon and use your hands to make dough balls that are 2 inches in diameter. Place these on a sheet pan and freeze them for at least an hour.

Preheat the oven to 375° and line a fresh sheet pan (or two) with parchment. You can bake up to 8 cookies in a single pan. I like to keep the dough frozen in a zip-lock bag and bake just as many as I need at a time.

Bake, from frozen, for 11 minutes. They should be just starting to brown. They won’t spread much.

*I think I can say that this is a #16 scoop, that it holds 2 oz. or 1/4 cup. But I say this with almost no confidence. I will also say that I don’t think it is that important and if you use the wrong size scoop, the cookies will still be delicious.

img_4070

Caramel Shards

3/4 sugar (I use organic cane sugar)
2 tbs water

Line a sheet pan with parchment.

Place sugar and water in a heavy pan, and stir to moisten the sugar. Place over high heat. Don’t stir, but you may swirl the pan while it’s cooking. Cook until the caramel turns, well, caramel-colored. Immediately, pour the caramel onto the prepared pan and tilt the pan to make a thin, even layer. Be careful, molten sugar is dangerously hot!

Let cool completely, then break into 1/2 inch-ish shards. Be careful, here, these can be sharp! I know, this recipe is so dangerous!

img_4084

img_4093

Posted in baked, baked goods, baking, snack, sweets, treats, Uncategorized, vegetarian | Tagged , , , , , , | 3 Comments

Gin

IMG_4034

IMG_1226

IMG_3985

IMG_3991

She always loved a bargain, so if we could bring our own wine to a restaurant, that establishment was especially esteemed. I don’t remember how many years ago (maybe 15?), Mom took us to her favorite place, bottle of red in hand, for an Italian dinner near her home.

Conflict and confusion broke out almost immediately when the hostess explained that policy had changed and we were not allowed to consume our wine, but would be welcome to purchase a bottle from the restaurant’s new collection. Fine, we said. And then, she insisted we remove the offending bottle from the premises. Well. Mom put her foot down. She told the young woman that was ridiculous and stood her ground. Her opponent wouldn’t budge. I prepared myself to be hungry for a long time while we located another acceptable byo place.

But, my mother has never been one to tolerate starvation, so she conceded. Or so I thought. I walked her out to the car to stow the wine. And as she closed the trunk, I heard her say, “Well, she’s not gonna be happy about the martini in my purse”! I thought she was kidding. I should have known better.

Seated at a table for six, Mom proceeded to ask all her companions to drink their water. She then emptied her water glass into the partially empty glasses, fished out some ice, and reached into her big purse for a small jar.

Pouring her contraband gin over ice, she snagged a big, fat olive from the relish tray, plunked it into her martini, and took a big, satisfied, sip. Score, Judith!

So, I come by my love of gin honestly. And what better way to honor my mom than to try my hand at making my own version of our favorite spirit this week, when the juniper berries are ripe?

IMG_3941

IMG_3943

IMG_3971

IMG_3987

I chose high quality vodka, and went out to harvest fragrant branches from laden evergreens just up the road. I plucked about ¼ cup of berries and chucked them into a pint jar with a couple long pieces of lemon zest (I used a potato peeler, careful to take just the colored part of the rind), then filled the jar to the brim with vodka.

I let my infusion steep for 3 days, shaking occasionally. Some of my sources called for filtering the resulting spirit, but I decided to try it simply strained, instead. My logic was that more of the juniper and lemon flavor would be retained that way.

The gin was a rousing success, a lovely yellow color, just the right amount of bitter woodiness from the juniper, good hit of lemon on the finish. I popped the jar into the freezer so I could enjoy it the way I always prefer my gin, syrupy-cold. Delicious.

IMG_3982

IMG_3975

Special thanks to my hand models, Bob and Brian (who has fled the country to Australia since these photos were shot). And super-special props to Megan, the best bartender ever, for suggestions, taste testing, and general awesomeness!

This post is dedicated to Mom, who is currently recovering from a stroke and subsequent brain surgery. She is unable to eat or drink right now, but we are all hoping that she will be able to enjoy a martini again soon. Until then, I hope you will join me in drinking a hearty toast to her!

Posted in drink, drinks, easy, family, gluten free, Uncategorized, vegan, vegetarian | Tagged , , , , , | 7 Comments

Farm Market Behavior: My Idea of Fun


img_3566

img_3549

img_1200


This is a bit embarrassing. If you know me well, you have probably witnessed this behavior. If you are a total stranger, you may have been aware of it. But the vast majority of my friends and acquaintances probably don’t know about this THING I do. And I do it all the time.

I go to a market. Might be our wonderful local farmer’s market. Might be the supermarket. Might be a store or outdoor coop in a faraway place (like in Hanalei, on Kauai). I get so excited about a particular item, usually fruit or vegetable, I start brainstorming about how I’m going to prepare it. When I do that, it is not at all unusual for a small crowd to gather. Other shoppers often begin asking questions, and before long, I’m conducting an impromtu cooking class.

Vendors generally love this. It’s free advertisement for their produce. It’s not uncommon for people to follow me around, see what else I buy, asking me questions the whole time. What can I tell you, this is my idea of fun!

This past Sunday, I indulged in another one of my odd ideas of fun. I sent Bob to the market and gave him only loose suggestions about what he should buy. When he got home, I got to play my little “what to cook” game without the audience. This is also very amusing. To me, anyway.

And guess what? Today, you get to be the audience!

This time of year, my go-to preparation for fall veggies is roasting. Usually, I do them simply, tossing with just salt, pepper, and olive oil. Scrub or peel the veggies, and cut them into similar sized pieces so they get done at roughly the same time. I like a 400° oven, but if you’ve got something else going, all you need to do is vary the cooking time for good results at different temps.

Here, I’ve roasted broccoli, brussels sprouts, parsnips, carrots, and turnips. They took about 20 minutes to be nicely charred and tender-perfect. But if anything was done before the potatoes were soft, I’d just take ‘em off the sheet sooner. Roasted veggies are good hot, warm, or a room temp.

Along with these gorgeous beauties, I roasted a hunk of good Greek feta. Just a glug of olive oil, and in 10 minutes, the cheese was bronzed and oozy, but held its shape nicely.

The veggies were served with the cheese and a drizzle of local honey. To paraphrase Laurie Colwin, I would walk through fire for this meal.

img_3897

img_3895

This morning, I cut up the leftover veggies, gave them a turn in the microwave, tossed them on top of some dressed greens, and topped it all with some soft handmade mozzarella for my husband to take for lunch on his long day of teaching.

Oh, before I move on, you may be wondering about the stunning fractal-amazing Romanesco in the photo.  It got its turn in a hot oven the following day. If you can find one, you must try it. Sweet, nutty, tender, it benefits from a sprinkle of parm before munching. Mine didn’t make it to the table, nor did it last long enough for me to snap a photo. Sorry!

img_3892

This very wise man also brought me some figs. These did not come from the local market, but a specialty store on his way home from work. I am a fig fanatic, so immediately set to work making a fig-worthy breakfast, some coconutty baked oats.

I mixed together a couple cups of thick cut organic oats, handful of flax meal, some slivered almonds, and coconut chips. Tossed with a bit of my own maple syrup and some coconut milk until just moist. Popped into a wood fired baking dish, and baked at 350° for about a half hour, until browned. Served with ripe figs and some extra syrup. Breakfast heaven!

img_3908

img_3902

Note to blog followers: when you go to your market and find something interesting, use the Contact link and send me an email. I’ll help you figure out what to do with it. Like I said, this is my idea of fun!

img_3882

img_3553

Posted in breakfast, ceramics, dinner, gluten free, healthy, main course, roasted, Uncategorized, vegetable, vegetarian | Tagged , , , , , , , | 6 Comments

Wheat Crackers, Chicken Pie, and “Unfried” Tomatoes

img_3500

img_3499

img_3839

img_3844

Remind me to tell you all about my break from blogging and social media. For now, I want to welcome you back to DebsPots blog with a little story and tell you about some of the cooking I’ve been doing lately here in the house in the woods.

This morning, I stepped out of my car and looked into the angelic face of a curly haired 3 year old wearing a jean jacket and a pair of khakis. He gave me a huge smile, then made his hands into claws and growled. I said “hi,” and then he yelled “Spider Man!” Smiling back, I walked away wondering about the interaction. Then I realized: Verbal Halloween Costume!!!

Everyone in my family has a weakness for Carr’s wheat crackers; I served them in When Life Gives you Lemons. So, when Stella published a recipe for a homemade version on Serious Eats, she had me at “wheat.” Now, I keep the ingredients (all organic, mind you) on hand and bake them every week. If you do make them, and they’re not quite crisp enough, pop them into a 250° oven for a half hour or so, preferably on a rack so the air can circulate.

They are the perfect snack when you need a little something. They’re crisp and toasty and terrific all on their own, but even better with a schmear of peanut or almond butter. Nothing beats a layer of cream cheese and some apricot or fig jam. Or lemon curd. There’s nothing lovlier next to a cup of Hot Chocolate. Or a bowl of ice cream, with or without warm chocolate or caramel sauce.

img_3843

But we all need protein sometimes, so I spatchcocked (I love that word), seasoned, and roasted an organic, free range, chicken under a brick. I’m not sure I’ll do it that way again because the skin stuck to the nonstick skillet and I lost half of the crispiness I’d worked so hard to achieve. But the meal was yummy and there was more than half a bird leftover.

The next day, I pulled all the meat from the bones. Do you enjoy that task? I always do it when I’m a little peckish and reward myself with some of the choice bits, like the oyster. Saving the meat for later, I dumped the bones and skin into a pot and brewed up some bone broth. Bone broth is the lazy cook’s version of stock, no need to add anything else; tasty and useful!

Later in the day, I trimmed and blanched some baby artichokes. Parcooked a local yukon gold in the microwave, and cubed it up. Sautéed green onion, local carrot, the artichokes, the pototoes, and some minced celery in leftover chicken fat combined with olive oil. Threw in a spoonful of flour, then the drippings from the chicken, and a good pour of bone broth. After a few minutes on a low heat, I had a gorgeous stew, into which I tossed a handful of spinach for flavor and color.

I could have stopped there, but I’d promised Bob a pot pie, so I set about making a biscuit crust; an old favorite from my beloved Laurie Colwin, but with the addition of some organic whole wheat flour (again, pretending to be a bit more healthy) and a bit less butter. You can sub some olive oil and/or chicken fat here, too, if you like. This supple crust is a dream, comes together and rolls out in a flash.

In lieu of a pie plate, I used a low-sided, wide, wood-fired stoneware bowl. Slid in the stew, arranged the dough on top, and made some air vents. Baked the pot pie in a 350° oven for 40 minutes. Savory and delicious! You could sub the artichokes for more traditional peas, a less labor intensive option.

img_3832

img_3833

img_3838

Oh, and I made some not-fried green tomatoes to go with. A lovely friend gave me a big bag full of very unripe San Marzanos last week. So I sliced them up, drizzled them with some panko, lots of salt and pepper, plenty of parm, and a glug of excellent olive oil, baked on a sheet pan on the other rack. Heaven with a glass of sparkly.

img_3501

img_3829

I wish you a happy halloween, and a beautiful start to your November!

Posted in baked, baking, ceramics, chicken, dessert, dinner, lunch, main, main course, one pot meals, poultry, side dish, snacks, treats, Uncategorized, vegetable, whole grain | Tagged , , , , | 5 Comments

Rhubarb Pecan Snack Bread

img_3139

img_3132

rhubread

img_3622

Happy belated Mother’s Day!

I recognize that originially, Mother’s Day was a promotion by card and candy companies interested in boosting sales, but I am hopelessly romantic when it comes to anything having to do with my children, so it is one of my favorite days of the year. In spite of the fact that it makes me sneeze and puts me at grave risk for Lyme Disease and poison ivy, I hike and plant, and mow, and adore all things May.

Of course, May and Mother’s Day both make me think of my own mom, whose 81st birthday is next week. Mom is a huge fan of lilacs. And, she adores rhubarb. Since I was small, she has always had a rhubarb plant, and celebrates spring by baking a strawberry-rhubarb pie.

Last week, Bob and I drove through pouring rain to begin the process of cleaning out my parents’ New Jersey house. They have made the move to Florida full-time for health reasons and the lake house is for sale. We walked around back, and I saw the rhubarb. Knife in hand, I ventured out into the torrent to collect a handful of red/green stems, discarding the big, poisonous leaves.

I wanted to make something that would showcase the beautiful stalks. I didn’t want to sweeten it too much, and I forgot to buy strawberries. Some research turned up a recipe on the wonderful King Arthur Flour site for a quick bread. As always, I made a couple tweaks for both taste and health.

Mary and Barbara joined me for the baking, and I dropped off a hunk for them the next day. Bob and I are working on the rest. The bread is moist, lightly sweet, with a pleasant sour bite from the rhubarb. The nuggets of pecan add a delightful crunch. It is perfect warm or toasted with a schmear of cream cheese.

img_3601

img_1064

img_3638

Rhubarb Pecan Snack Bread

2 ½ cups sliced rhubarb, plus one stalk for garnish
1 cup organic all purpose flour
¾ cup whole wheat flour
2 eggs, room temp
1 cup organic cane sugar, divided
sprinkle freshly grated nutmeg
finely grated zest of 1 lemon
½ tsp. baking soda
½ tsp. salt
1/3 cup walnut or vegetable oil, plus a bit extra for greasing the pan

Extra sugar for decoratiing (opt)

Preheat oven to 350°. Grease a 9 x 5 loaf pan.

Cook the sliced rhubarb in a dry pan until it breaks down, about 5 minutes. Add ½ cup of the sugar and mix well. Let cool. Cut the remaining stalk into strips or small half moons to garnish the top of the bread.

Mix the flours, remaining half cup sugar, salt, baking soda, lemon zest, and nutmeg in a large bowl. Mix the eggs, oil and rhubarb mixture in a medium bowl.

Pour the wet mixture into the dry and mix gently until just combined, being careful not to overmix. Transfer the batter to the prepared pan, and smooth the top. Now use the reserved raw rhubarb to make a pretty pattern on top of the bread. Sprinkle with extra sugar if you like.

Bake for 55-60 minutes, until firm. Cool in pan on a rack for 15 minutes, turn out and cool to room temp before slicing.

img_3626

img_3633

Posted in baked, baked goods, baking, bread, breakfast, brunch, dessert, snack, sweets, treats, Uncategorized, vegetarian | Tagged , | 12 Comments